Getting started: Signing up
The Getting Started section takes you from the initial signing up for Quill to an AI agent answering your users through your first channel: a web widget channel with a chat box on your website. Signing up is the first step.
-
This page covers the first Getting Started step, Signing up, walking you through the creation of a Quill domain and handing you two access keys.
- A Quill domain is a web address that your Quill deployment can be reached at.
- A license key activates Quill.
- An API key signs you into the deployment's management dashboard.
-
The signing-up routine takes your details and those of the machine you want to run Quill on, and hands you the Docker command that starts Quill.
-
In this article:
Prerequisites
Before signing up, make sure you have:
- An email address for Quill's access details.
- The public IP address of the machine that will run Quill.
- Your Quill domain will point at this address.
- To try Quill locally, use
127.0.0.1.
Signing up
Signing up starts a 90-day free trial. No credit card or sales call is required, and WRU usage is unlimited during the trial.
For current plan details, see Quill pricing.
Open ravendb.net/quill/start, fill in the form, and confirm your email address with the code Quill sends you.
Filling in the sign-up form
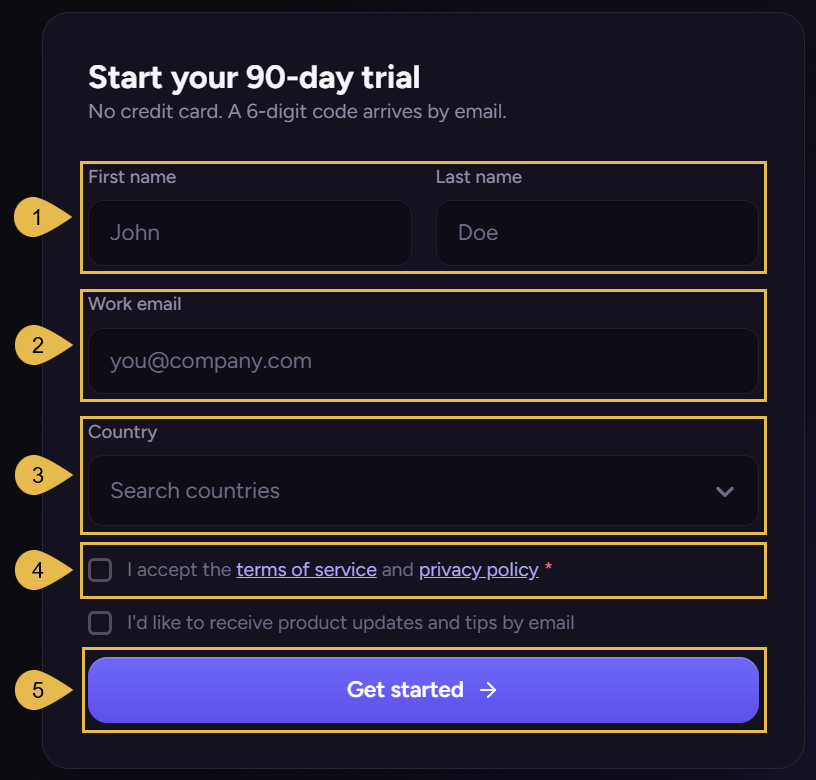
-
First name and Last name
Enter your name. -
Work email
Enter an address only you have access to.
Quill's access details will be sent to this address at the end of the registration. -
Country
Select your country from the list. -
Accept
Check to accept our service terms and privacy policy. -
Get started
Click to send a verification code to the address you entered.
Entering the verification code
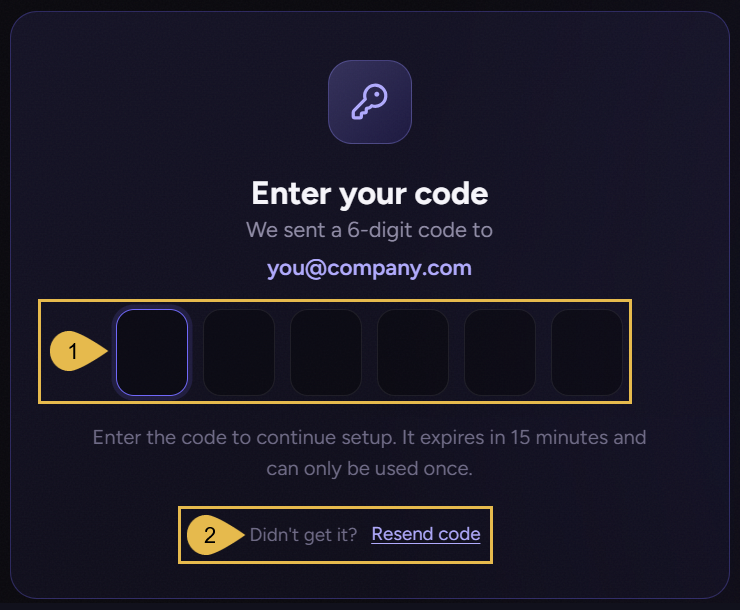
Clicking Get started will send a verification code to your email address and open this dialog:
-
The code field
Enter the six-digit code sent to your address.
The code expires in 15 minutes, and can be used only once.
A valid code will start the three-stage wizard to register your Quill deployment. -
Resend code
Click to resend if the code didn't arrive at your address.
Registering your Quill deployment
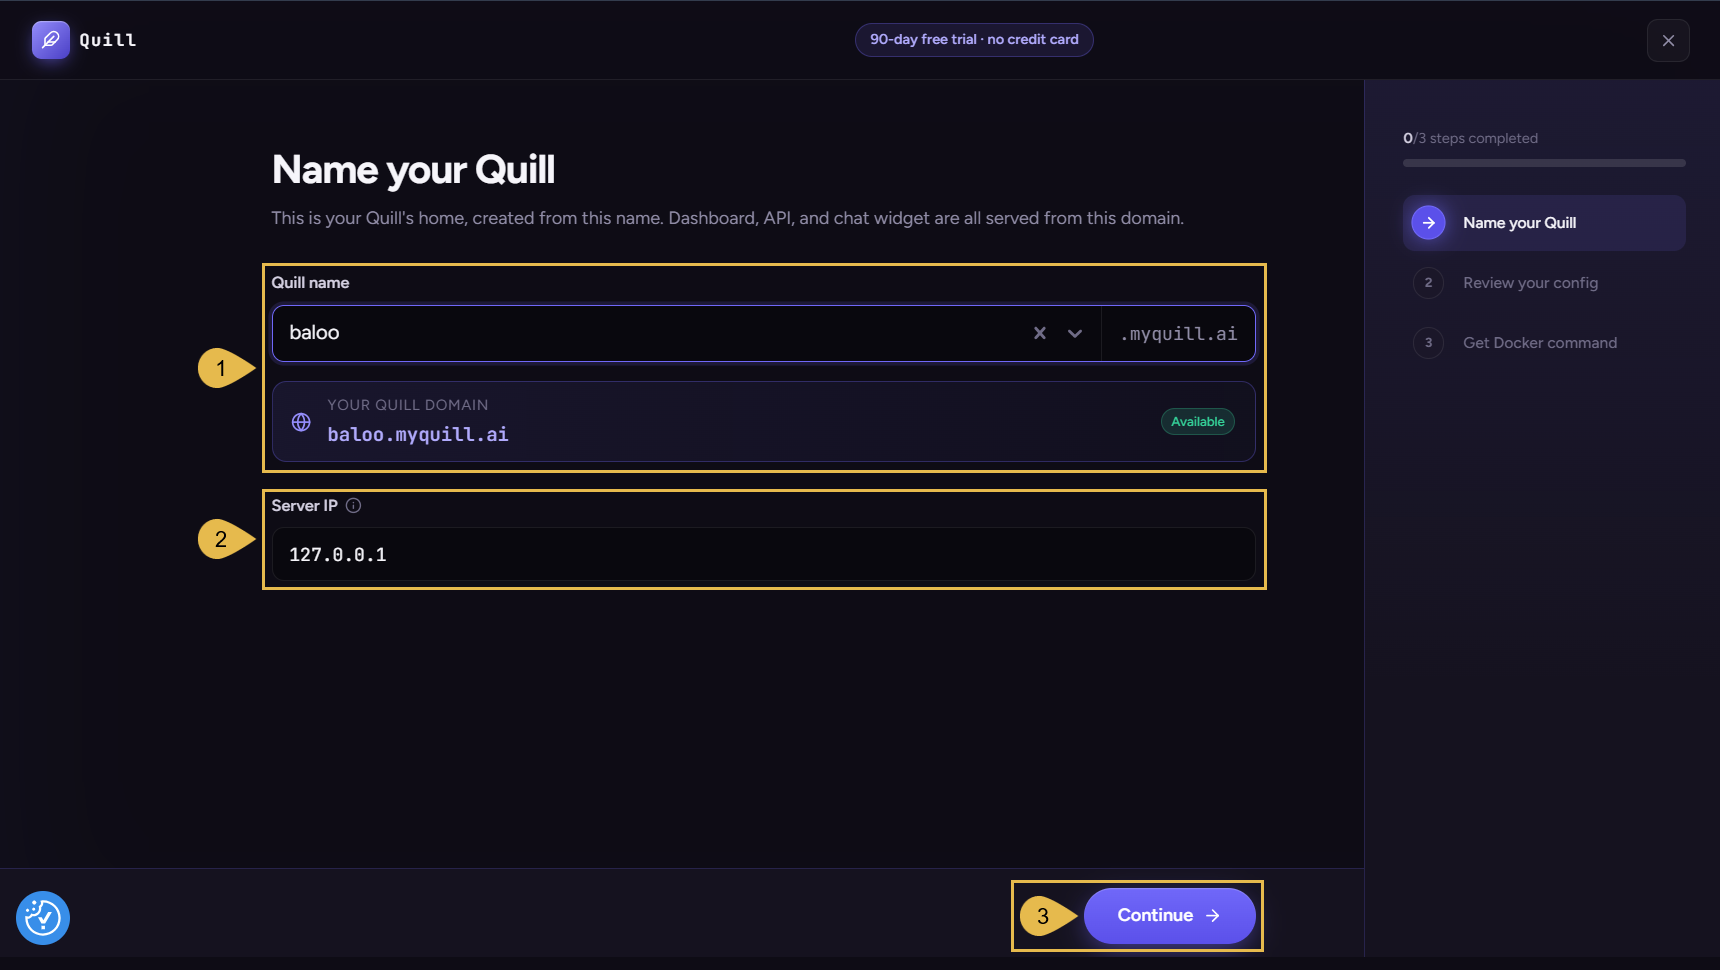
Naming your Quill domain
-
Quill name
-
Enter a name for your Quill deployment.
The domain forms below the field, as<name>.myquill.ai, and is marked Available if the name hasn't been taken yet.
e.g.,
Quill name: baloo
Quill domain:baloo.myquill.ai -
If your account already holds Quill domains, the field offers them in a dropdown.
Select an existing domain to edit its details.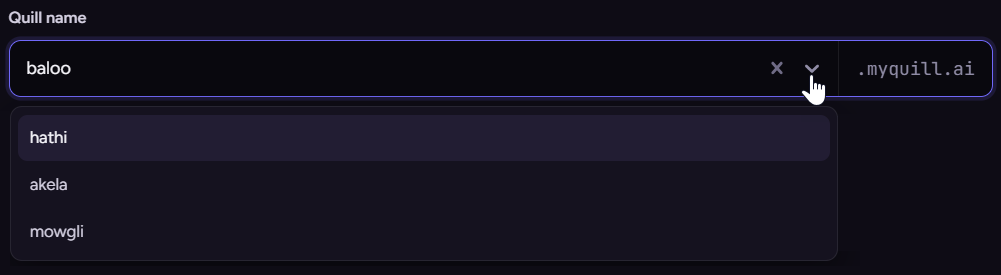
-
-
Server IP
Enter the public IP address of the machine that will run Quill.
To try Quill locally, use127.0.0.1. -
Continue
Click for the next wizard stage: Reviewing and confirming
Reviewing and confirming
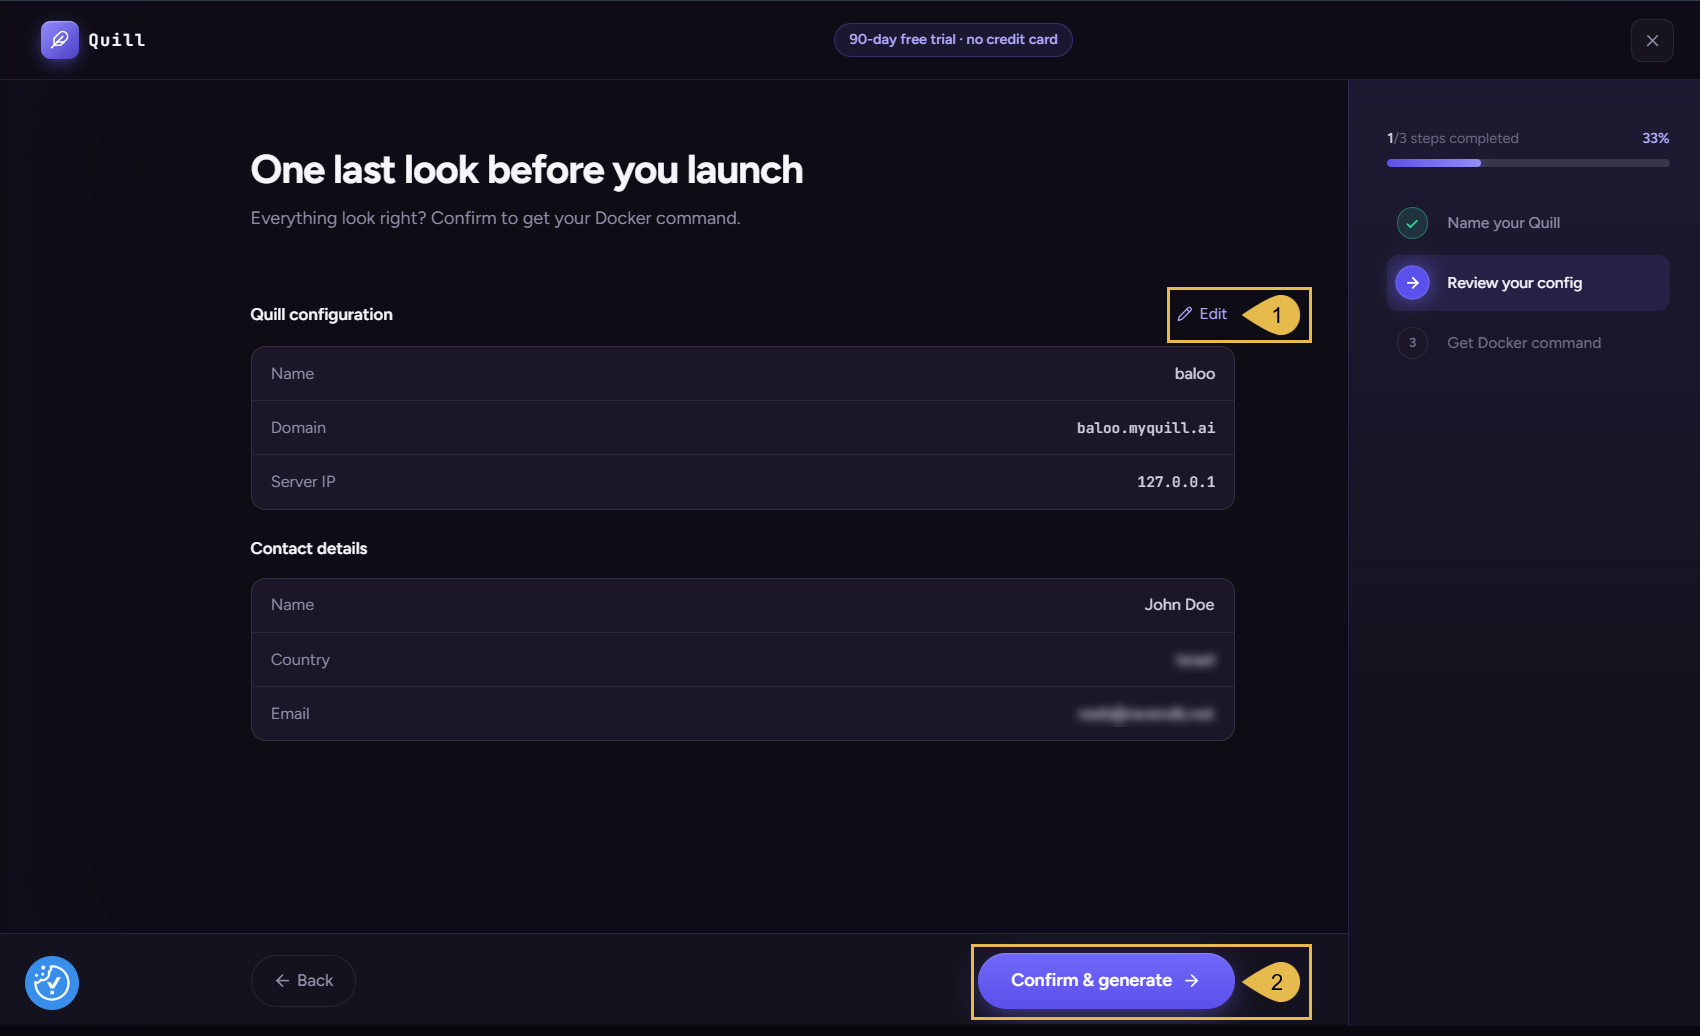
This wizard stage gathers the details collected so far, for a final check before the domain is registered.
-
Edit
Click to reopen the Name your Quill stage and modify its details. -
Confirm & generate
Click to register the domain, generate the access keys, and save your setup details.
Saving your setup details
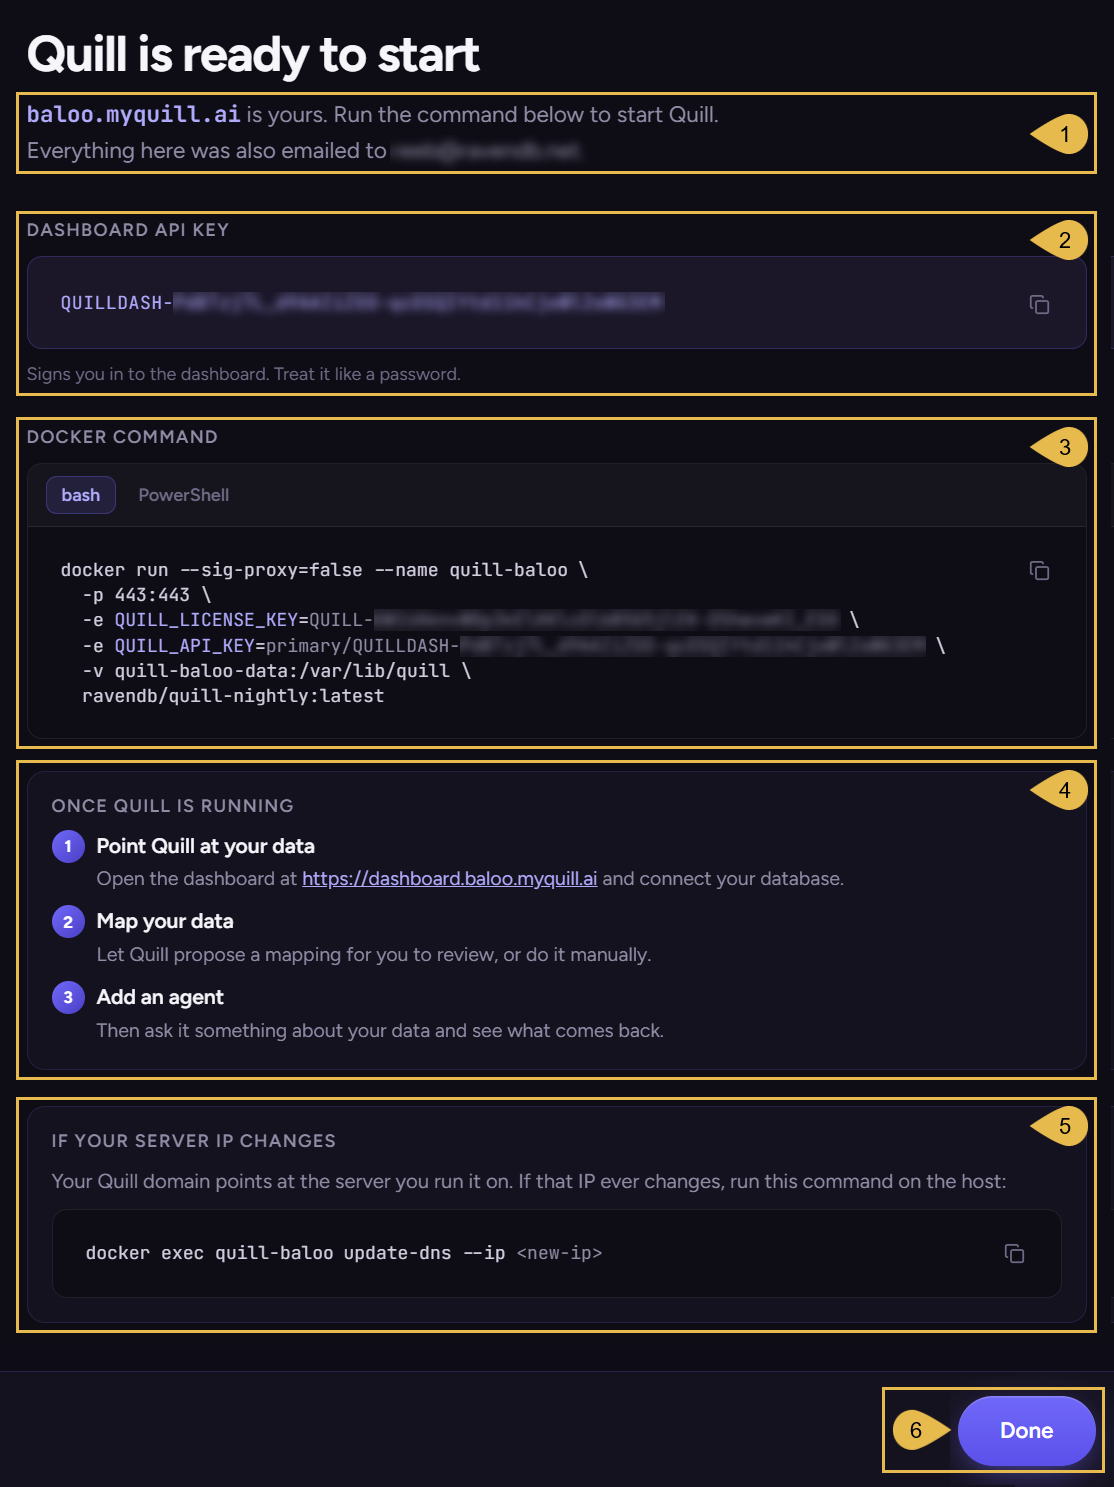
The wizard's last stage presents the registered domain, the dashboard API key, and the Docker command that
starts Quill, allowing you to review and copy them.
All the details that are displayed here are also sent to the email address you provided.
-
Your Quill domain
The dashboard, the API, and the chat channels of your deployment are all served at this address. -
Dashboard API key
The key that signs you into the management dashboard.
Copy the key before leaving this stage.
A lost key can be recovered.Do not share this key, it is the password to Quill's management.
-
Docker command
The command that starts Quill on the machine whose address you provided; you can run it using either its bash or PowerShell form.
The Docker command already includes both the license key and the dashboard API key, so you do not have to add these keys separately.- The license key retrieves the setup package for the registered domain.
- The dashboard API key, by contrast, belongs to the signup account.
The same key is issued for every Quill domain registered under the same email address.
See One key per account.
Learn more about the Docker command in Starting Quill.
-
Once Quill is running
The address of your management dashboard, and the steps that follow: connecting your data, mapping it, and adding an agent. -
If your server IP changes
The command that re-registers the domain with a new address.
Run it on the machine that hosts Quill. -
Done
Click once the API key and the Docker command are copied.
Done returns you to the beta landing page.