Setting up RavenDB with Docker and HTTPS

What you will learn
- How to run RavenDB with HTTPS certificate on Docker
- How to generate self-signed certificates
Introduction
Running applications in Docker containers offers numerous advantages over installing them directly on a system. Docker ensures isolation and consistency by encapsulating an application and its dependencies, preventing conflicts, and guaranteeing the same behavior across different environments. Its portability allows containers to run on any system that has Linux kernel to be shared, simplifying the movement of applications between environments and eliminating dependency conflicts.
RavenDB provides official Docker images that can be pulled from Docker Hub. These images support both Linux and Windows containers, ensuring broad compatibility across different systems. The images are available in two repositories:
- https://hub.docker.com/r/ravendb/ravendb
Contains images of stable releases. - https://hub.docker.com/r/ravendb/ravendb-nightly
Contains images of nightly development builds.
These Docker images support a variety of architectures, including:
- Linux: arm32, arm64, and amd64
- Windows: amd64
In this tutorial, we are going to use the multi-platform image ravendb/ravendb:latest.
Prerequisites
Before running RavenDB, we need to prepare an environment.
First of all, we need a place to keep all the files created by the RavenDB server.
mkdir -p ~/ravendb/data
In order to have a secure connection with the server it's recommended to use HTTPS protocol. To do that we will need a DNS entry pointing to the server and server certificate. It's best to use automated tools like certbot for certificate generation and for example AWS Route 53 as DNS service.
For the purpose of this tutorial, to simplify the setup, we will use a self-generated certificate and entry in /etc/hosts. Using self-signed certificates is not recommended for public-facing websites and services. Those are not trusted by default by the OS and must be added as root in the certificate store on every server and client machines that want to communicate. A recommended approach is to use certificates from a certificate authority like Let's Encrypt, ZeroSSL, or any other well-known certificate issuer. There is also an option to use RavenDB initial setup to get a certificate.
mkdir -p ~/ravendb/certs
cd ~/ravendb/certs
Specify url:
url="my-test.instance"
Generate private key and server certificate:
openssl req -x509 -newkey rsa:4096 -sha256 -days 3650   -nodes -keyout my-test.instance.key -out my-test.instance.crt -subj "/CN=$url"   -extensions v3_req -config <(printf
"[v3_req]\nkeyUsage=digitalSignature,keyEncipherment\nextendedKeyUsage=serverAuth,clientAuth\nsubjectAltName=DNS:$url")
Generate pfx from private key and server certificate:
openssl pkcs12 -export -out my-test.instance.pfx -inkey my-test.instance.key -in my-test.instance.crt
Remember to save the pfx certificate on your local machine and install it in the root certificate store. You will need it to connect to the RavenDB server for the first time.
When running applications inside Docker containers, like RavenDB, it's common to manage file permissions on the host system that must be accessible to the container. In Linux, every user and group is associated with a unique identifier known as a User ID (UID) and a Group ID (GID), respectively. These numerical identifiers are crucial for managing file ownership and permissions. The container's processes may run under a user with a specific UID and GID, which can differ from those on the host system. In the case of RavenDB, it uses 999 as both the UID and GID for its internal user. This means files on the host system that are mounted into the container must be accessible by the user with these identifiers. Without this adjustment, the container might not have the necessary permissions to read or write to the mounted files, leading to potential errors or malfunctioning of the application.
In summary, while human-readable names are convenient on a single system, UIDs and GIDs ensure consistency across different environments, especially in containerized applications like those running in Docker. Therefore, using numerical identifiers is essential when managing permissions between the host and the Docker container to ensure seamless operation.
Here is the command to change file permissions:
sudo chown -R 999:999 ~/ravendb/
The last step is to obtain a license from https://ravendb.net/buy#developer. There is a free developer license available.
Setup
With the environment prepared we can start building our docker compose. To keep everything in one place let's create docker-compose.yml file in ~/ravendb directory.
touch ~/ravendb/docker-compose.yml
We can start writing docker compose file with our favorite editor. It starts the same as always with specifying services, naming containers, and selecting Docker image. As mentioned before we will be using RavenDB's multi-platform image:
services:
  ravendb:
    container_name: ravendb
    image: ravendb/ravendb:latest
Now we can mount the directories prepared earlier. RavenDB by default keeps the data in /var/lib/ravendb/data. The folder with certificate can be mounted anywhere within the container. We will specify a path to it in the next step. Replace the {username} with your linux username.
    volumes:
      - type: bind
        source: /home/{username}/ravendb/data
        target: /var/lib/ravendb/data
      - type: bind
        source: /home/{username}/ravendb/certs
        target: /certs
We would like to be able to access the server. Port binding will help us with that. I'm going to use the default port for the HTTPS protocol. There is also a second port needed for inter-node communication (replication) or data subscription processing. The default used by RavenDB is 38888, so that's what I'm going to use here as well.
    ports:
      - 443:443
      - 38888:38888
Based on values set in previous steps we can configure RavenDB server with environment variables. Several key environment variables ensure that the server runs correctly and securely:
| Variable | Example value | Purpose |
|---|---|---|
RAVEN_Setup_Mode | None | Disables the setup wizard. RavenDB assumes all configuration is provided through environment variables or config files, which is ideal for automated deployments. |
RAVEN_License_Eula_Accepted | true | Accepts the EULA. Required to run the server without manual intervention. |
RAVEN_ServerUrl | https://0.0.0.0 | The URL RavenDB binds to for incoming connections. 0.0.0.0 is a wildcard that accepts connections on any network interface. |
RAVEN_PublicServerUrl | https://my-test.instance | The public URL clients use to connect. Replace with the actual domain accessible to clients. |
RAVEN_ServerUrl_Tcp | tcp://0.0.0.0:38888 | Listens on all interfaces for TCP connections (replication, subscriptions) on port 38888. |
RAVEN_PublicServerUrl_Tcp | tcp://my-test.instance:38888 | The public TCP address clients use. Replace with the actual public address and port. |
RAVEN_Security_Certificate_Path | /certs/my-test.instance.pfx | Path to the PFX certificate file. Must include both the certificate and private key to secure HTTPS and TCP connections. |
RAVEN_License | '{Put your license here}' | The RavenDB license string. Required to activate the server. |
There are other options to pass certificates to RavenDB, especially useful in containerization scenarios, where the certificate comes from and is renewed by an external facility. You might want to use approach described in the certificate configuration docs.
Also you might have to recreate the container on certificate renewal, unless you configured the renewal process with RAVEN_Security.Certificate.Renew.Exec environment variable.
For more detailed guidance, refer to the RavenDB configuration options documentation.
    environment:
      - RAVEN_Setup_Mode=None
      - RAVEN_License_Eula_Accepted=true
      - RAVEN_ServerUrl=https://0.0.0.0
      - RAVEN_PublicServerUrl=https://my-test.instance
      - RAVEN_ServerUrl_Tcp=tcp://0.0.0.0:38888
      - RAVEN_PublicServerUrl_Tcp=tcp://my-test.instance:38888
      - RAVEN_Security_Certificate_Path=/certs/my-test.instance.pfx
In my case there is one more step required. Because I don't have any public DNS entry RavenDB server won't be able to resolve the hostname I used. Therefore, I have to tell docker that my-test.instance is its own address:
    extra_hosts:
      - "my-test.instance:127.0.0.1"
Final docker-compose.yml
The final version of docker-compose.yml should look like this:
services:
  ravendb:
    container_name: ravendb
    image: ravendb/ravendb:latest
    volumes:
      - type: bind
        source: /home/{username}/ravendb/data
        target: /var/lib/ravendb/data
      - type: bind
        source: /home/{username}/ravendb/certs
        target: /certs
    ports:
      - 443:443
      - 38888:38888
    environment:
      - RAVEN_Setup_Mode=None
      - RAVEN_License_Eula_Accepted=true
      - RAVEN_ServerUrl=https://0.0.0.0
      - RAVEN_PublicServerUrl=https://my-test.instance
      - RAVEN_ServerUrl_Tcp=tcp://0.0.0.0:38888
      - RAVEN_PublicServerUrl_Tcp=tcp://my-test.instance:38888
      - RAVEN_Security_Certificate_Path=/certs/my-test.instance.pfx
      - RAVEN_License='{Put your license here}'
    extra_hosts:
      - "my-test.instance:127.0.0.1"
The only thing left to do is to start the container:
docker compose -f ~/ravendb/docker-compose.yml up -d --force-recreate --wait
Validation
Because my-test.instance is not a real DNS name, we also need to add it to the local hosts file so the browser can find it:
echo "127.0.0.1 my-test.instance" | sudo tee -a /etc/hosts
We can now check if the container is running:
docker compose ls
The output should look like this:
NAME                STATUS              CONFIG FILES
ravendb             running(1)          ~/ravendb/docker-compose.yml
Let's try connecting to the RavenDB server using the URL and certificate that were both created in the prerequisites. In my case it's https://my-test.instance
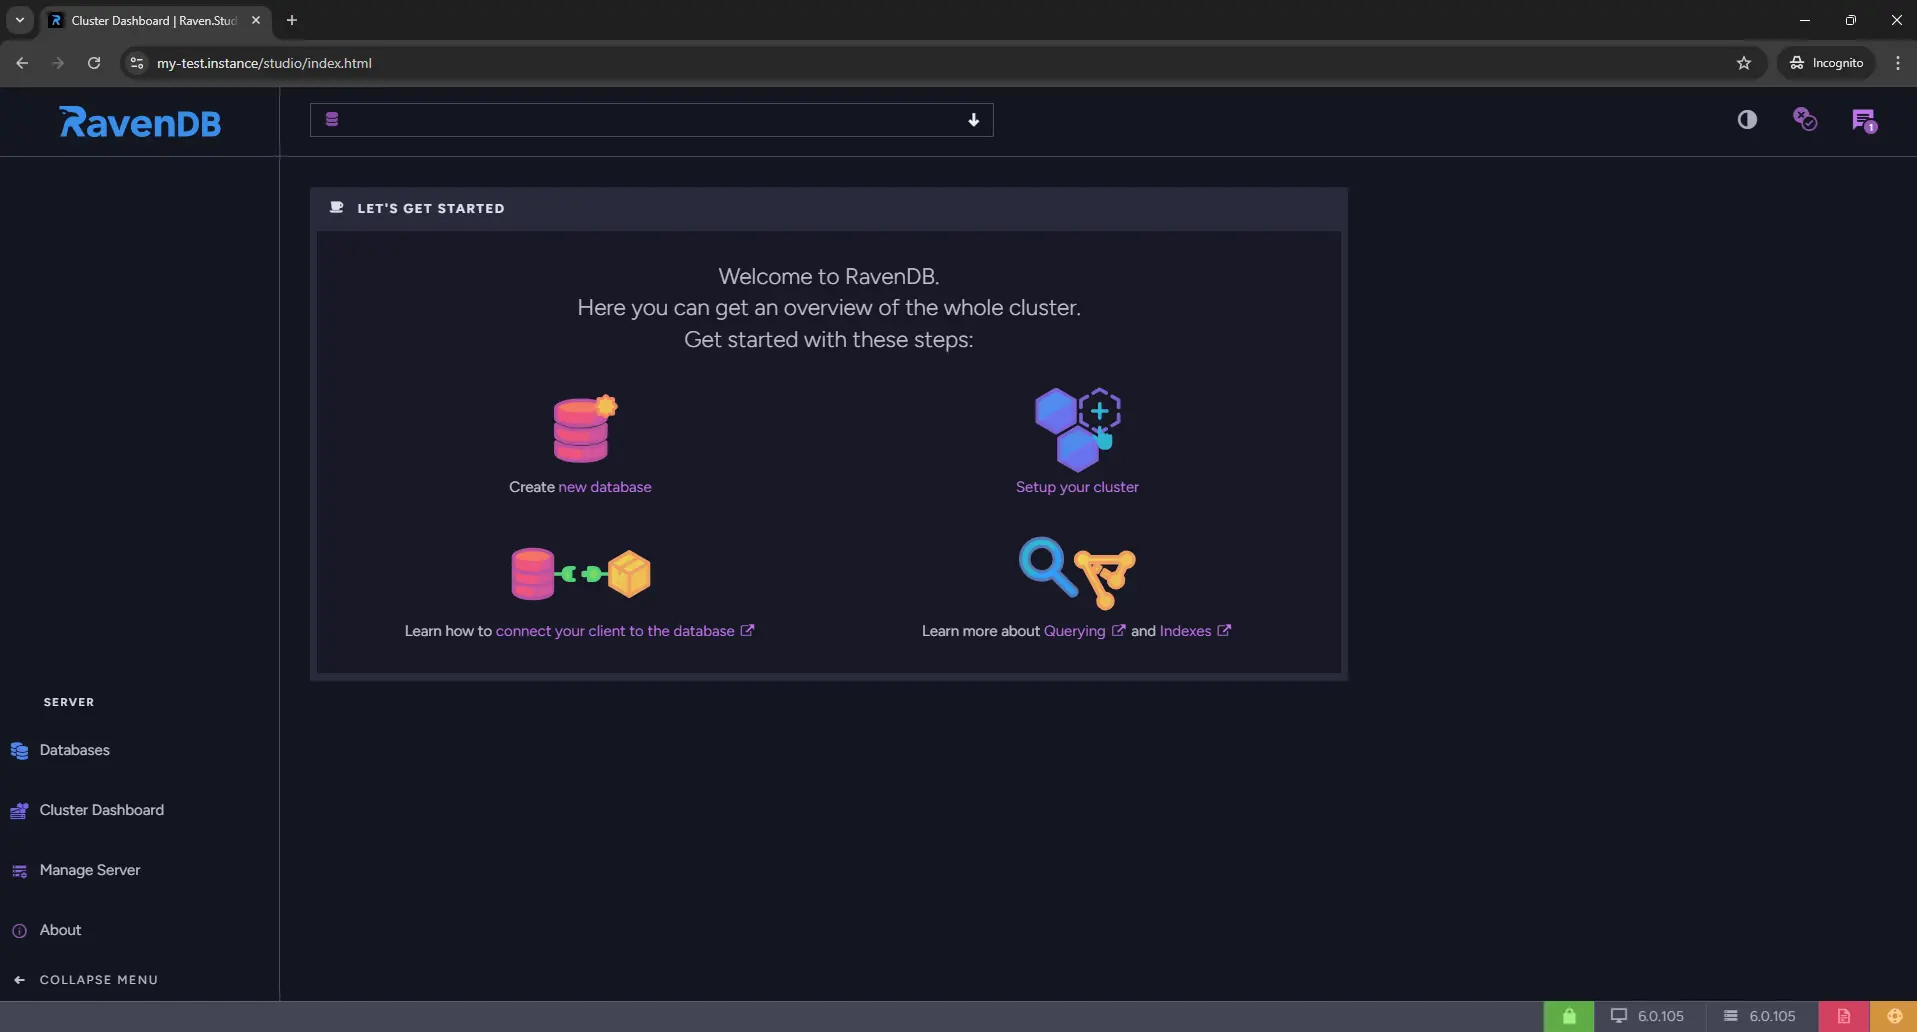
You can now set up your node.
Summary
This guide walked through running RavenDB in Docker with HTTPS using a self-signed certificate, Docker Compose volume mounts, and environment variable configuration.
- Self-signed certificates work for local development but must be installed as trusted root certificates on every machine that connects; for production, use Let's Encrypt, ZeroSSL, or another public CA instead.
- RavenDB's internal user runs as UID/GID 999, so host directories mounted into the container must be owned by that numeric ID or the server will fail to read or write its data files.
- Setting RAVEN_Setup_Mode=None bypasses the interactive setup wizard entirely, which is the correct approach for automated or containerized deployments driven by environment variables.
- When your hostname is not registered in public DNS, add it to the container's extra_hosts so RavenDB can resolve its own public URL during startup validation.