Feed Elasticsearch from Your RavenDB

If you care about your craft, you probably compare various products before selecting them for your next project. While Elasticsearch is an independent building block in your system, RavenDB is an all-in-one solution that provides full-text search, vector search capabilities, and much more…
If you decide to bet on RavenDB, it not only eliminates the need for an external indexing solution but also reduces the complexity and maintenance costs of your system. It’s reliable, performant at scale, and packed with features to cover any usage scenario.
Still, RavenDB’s broad catalog of use cases means you may be adopting it for entirely different reasons than just full text search - for example, as your transactional database, AI-native database, or even time-series store. Or you might already have an Elasticsearch cluster running in your environment, since it handles system logs via the ELK stack.
In those situations, you’ll often want to push some RavenDB collections into Elasticsearch. Building this manually can get complicated fast: custom pipelines, background workers, job schedulers - all just to wire two systems together.
But there’s no need to reinvent the wheel.
RavenDB ships with an ETL engine, including native Elasticsearch ETL support. It’s easy to configure, highly reliable, and removes the need for any bespoke integration code. Your data flows directly from RavenDB to Elasticsearch in a controlled, incremental, production-ready way - right out of the box.
ETL (extract, transform, load) is a process that continuously extracts data from a source (e.g. RavenDB database), transforms it according to the script, and then loads it to a designated place. It allows us to continuously propagate new documents and their changes (or deletions) from RavenDB to Elasticsearch and, if needed, transform them to match your Elastic data model.
In this guide, we’ll show you how easily you can set up your own RavenDB Elasticsearch ETL, which will abstract out the complexity of connecting these two services.
Prerequisites
The only requirements are RavenDB with an enterprise license and your Elasticsearch project. If you just want to try things out, claim a free developer license.
If unsure of your licence, you can check whether you can use ETL by opening the chosen database in RavenDB, selecting the Tasks section, and then Ongoing Tasks. Then, try to create a new ongoing Elasticsearch ETL task. If still in doubt, check Info Hub's licensing section on the right.
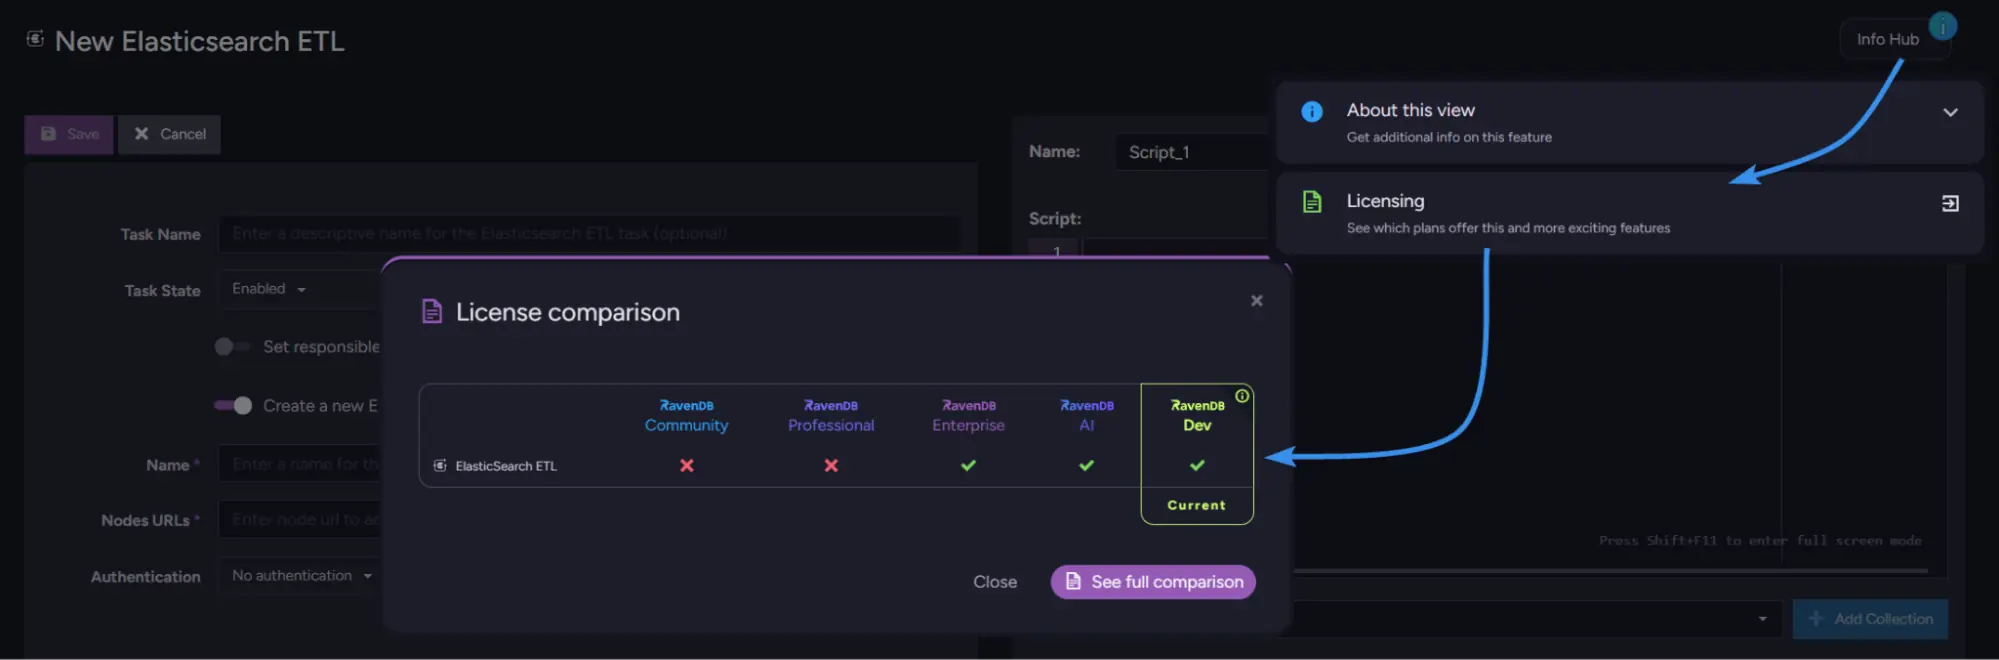
In this guide, we’ll use RavenDB v7.1 with a sample dataset and an Elastic Cloud instance.
Setup
There are two halves to this. First we collect an endpoint and an API key on the Elasticsearch side, then we hand both to RavenDB and write the transformation script.
Elasticsearch
To start, we will need two things from Elasticsearch:
- Elasticsearch Endpoint URL
- API key (that has been granted specific permissions)
Enter your Elasticsearch project, and you can immediately copy the first needed thing - the Elasticsearch Endpoint. For an on-premise Elasticsearch endpoint, it is just a URL (host + port) your client communicates with, for example: https://127.0.0.1:9200. Copy it aside, as we will need it for the connection string:
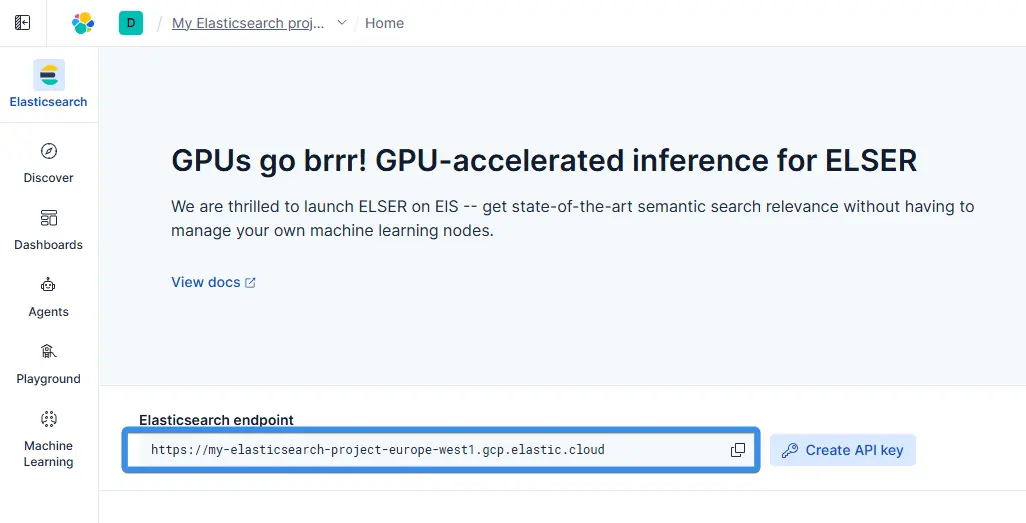
Then, next to it, we click Create API key. This opens a menu where we select the name, then choose the permission. To assign specific permissions, you enable “Control security privileges”, which opens a menu to enter JSON.
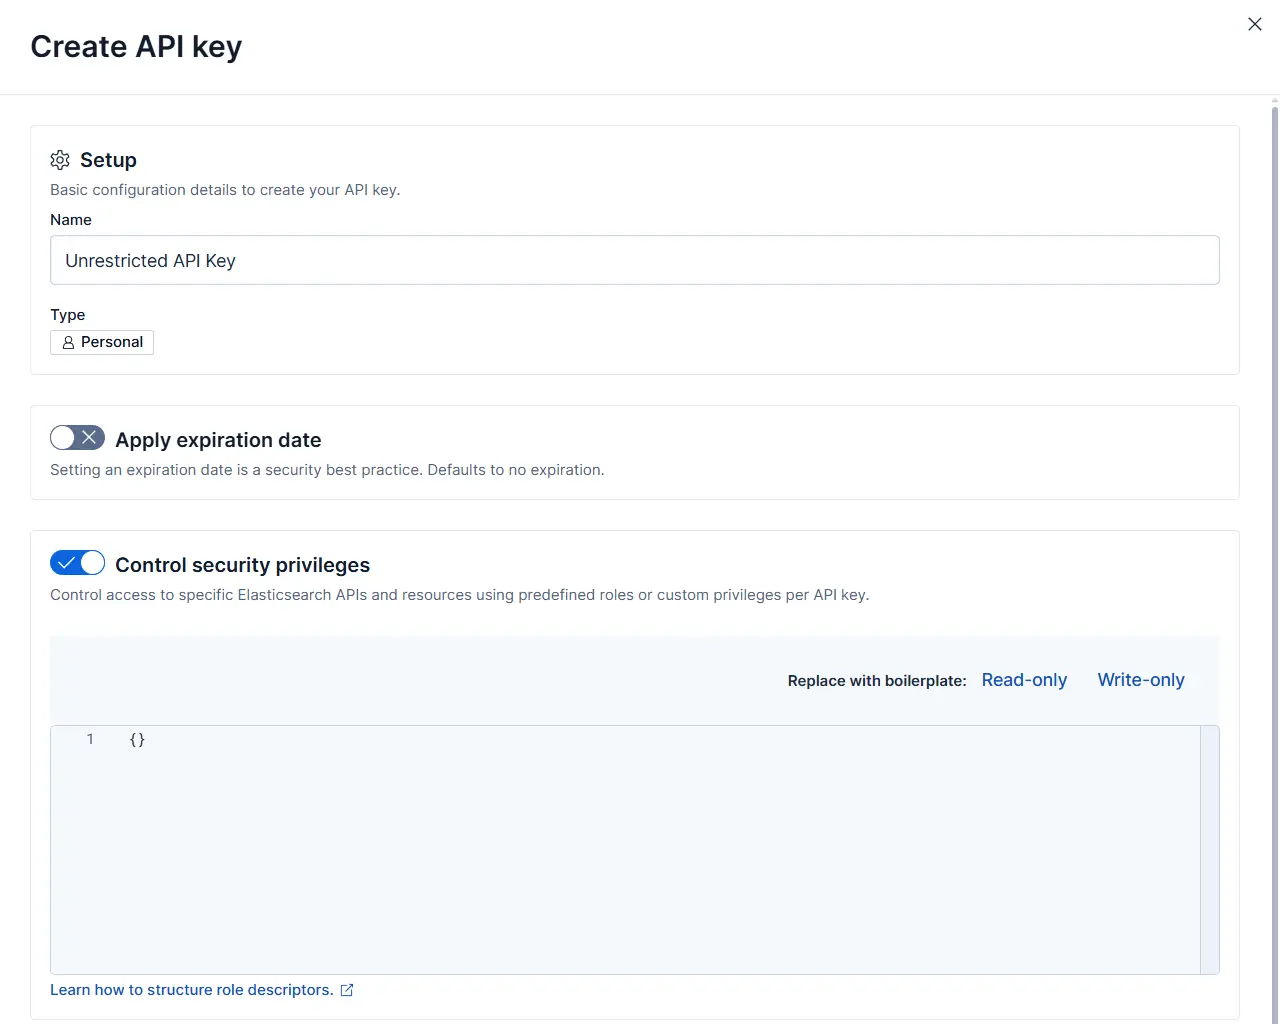
To enable RavenDB to connect to Elasticsearch and move data to it, it needs a few index permissions. Minimal permissions JSON should look like this:
{
  "ravendb-role": {
    "cluster": [
      "monitor"
    ],
    "indices": [
      {
        "names": [
          "*"
        ],
        "privileges": [
          "create_index",
          "read",
          "write",
          "delete",
          "maintenance"
        ],
        "allow_restricted_indices": false
      }
    ],
    "applications": [],
    "run_as": [],
    "metadata": {},
    "transient_metadata": {
      "enabled": true
    }
  }
}
To run an Elasticsearch ETL, the role needs cluster-level monitor access plus index-level create_index, read, write, delete, and maintenance privileges.
Inside these security privileges, we define what the ravendb-role is allowed to do. The role is granted cluster-level monitoring access. For indexes, the role receives broad permissions across all index names (“*”, adjust it manually based on what indexes your ETL will use), including creating new indexes, reading and writing data, deleting documents, and performing maintenance operations.
If you want to create such an API key on your on-premise instance, you can read about how to do it in the official Elasticsearch docs.
With these inside security privileges, you can finalize API key creation. Copy it to a safe place, as it will be unavailable after leaving the current page. Then we can move to RavenDB and its ongoing tasks.
RavenDB
Open the chosen database in RavenDB, select the Tasks section, and then Ongoing Tasks. Then create a new ongoing Elasticsearch ETL task.
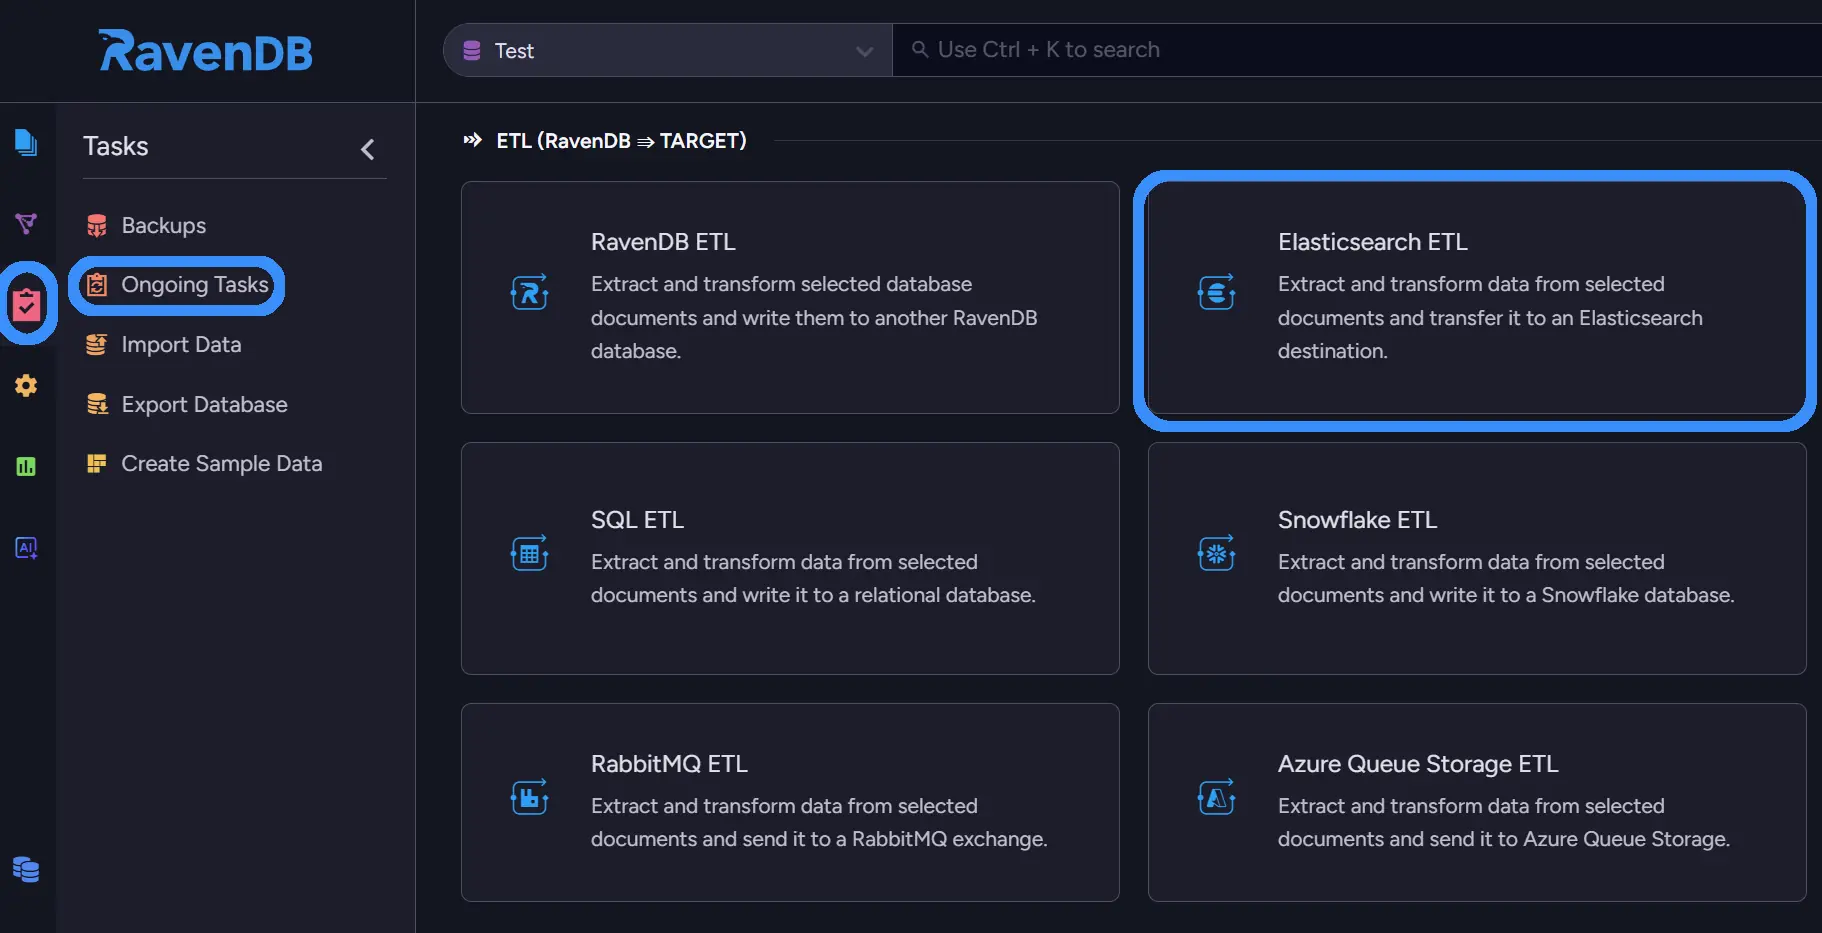
Inside, we will start by setting up the connection.
- Select Task Name, and if not switched on, select ‘Create a new Elasticsearch connection string’.
- You input your Connection String’s Name; it can be whatever you want.
- In ‘Nodes URLs’, enter your Elasticsearch endpoint (or multiple if running a high-availability cluster)
- Add it using the ‘Add URL’ button on the right.
Then you want to switch your Authentication method to an encoded API Key, since that is the one we have. You can also authenticate using different options, such as an unencoded API key, Basic (username and password), or a certificate.
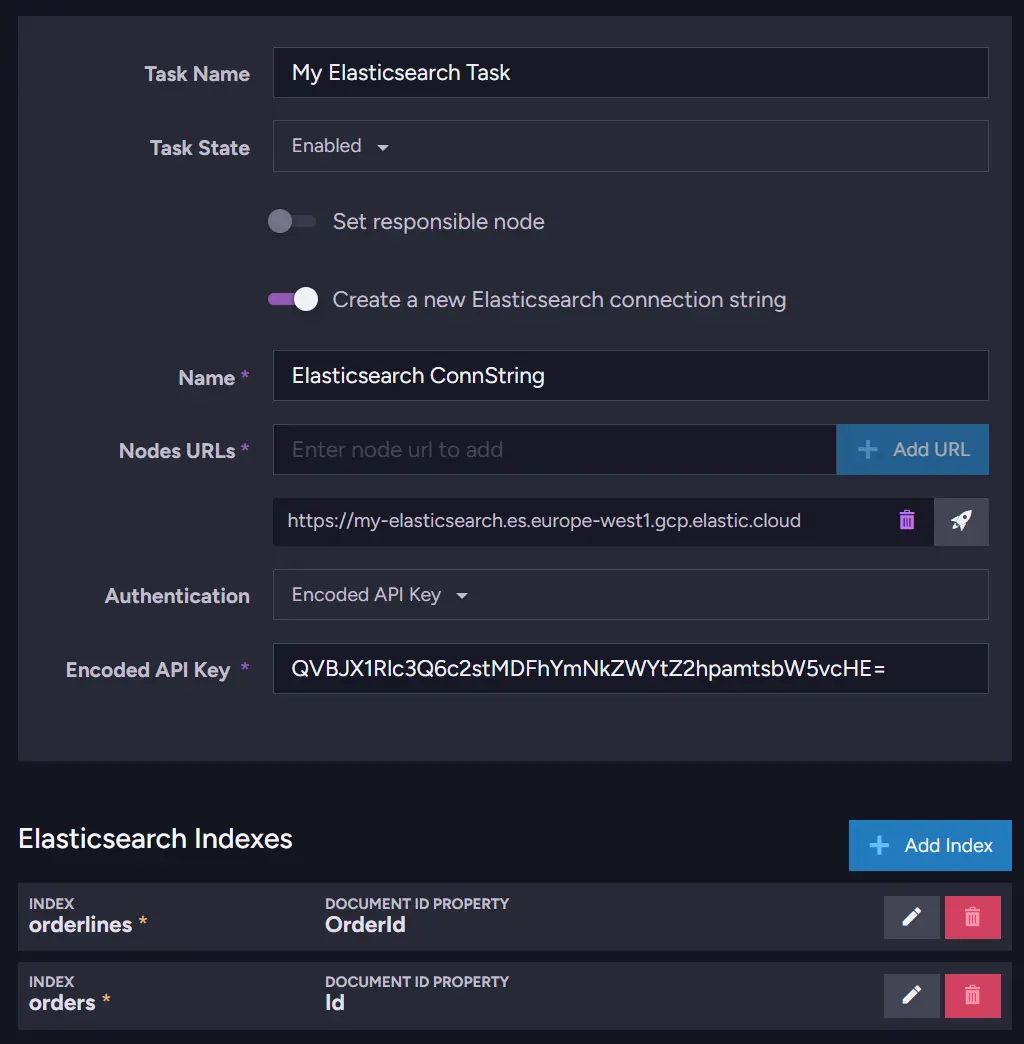
Now we need to tell RavenDB which indexes to create or update, and which fields we want from our documents.
Transformation Script
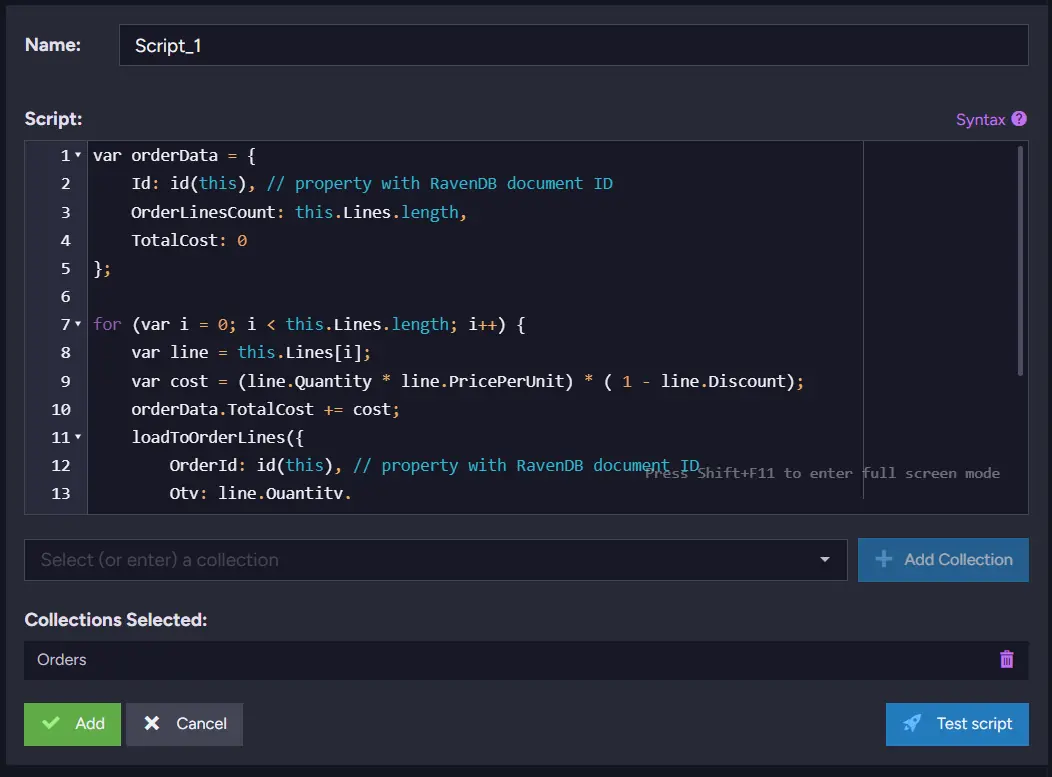
Start selecting which document collections you want to process, below the script. You can do this at the bottom. The transformation script can be as advanced as you need. For example, the easiest way to try is just to transfer the whole document. Pick the Products collection, and the whole script is one line. The index name is baked into the function name, so loadToProduct sends the document to the product index:
loadToProduct(this);
loadToChosenIndex(object); function is a signal to RavenDB that the object you target should be sent to a specific Elasticsearch index. It is a basic function to work with Elasticsearch using RavenDB.
We can also shape it a little better, and include only the required information, or try to fit it into your existing Elastic data model. To extract only what we need, we can do it like this:
var productData = {
    ProductId: id(this), // property with RavenDB document ID
    QtyPerUnit: this.QuantityPerUnit,
    Category: this.Category,
    Cost: this.PricePerUnit
};

loadToProduct(productData);
As you can see, we select fields, put them into an object, and later send it to Elasticsearch.
The key element here is:
ProductId: id(this)
This will extract RavenDB’s Id of the documents from the collection you attach. You can change first Id to anything you want, for example:
ReportId: id(this)SourceDocumentId: id(this)
But what if we want to transform some data that has nested fields? Let’s use the following script:
var orderData = {
    Id: id(this), // property with RavenDB document ID
    OrderLinesCount: this.Lines.length,
    TotalCost: 0
};

for (var i = 0; i < this.Lines.length; i++) {
    var line = this.Lines[i];
    var cost = (line.Quantity * line.PricePerUnit) * ( 1 - line.Discount);
    orderData.TotalCost += cost;
    loadToOrderLines({
        OrderId: id(this), // property with RavenDB document ID
        Qty: line.Quantity,
        Product: line.Product,
        Cost: line.PricePerUnit
    });
}

loadToOrders(orderData); // load to Elasticsearch Index 'orders'
In this example, we propagate aggregated order details by defining OrderLinesCount and TotalCost, which are bumped later when processing OrderLines and the OrderLines themselves, as independent items.
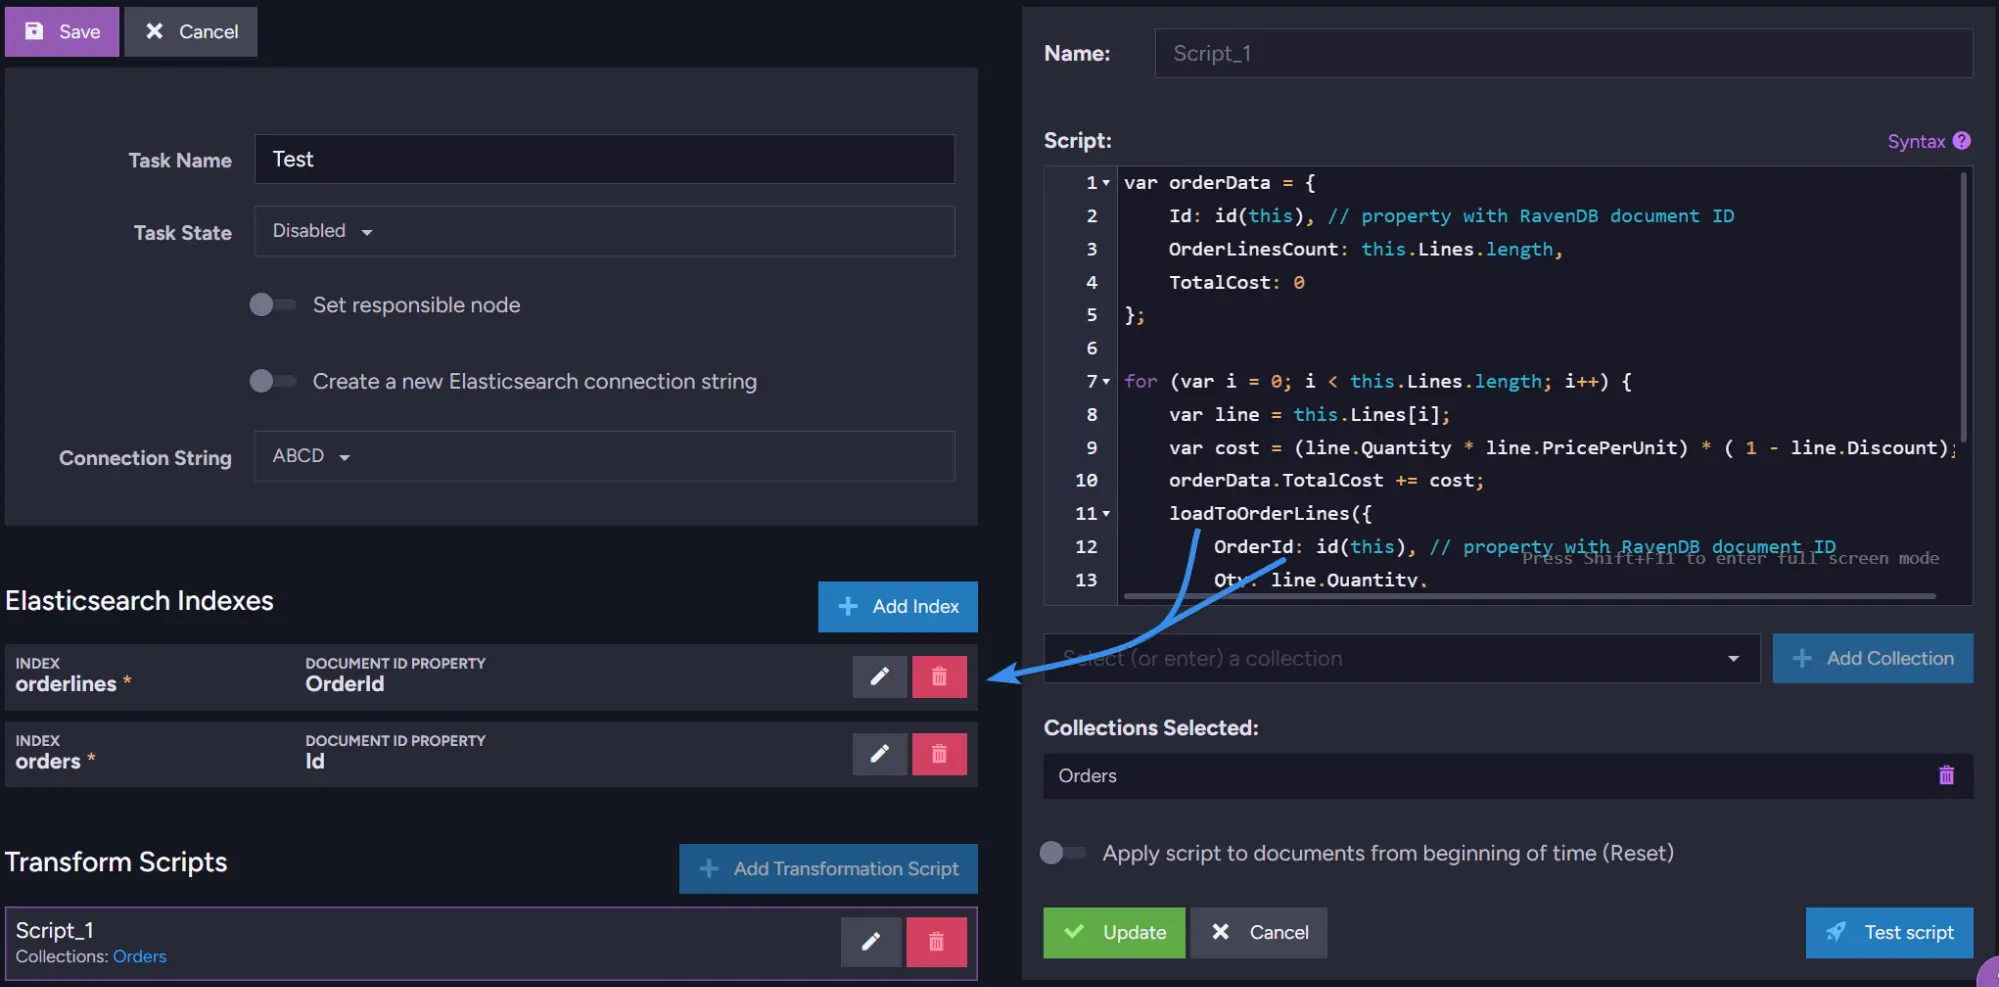
After saving the script, review the Elasticsearch Indexes under the connection string. The indexes you define there must match the names used in your script. This means the name passed to loadTo needs to match the index name, and the document ID field you send must match the ID defined in the transformation.
The index name you register must match the target in your loadTo<Index> call (lowercased), and the Document Id field must match the ID you set in the transformation.
For example
ReportId: id(this)
loadToReports(reportsData);
Means we need to input “reports” (lowercased) as Index name and “ReportId” as Document Id.
After this, all you need to do is save your task and let RavenDB transport the selected documents. And that’s it. All selected data will be synced up with Elasticsearch.
Do you still need two search engines?
Once your ETL is in place and your Elasticsearch index starts receiving data, you’ve got everything you need to keep your existing setup operational.
But when you have a moment to step back and look at the bigger picture, it’s worth thinking about whether you actually need two separate search engines long-term.
RavenDB isn’t just a simple OLTP database - it ships with a powerful full-text search engine (Corax), semantic and vector search, and if you prefer Lucene, it’s also available. If your system is already moving toward RavenDB, it may simplify your life to unify both storage and search under a single roof.
About Lucene that we mentioned, Elasticsearch uses it too, and RavenDB can run on it as well. That shared ancestry means the everyday full-text toolkit lines up closely. Here is how the pieces actually map:
| Elasticsearch capability | RavenDB equivalent | Notes |
|---|---|---|
match / query_string full-text | search() in RQL | Same tokenized matching, expressed inline in the query |
| Analyzers and tokenizers | Lucene analyzers, including custom ones | Corax fully supports all Lucene analyzers |
| Fuzzy matching | fuzzy() | |
| Phrase and proximity | proximity() plus quoted phrases | |
| Prefix, wildcard, regex | startsWith, endsWith, regex | |
| Field and term boosting | boost() | |
| Highlighting | Highlighting | |
| Terms and range aggregations | Facets with Sum, Min, Max, Average | |
| Suggesters (did-you-mean) | Suggestions | |
| More Like This | MoreLikeThis | |
| Geo queries | Spatial queries | |
| kNN / dense vector search | vector.search() | RavenDB can also generate the embeddings for you |
| Synonym token filters | No built-in equivalent | Reachable through a custom analyzer, but you build it yourself |
| Percolator (stored queries matched against new docs) | No equivalent | |
| Pipeline aggregations, date histograms | Map-reduce indexes | A different model, not a drop-in translation |
| Kibana, Logstash, Beats | No equivalent |
So the search primitives you reach for day to day are all there, and a few things are not. The honest dividing line is what your Elasticsearch cluster is actually doing for you. If it powers application search over your operational data, that job moves to RavenDB cleanly and you drop a moving part. If it is the E in your ELK stack, holding logs and Kibana dashboards, keep it, because RavenDB is not trying to replace that.
You don’t have to make that decision today. But when you’re ready, bringing that search layer into RavenDB is a smooth transition - especially when you compare how expressive queries can be.
What you can do in Elasticsearch with code like this
{
  "query": {
    "bool": {
      "must": [
        {
          "query_string": {
            "query": "robots AND \"science fiction\"",
            "fields": [ "title", "description" ]
          }
        }
      ],
      "filter": [
        { "term":  { "isReleased": true }},
        { "range": { "release_date": { "gte": "2010-01-01" }}}
      ]
    }
  }
}
You can do the same in RavenDB, just like this:
from Movies
where (search(Title, "robots \"science fiction\"")
      or search(Description, "robots \"science fiction\""))
and IsReleased = true
and ReleaseDate >= "2010-01-01"
Or just use semantic search:
$p0 = ["science fiction", "robots"]

from Movies
where vector.search(embedding.text(Description), $p0, 0.8)
and IsReleased = true
and ReleaseDate >= "2010-01-01"
Summary
Your data is now flowing to Elasticsearch! Here is what we wired up along the way:
- An Elasticsearch API key scoped to a
ravendb-rolewith clustermonitoraccess andcreate_index,read,write,delete, andmaintenanceprivileges on the target indexes. - A RavenDB Elasticsearch connection string pointing at your node URLs, authenticated with that encoded API key.
- A transformation script that picks the fields you actually want and hands them to
loadTo<Index>, including a nested example that fans order lines out into their own index. - Index registrations whose names match the
loadTotargets (lowercased) and whose Document Id fields match the IDs set in the script.
In the meantime, while your ETL transports data to Elasticsearch, take a look at how RavenDB can help you implement semantic search here.