Cloud Portal: The Users & Access Tab
The Users & Access page lets you manage all users on your account: invite or remove members, assign their account roles, and manage their per-product permissions.
The users list
The Users & Access page lists every user on the account. Each row shows the user's email, their status (Owner, Active, or a pending invitation), and their access — split into their assigned account roles and their per-product access.
Access is shown as two compact chips you can expand — for example 3 roles and 3 products. Expanding the product-access chip lists each product the user can access together with its level: the resolved permission preset (Viewer, Operator, Manager, or Admin), a Security admin badge where that add-on is enabled, or Custom for a legacy permission set that does not match any preset. The Account Owner is shown with full access to all products. Your own row is displayed the same way.
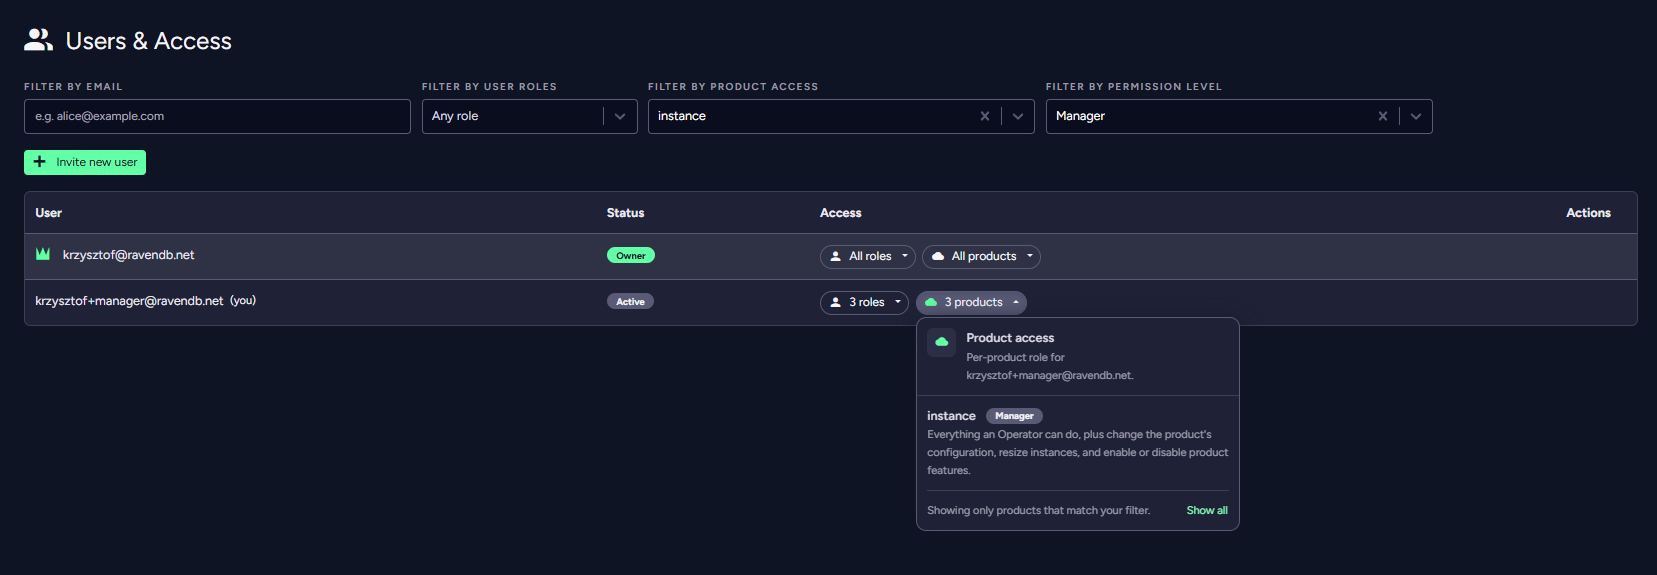
You can filter the list by email, by account role, by product access, and by permission level.
Who can manage users and permissions
Managing users, roles, and product permissions is limited to the Account Owner and users with the Account with User Management role.
A user with the Account with User Management role can modify the roles of other users, with the exception of other Account with User Management users. They cannot assign or remove account roles that they do not possess themselves.
A user with the Account with User Management and Products Creation roles can assign the Products Creation role to another user (provided that user does not have the Account with User Management role). A user with the Account with User Management and Products Creation roles cannot assign the Billing role to another user.
Only the Account Owner can modify the roles of users who have the Account with User Management role, or assign/remove that specific role. The Account Owner can modify any role for any user.
Per-product permissions follow the same principle: in the edit-user panel, product controls are locked with a padlock for products the acting manager cannot access. See Product permissions for the full rules.
You can read more about account roles and product permissions on the Account page.
Adding a new user
Click Invite new user at the top of the users list to open the invite panel. Both account roles and per-product permissions are set in this single panel.
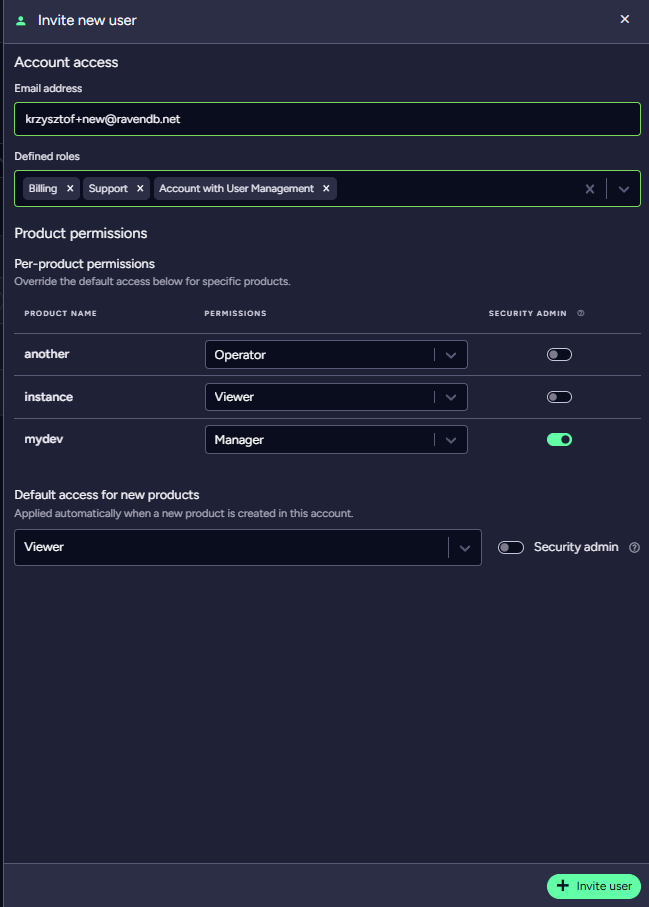
1. Provide an email address. 2. Select the user's account roles. 3. Assign per-product permissions using the presets, and optionally set the user's Default access for new products. 4. Click Invite user to send the invitation.
Removing a user
Each row in the users list has action buttons in the Actions column.
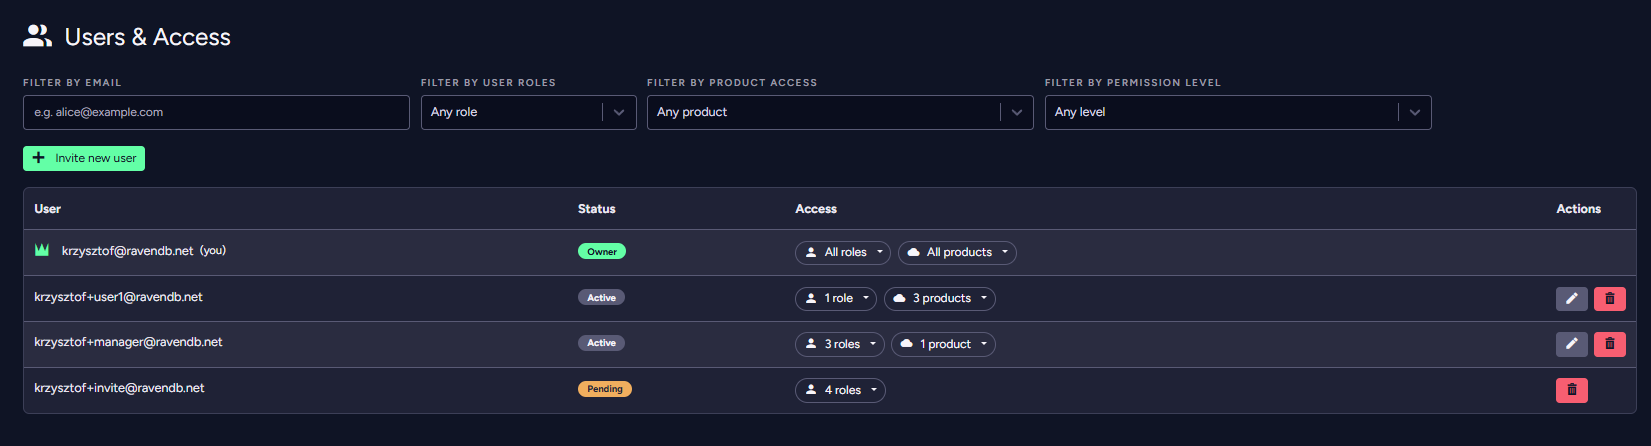
- Click Remove (the trash icon) to remove an active user from the account.
- Click Cancel invitation (the trash icon on a pending row) to withdraw a pending invitation.
The Account Owner row and your own row have no removal button.
Managing existing users
Click the Edit button on a user's row to open the edit panel. As with the invite panel, account roles and per-product permissions are managed together here.
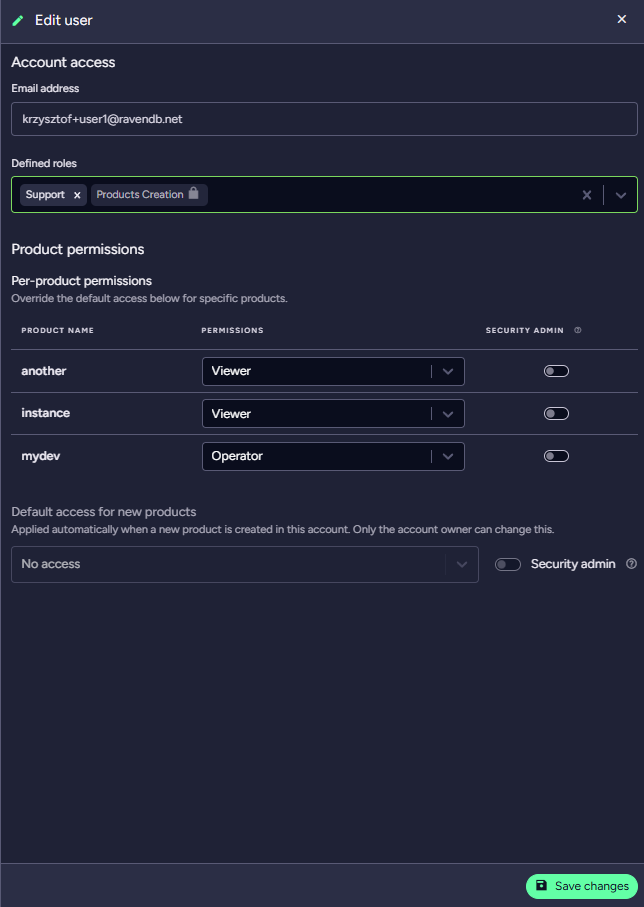
1. Adjust the user's account roles. 2. Adjust per-product permissions using the presets. Each preset shows a short description of what it grants. Products you cannot access yourself are locked (see the subset rule above). If you are the Account Owner, you can also update the user's Default access for new products here. 3. Click Save changes.
Opening a product you have no access to shows a clear message — asking you to have your account administrator grant access via Users & Access — rather than a bare error. Ask an account administrator (the Account Owner or a user with the Account with User Management role) to grant you the appropriate product permissions.