Cloud Portal: The Products Tab
The Products tab lets you provision a new cloud product, or manage an existing one.
You can provision products of three types: Free, Development and Production.
Provisioning a New Product
To provision a new product, open your Portal's Products tab and click Add Product.
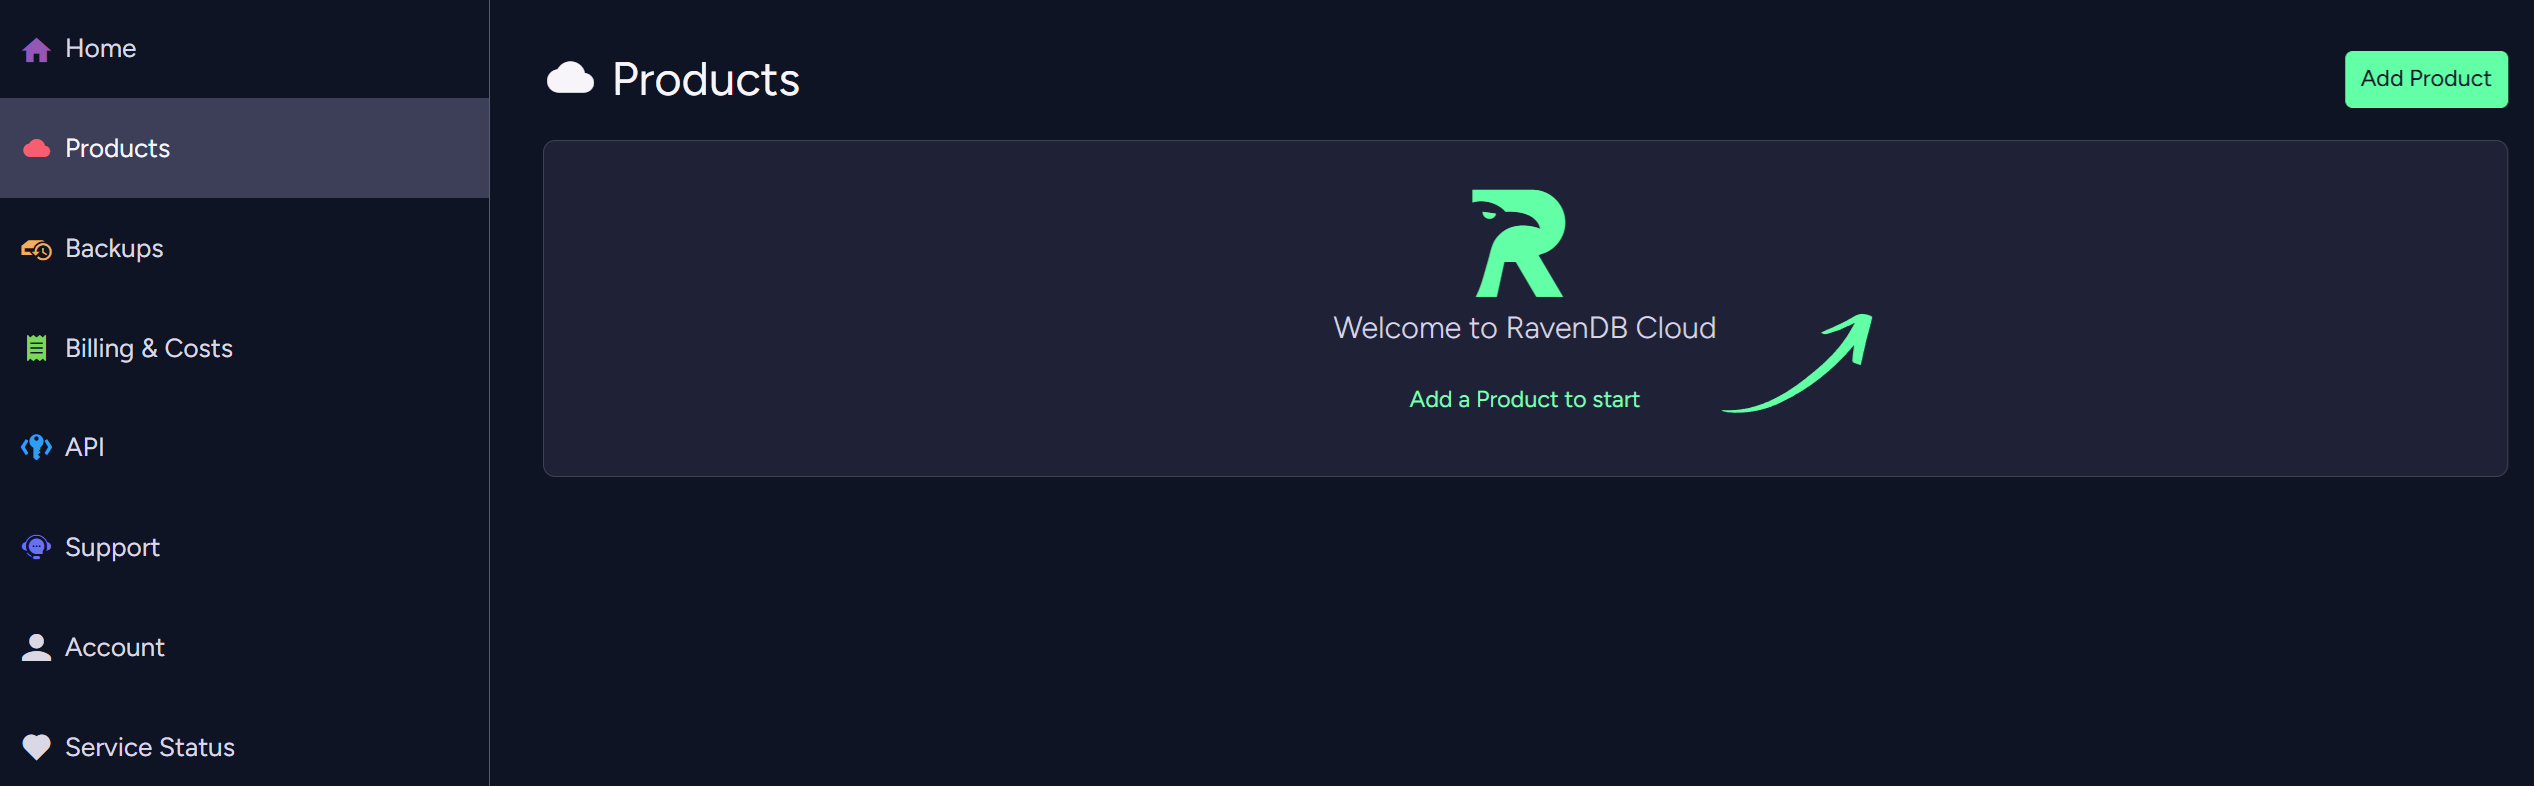
The New Product wizard will open and walk you through the following simple stages:
A. Plan
B. Account
C. Billing
D. Customize
E. Summary
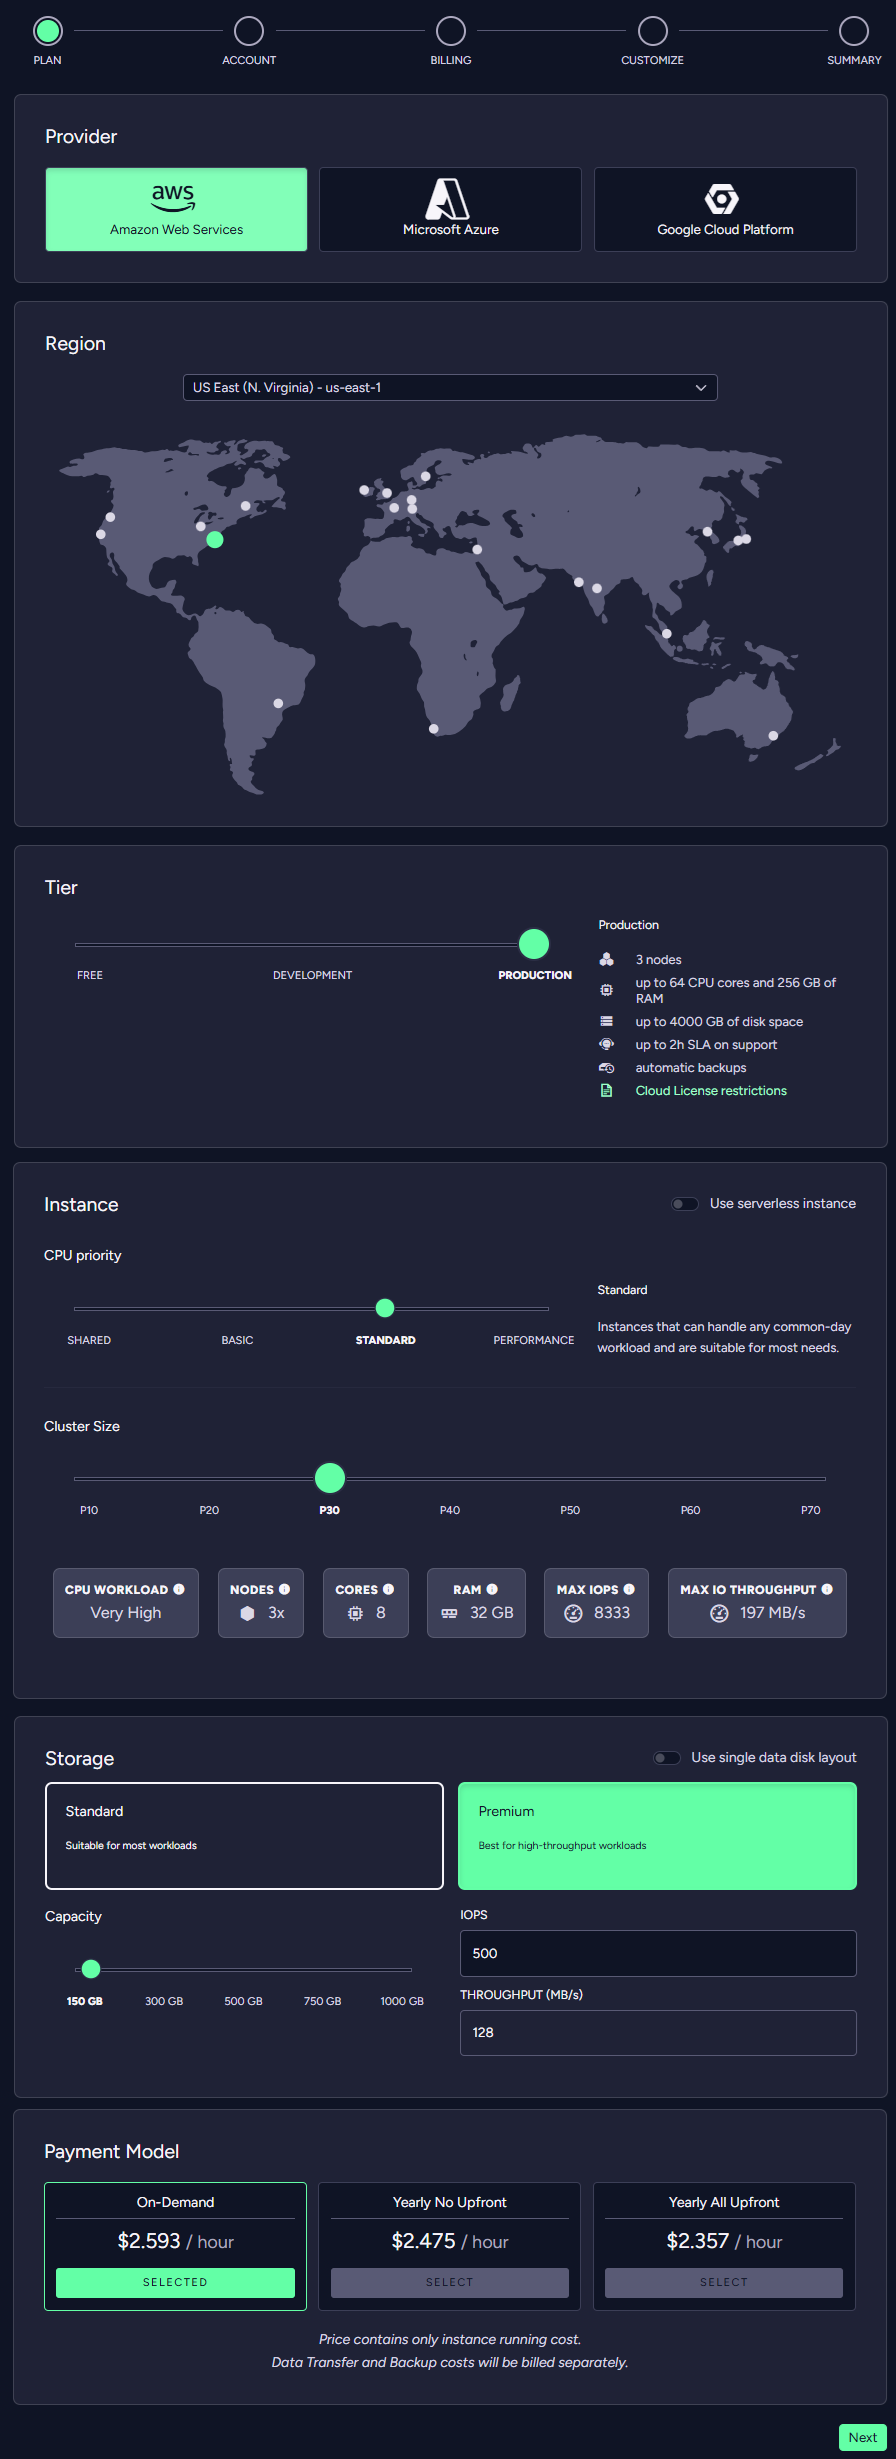
A. New Product: Plan
Use the Plan page to choose your product's cloud Provider, Region, Tier, Instance, Storage and Payment model.
-
Cloud Provider
Choose your cloud host. It can currently be one of three providers:
Amazon Web Services, Microsoft Azure, and Google Cloud Platform. -
Region
Select where your equipment would be physically located. -
Tier
You can raise a Free node, a Development node or a Production cluster.
Learn more about them in the Tiers and Instances page. -
Instance
Choose the instance type that best suits your requirements.
Learn more about them in the Tiers and Instance page. -
Storage
Select disk type and size.
Learn more about them in the Scaling page. -
Payment model
Choose your payment model and commitment.
Learn more about them in the Pricing, Payment and Billing page.
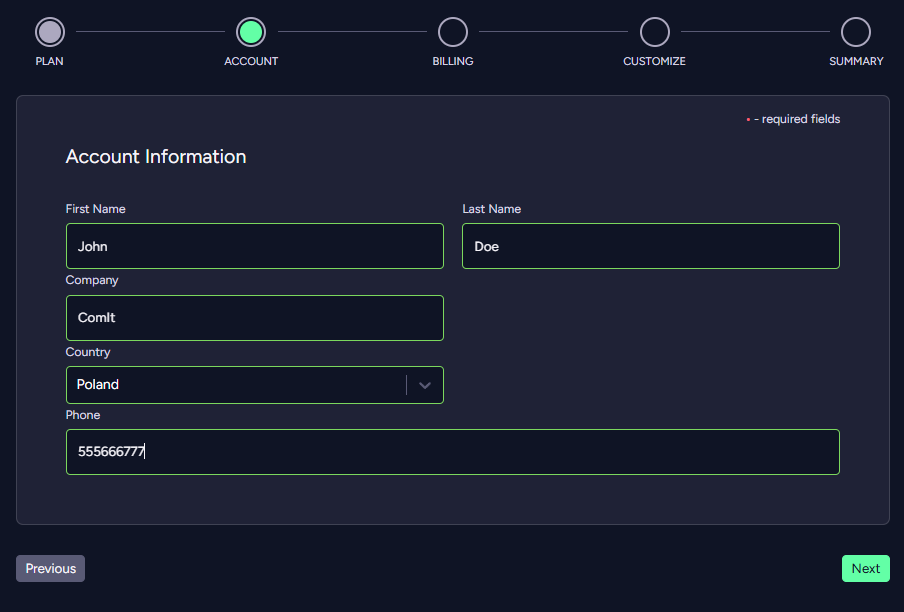
B. New Product: Account
Enter your account information and click Next.
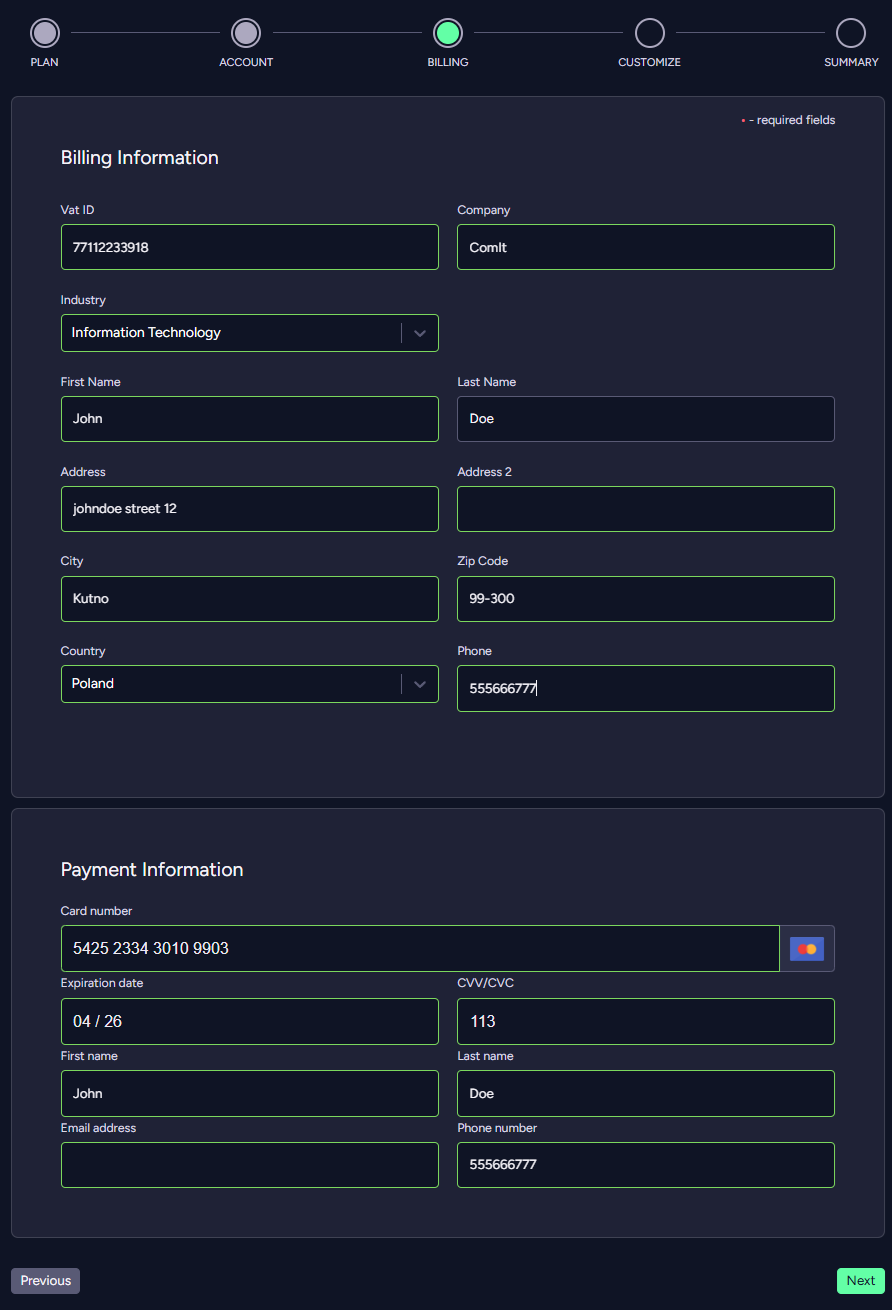
C. New Product: Billing
Enter your billing details and click Next.
D. New Product: Customize
Choose your product's display name, release channel and allowed IP addresses.
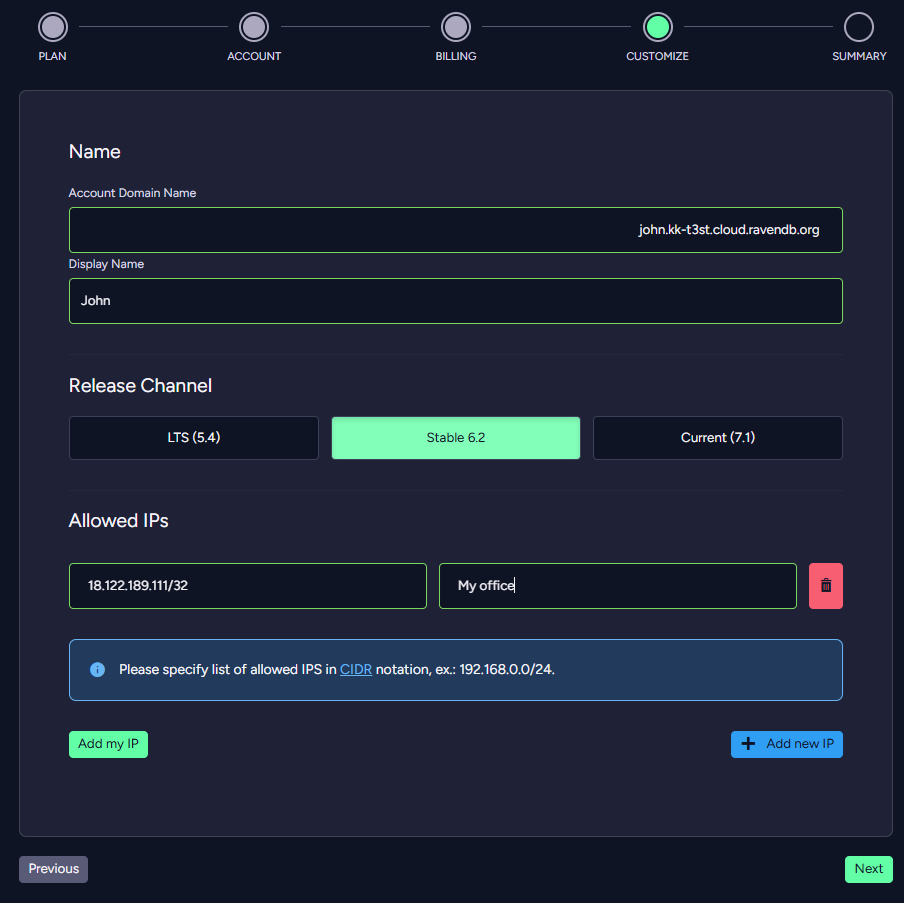
The Display Name is simply the name that would appear in your Cloud Products tab.
The Allowed IPs section determines which addresses would be allowed to manage your database.
This adds an important layer to your database security on the network level.
You can read more about it in the Security page.
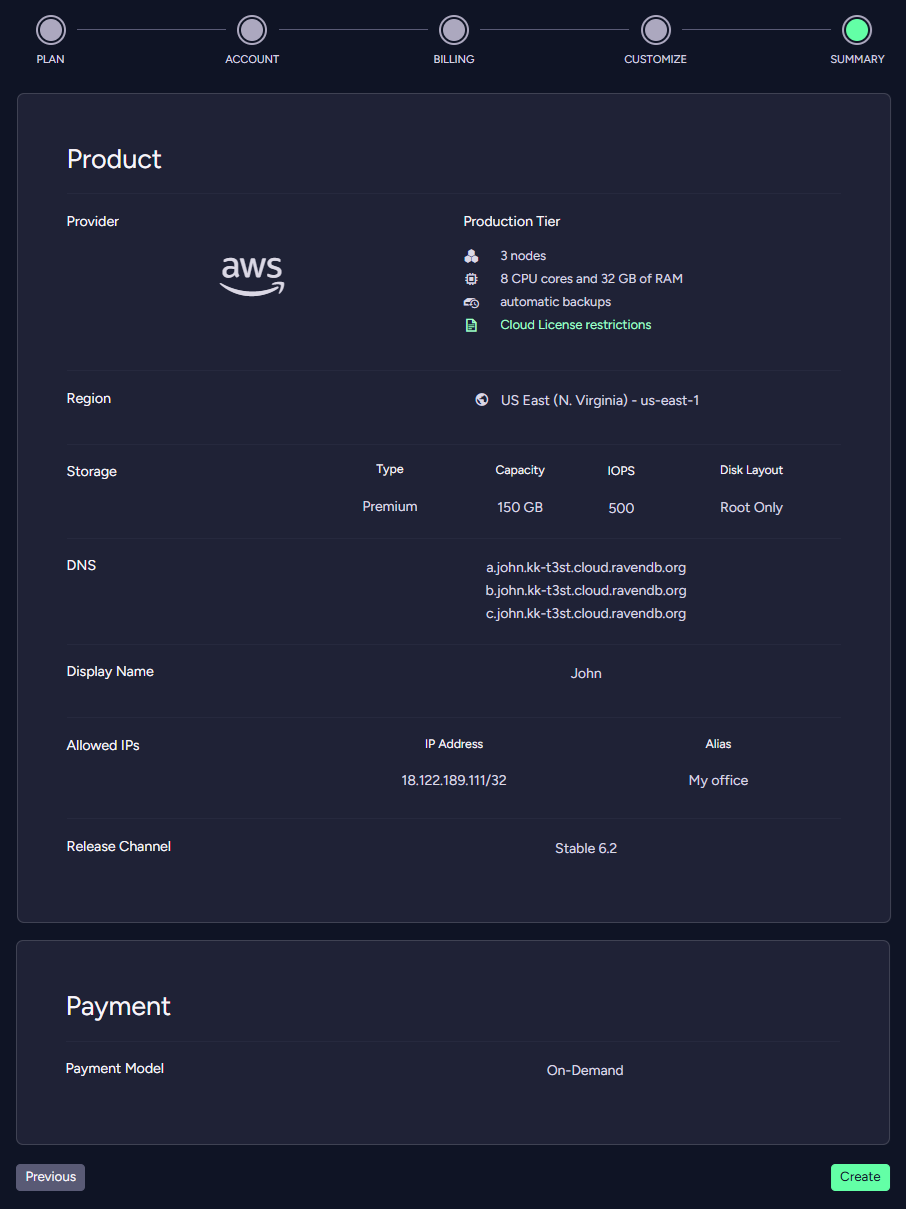
E. New Product: Summary
The Summary stage shows you your choices and lets you edit them if you wish.
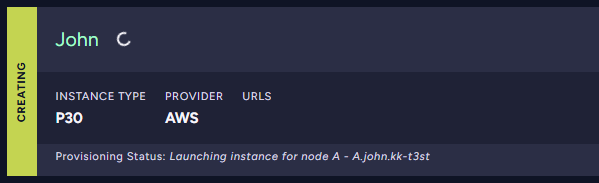
 When you finish defining your product, the cloud provisioning routine will show you
your new product's status until it's ready to go.
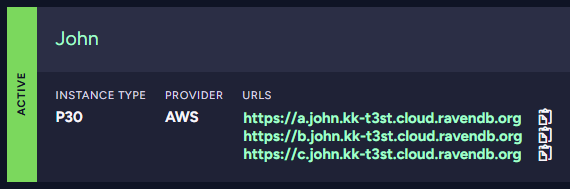
When you finish defining your product, the cloud provisioning routine will show you
your new product's status until it's ready to go.
View the Product Metrics
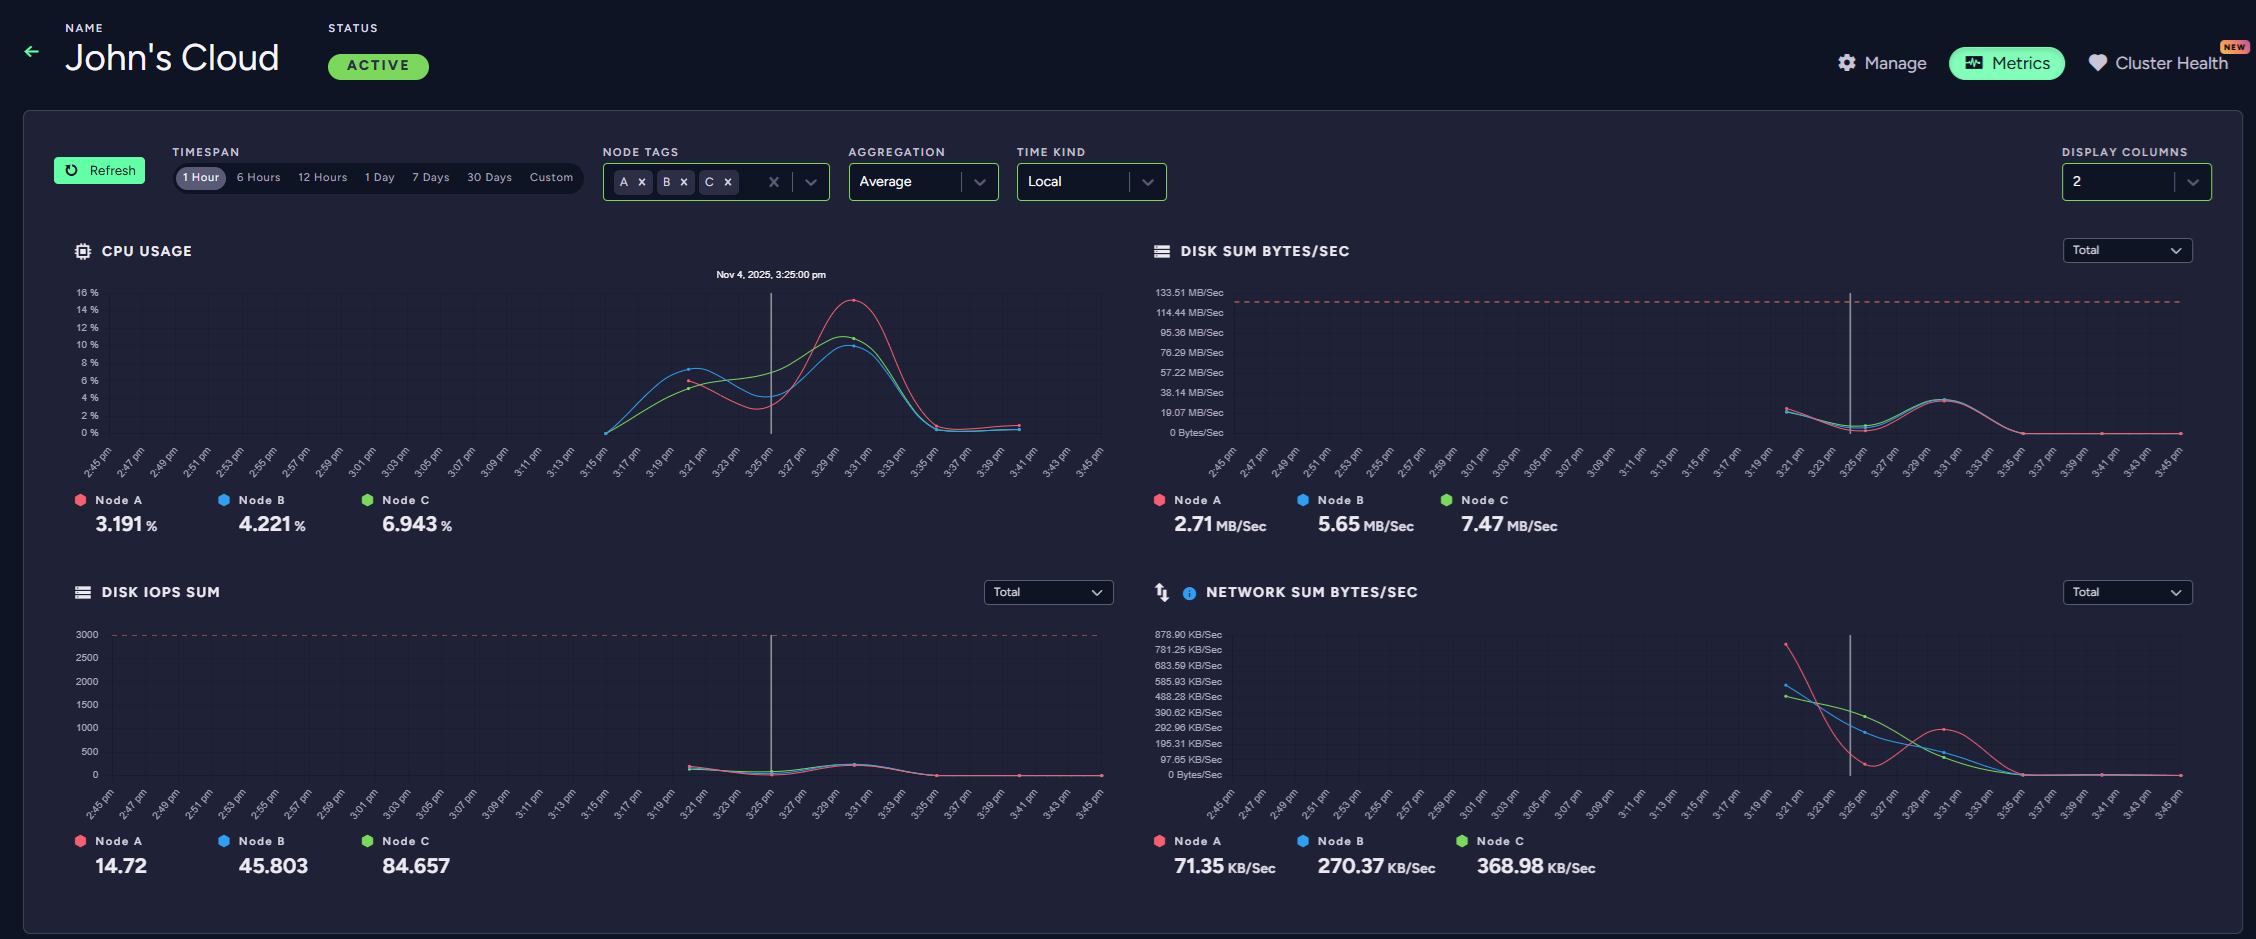
This allows you to analyse your machine resources for a selected time period and cluster node. It's useful for analysing usage, instance overload and traffic.
View the Cluster Health
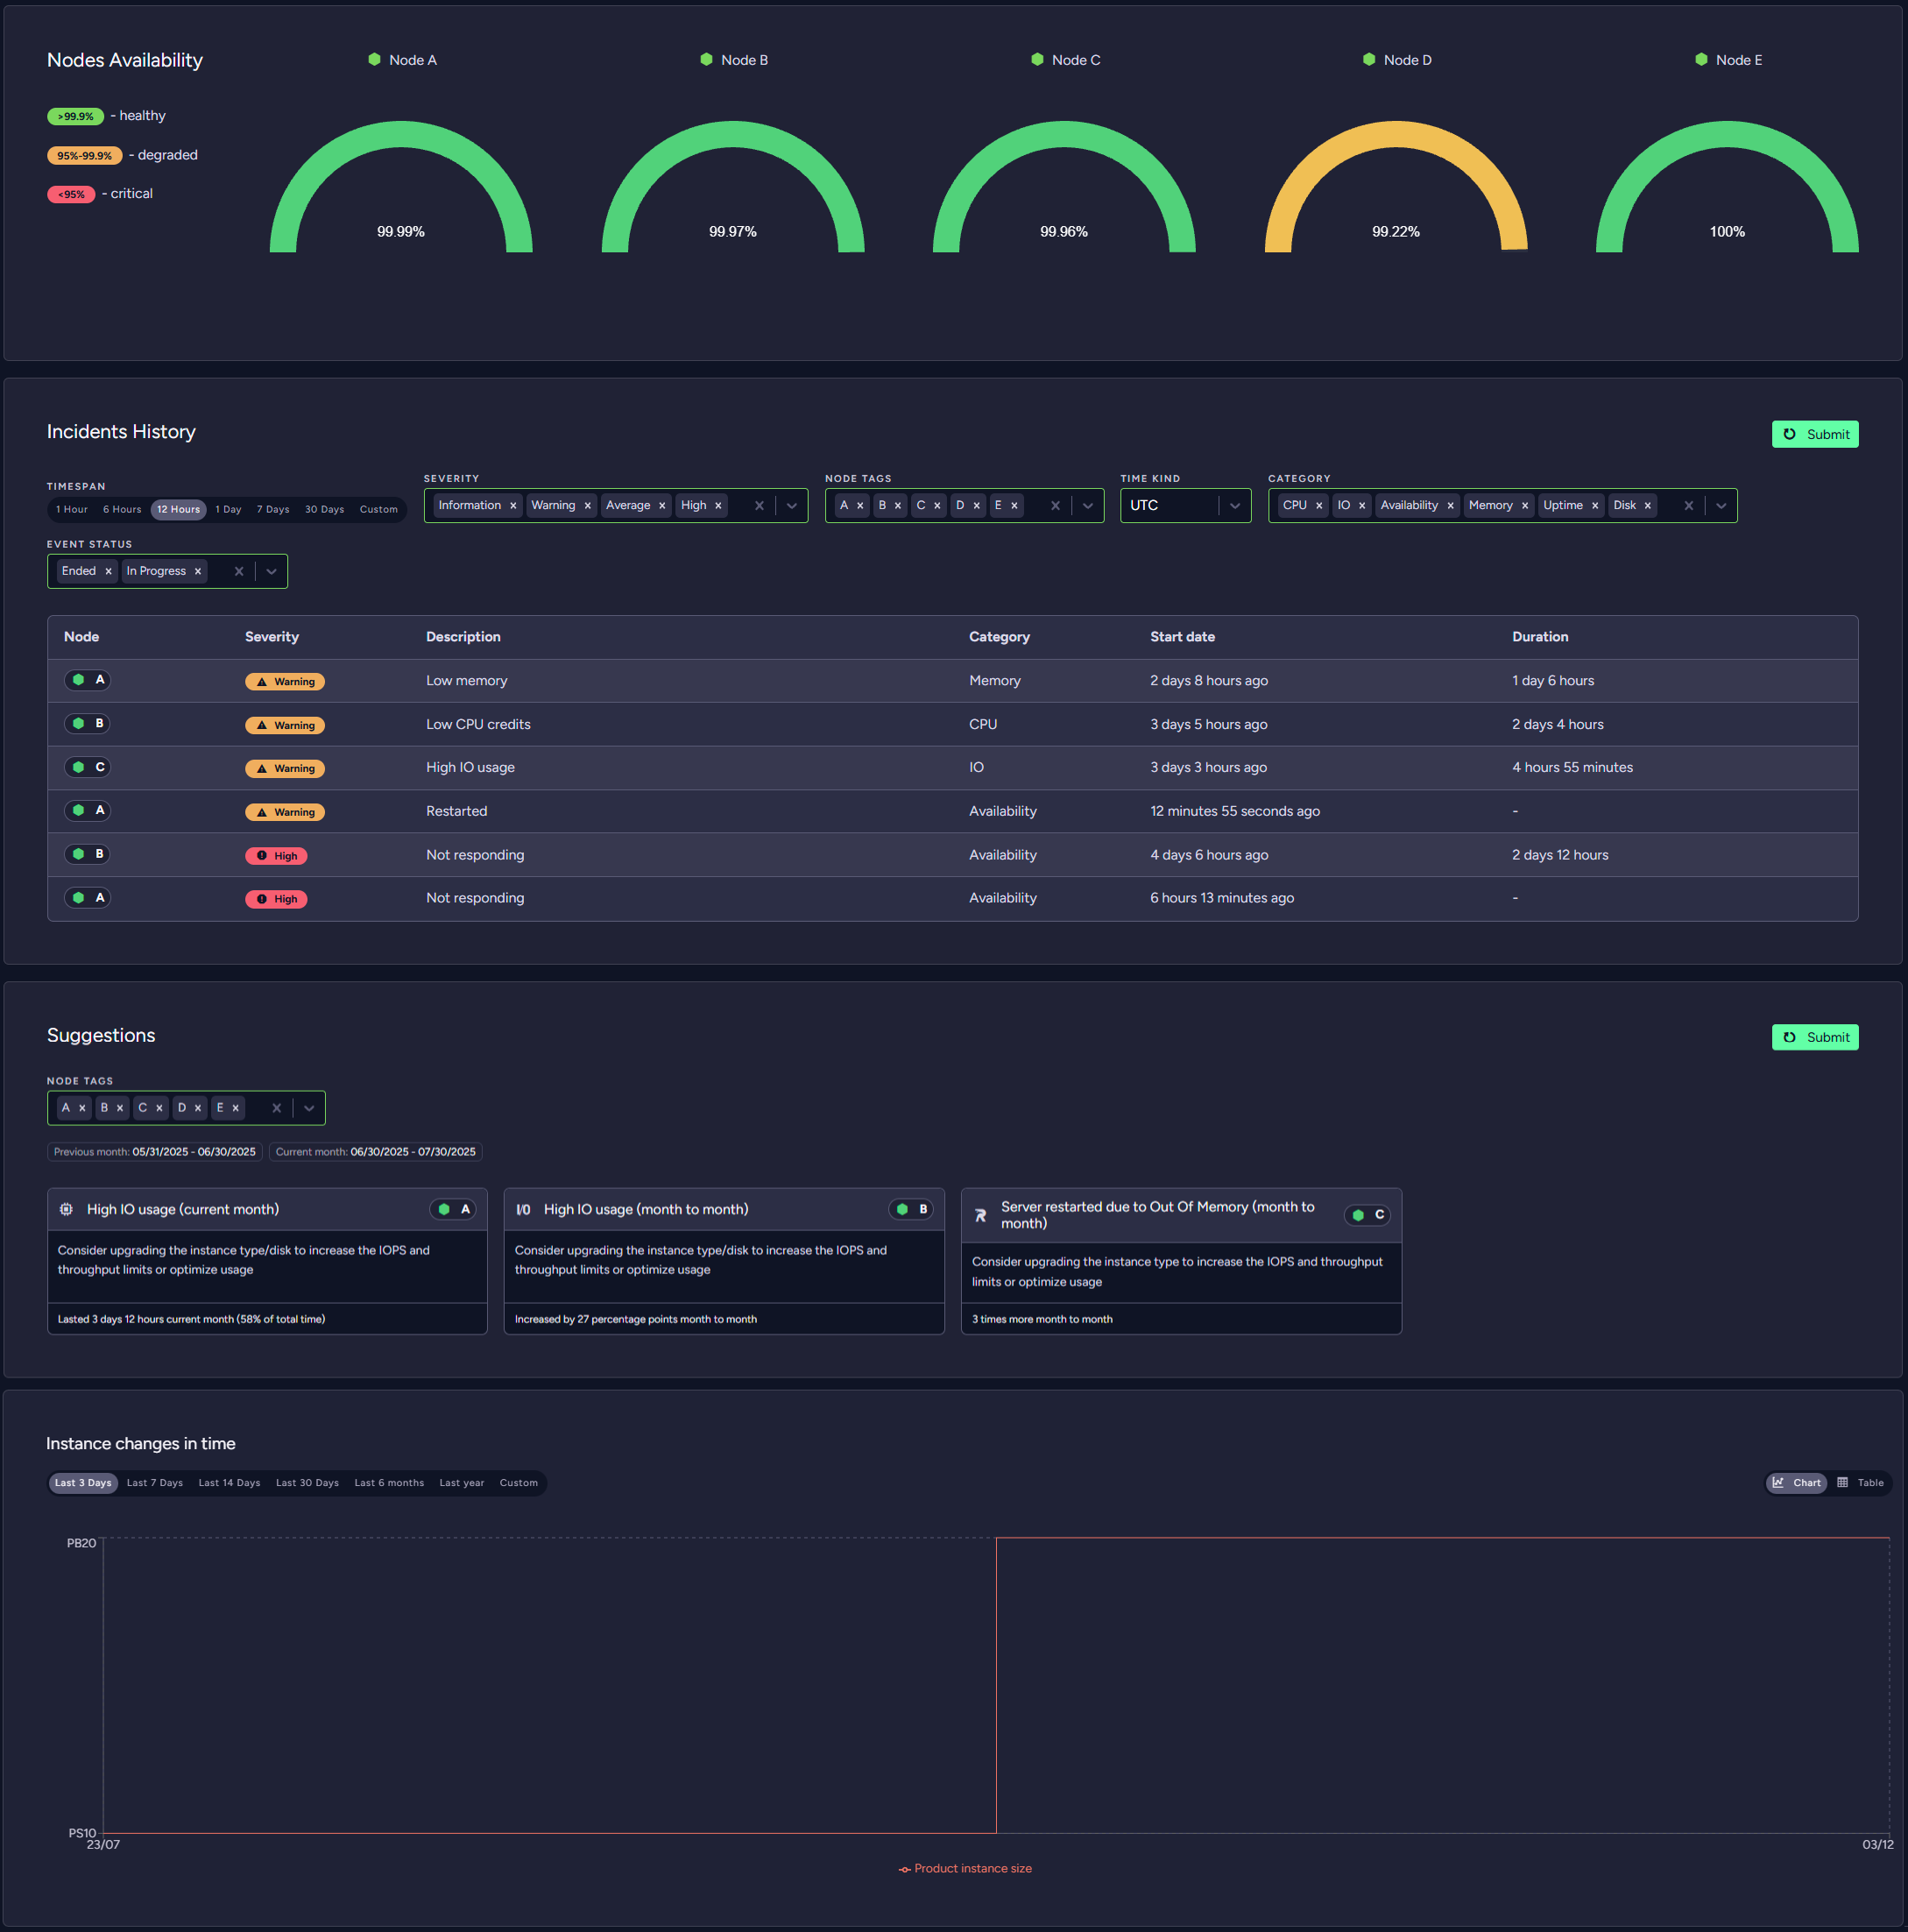
This allows you to analyse your cluster incidents for a selected time period, cluster node, severity, category and event status.
In addition, Cluster Health generates suggestions for a selected cluster node based on incident trends that can help resolve cluster stability issues.
The view also shows node availability for the last 30 days and a history of product type changes.
It's useful for analysing usage, instance overload and traffic.
More details can be found here.
Managing an Existing Product
To modify an existing product, find it in the Products tab and click its Manage button.
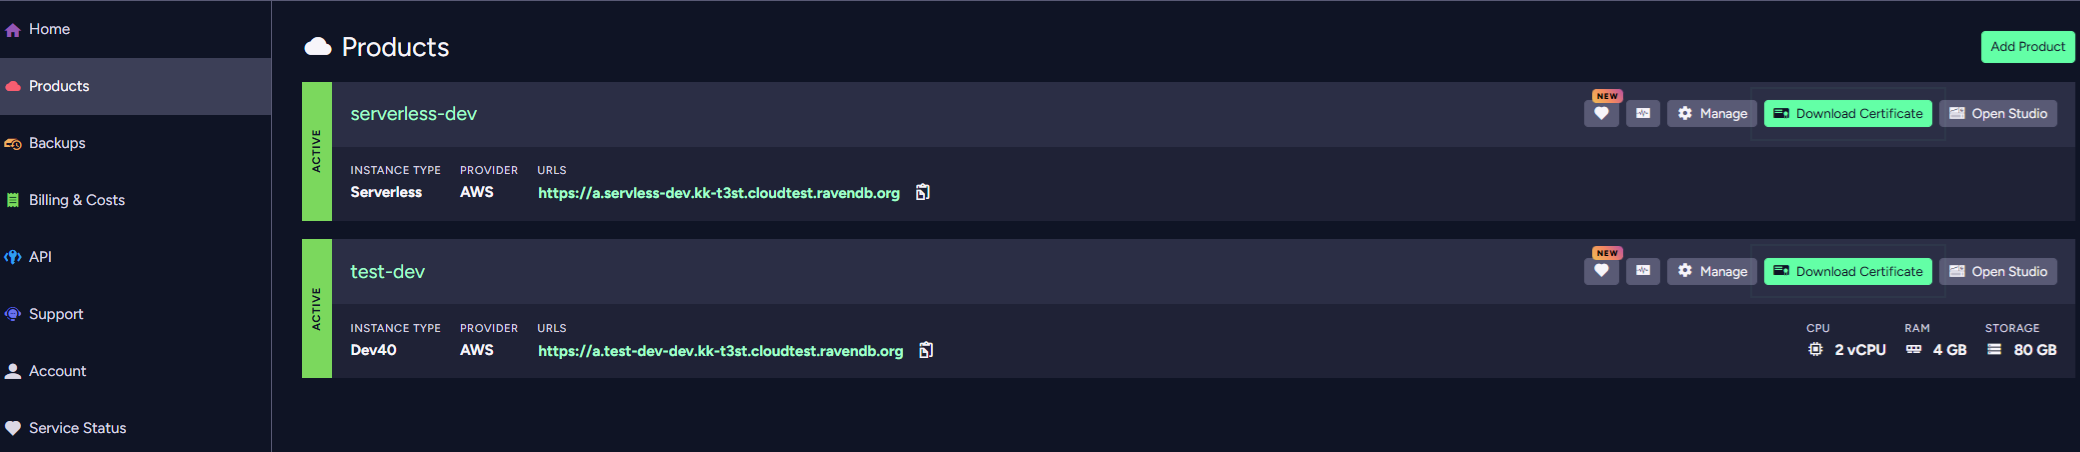
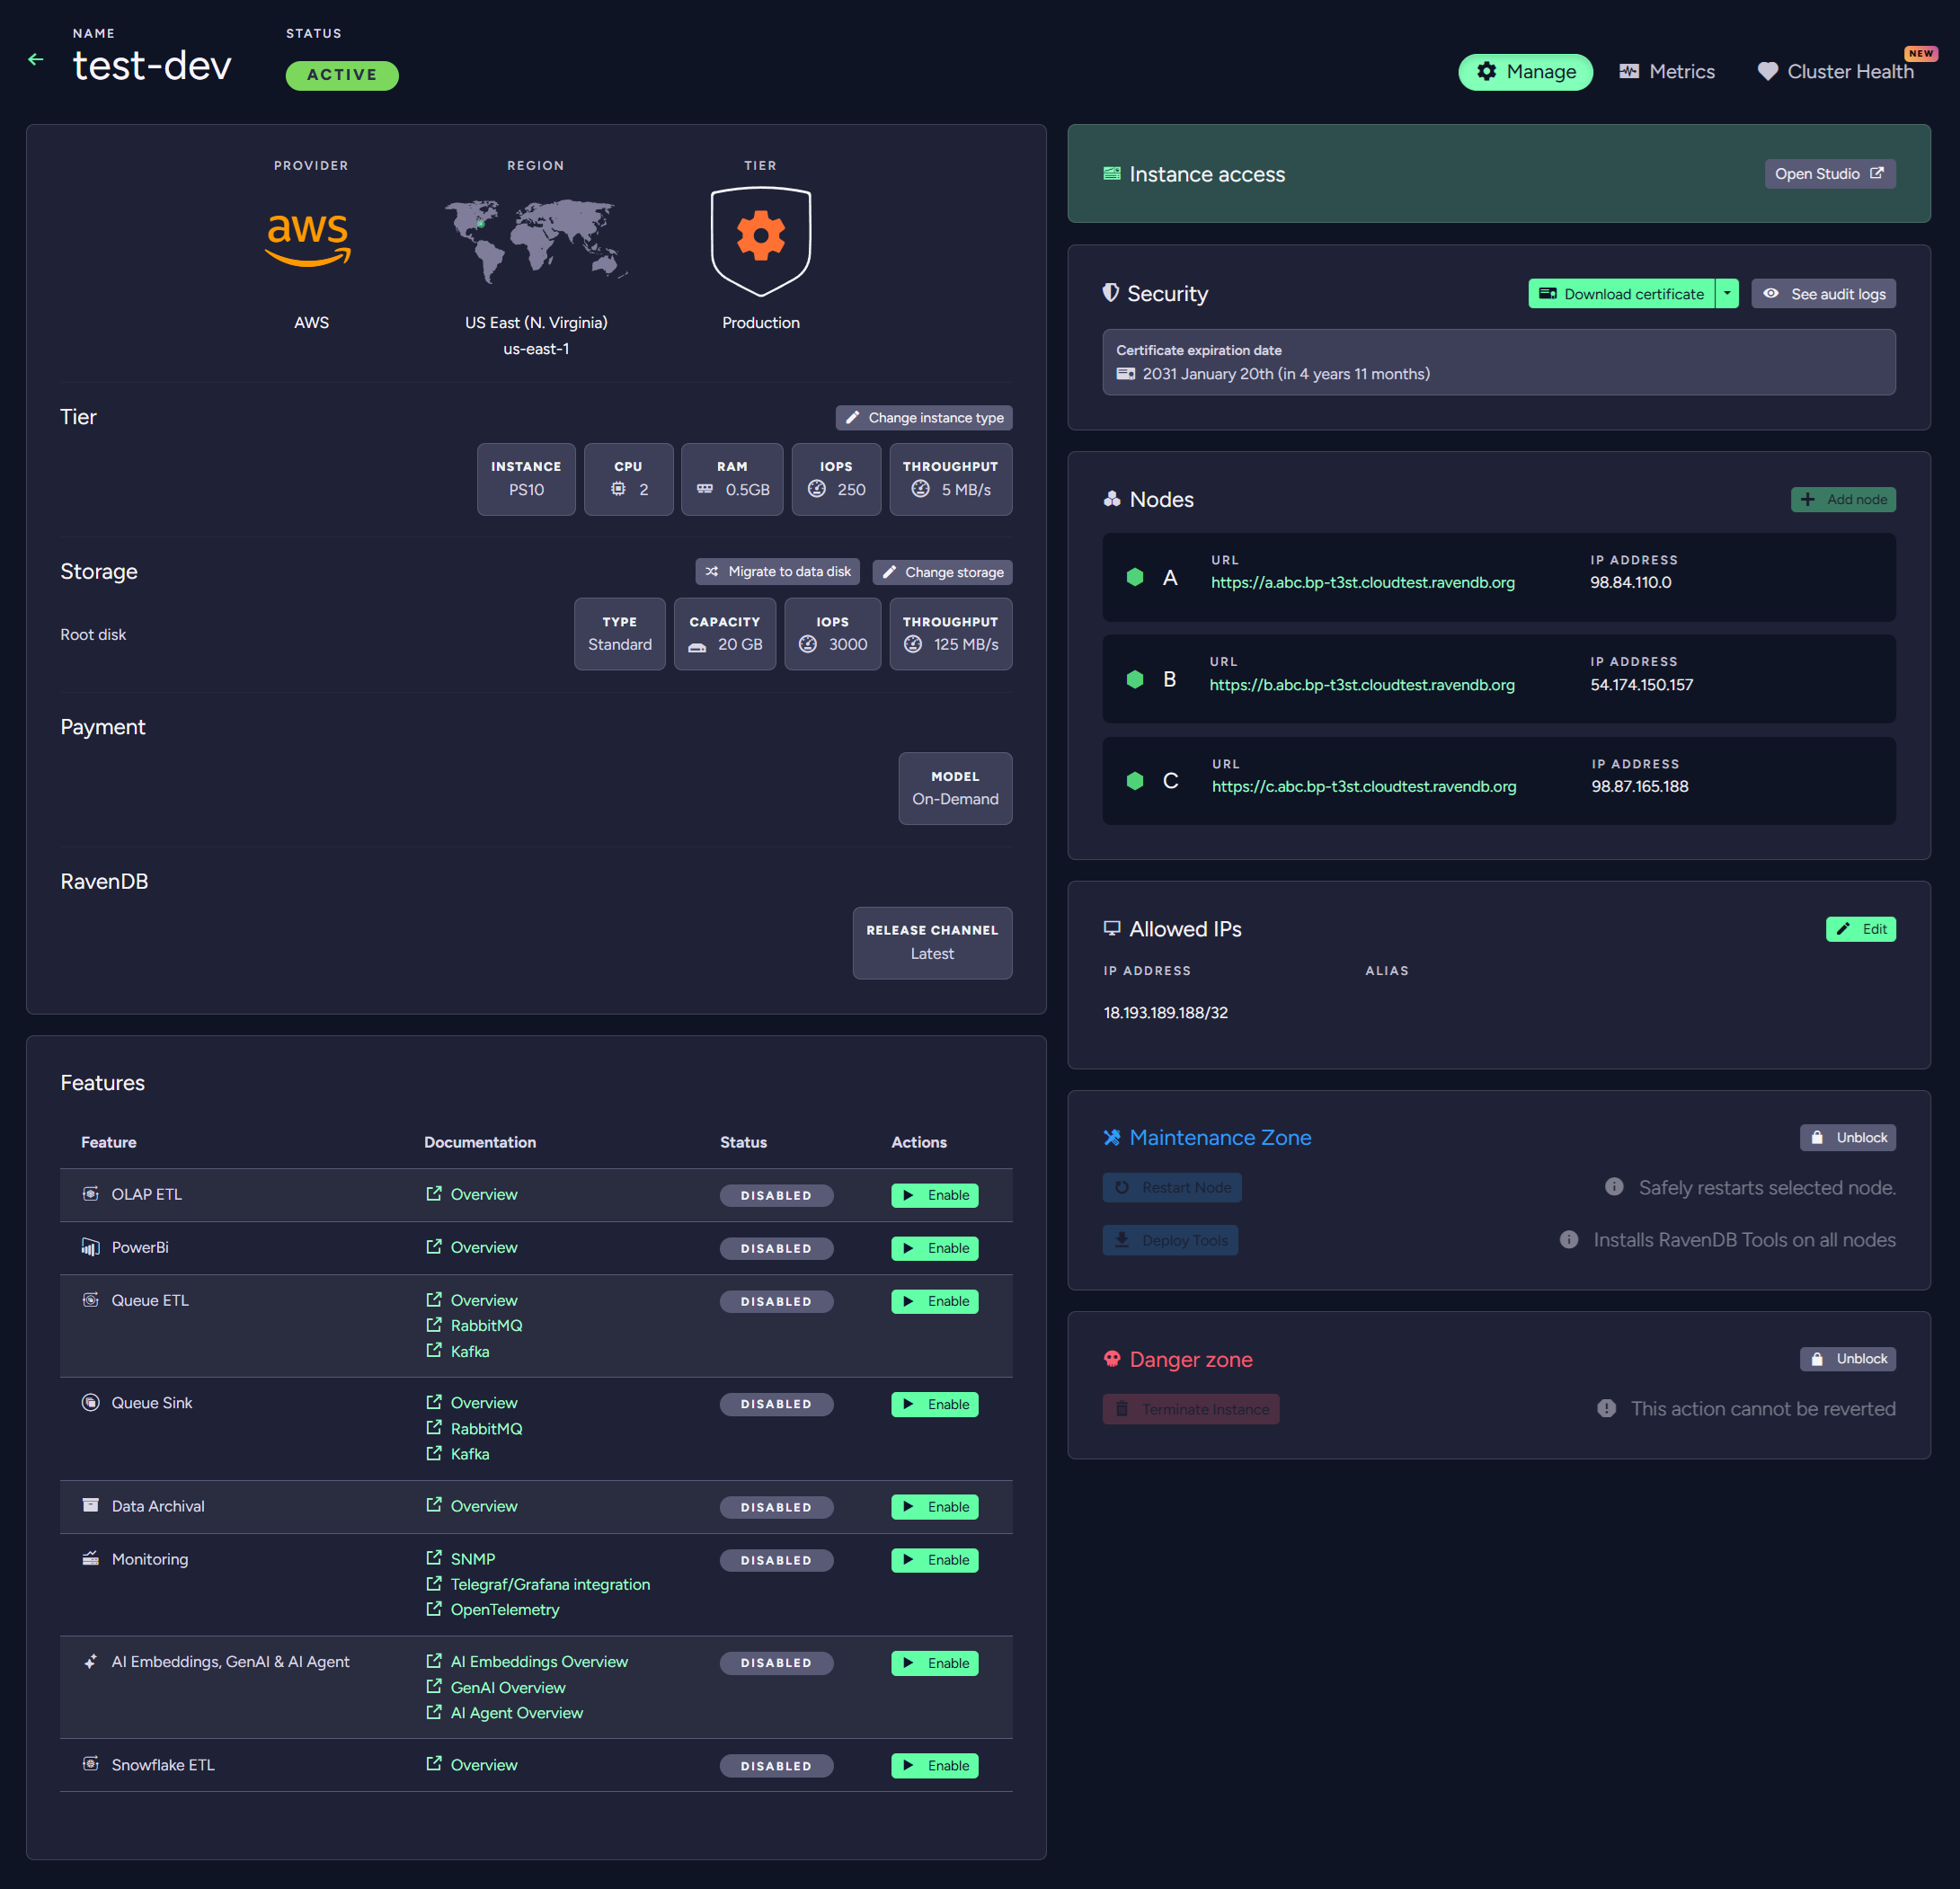
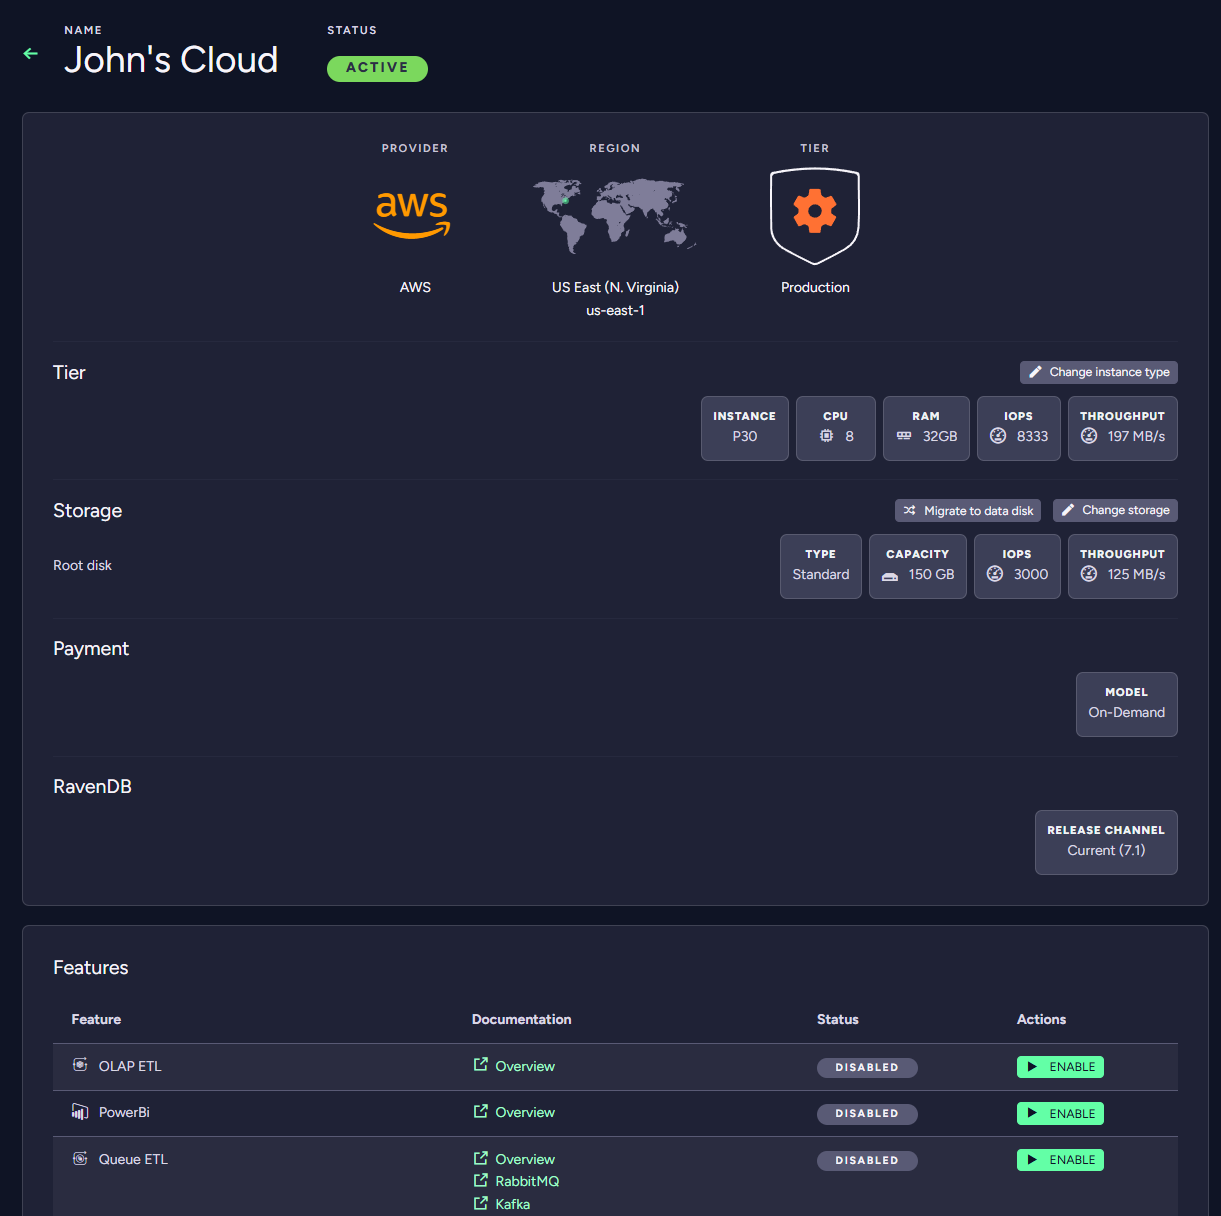
This is a general view of the product details page:
This is a general view of the serverless product details page:

Change Instance Type and Storage
You can view your configuration and change your product's instance type and storage size here.
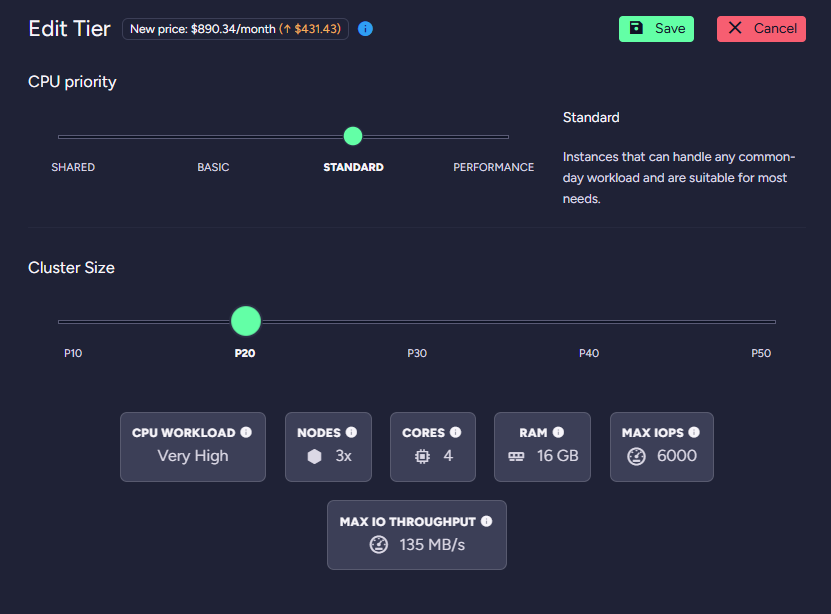
- Change Instance Type
Use sliders to set your desired configuration. This can be changed later as you need to scale to changing data processing needs.
More details can be found here.
- Change Storage
Use this slider to modify your product's storage.
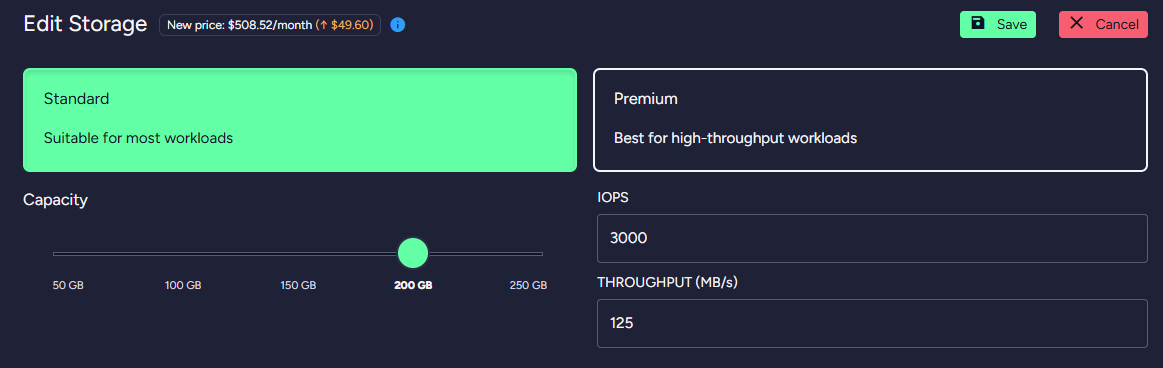
Disk can be migrated to Data Disk using Migrate disk button.

When eligible, the Storage section also shows an Upgrade to Premium V2 button to upgrade the disk to Azure Premium SSD v2.

More details can be found here. For Azure Premium SSD v2 — eligibility, constraints, and behavior of the upgrade — see Azure Premium SSD v2.
Instance Access
- Open Studio
Click this button to open the RavenDB Studio of node A.
Security: Your Certificate, Audit Logs and Allowed IPs
Use the security tab to download your certificate or determine which addresses are allowed to connect your database instance.

-
Download Certificate Click this button to download the Initial Client Certificate. This is an operator-level certificate used to perform cluster-wide operations (like creating/deleting databases) and for your first login to RavenDB Studio.
-
Regenerate Certificate Click the dropdown next to the Download certificate button to regenerate it.
Regenerating a certificate creates a new identity. After this operation, you must download and install the new certificate to maintain access via the portal.
The previous certificate is not automatically removed from the cluster by this operation. To revoke old certificates, you must use the RavenDB Studio Certificates view.
For maximum security and performance, we recommend using the initial certificate only for setup and emergency access.
- Granular Permissions: Create separate certificates for each user, developer, or application.
- Least Privilege: Use the Studio to assign specific roles (e.g., User vs. Admin) or restrict access to specific databases.
- Save CPU Credits: If your instance uses a burstable CPU (especially low-end instances), generating certificates can consume significant CPU credits. We recommend generating certificates off-cloud (on your own machine) and importing them into the Studio via Settings > Certificates.
-
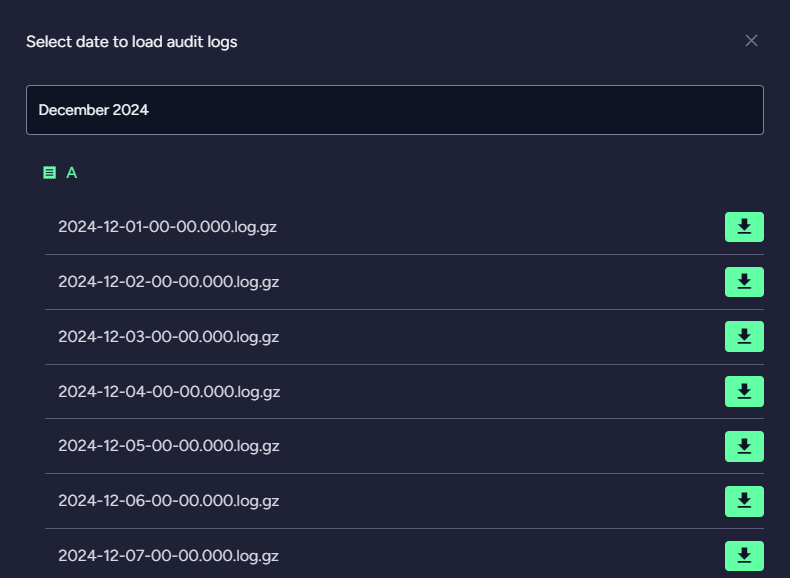
See audit logs Click this button to view audit logs. A popup will show where you have to select a year and month. You can download audit logs from there.
-
Edit
Click this button to edit your product's list of Allowed IPs.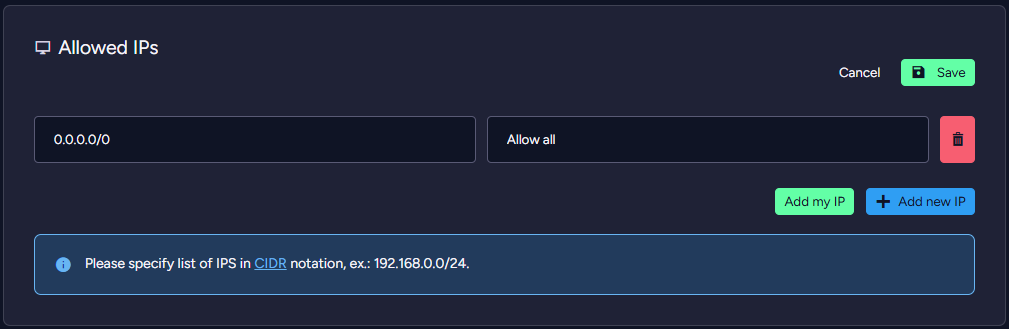
You can increase your system's security further using this in-depth security measure and restrict access to trusted sources, e.g. your application servers. More details can be found in the Security page.
Manage features
You can view features available for your product, enable, disable and configure them here.
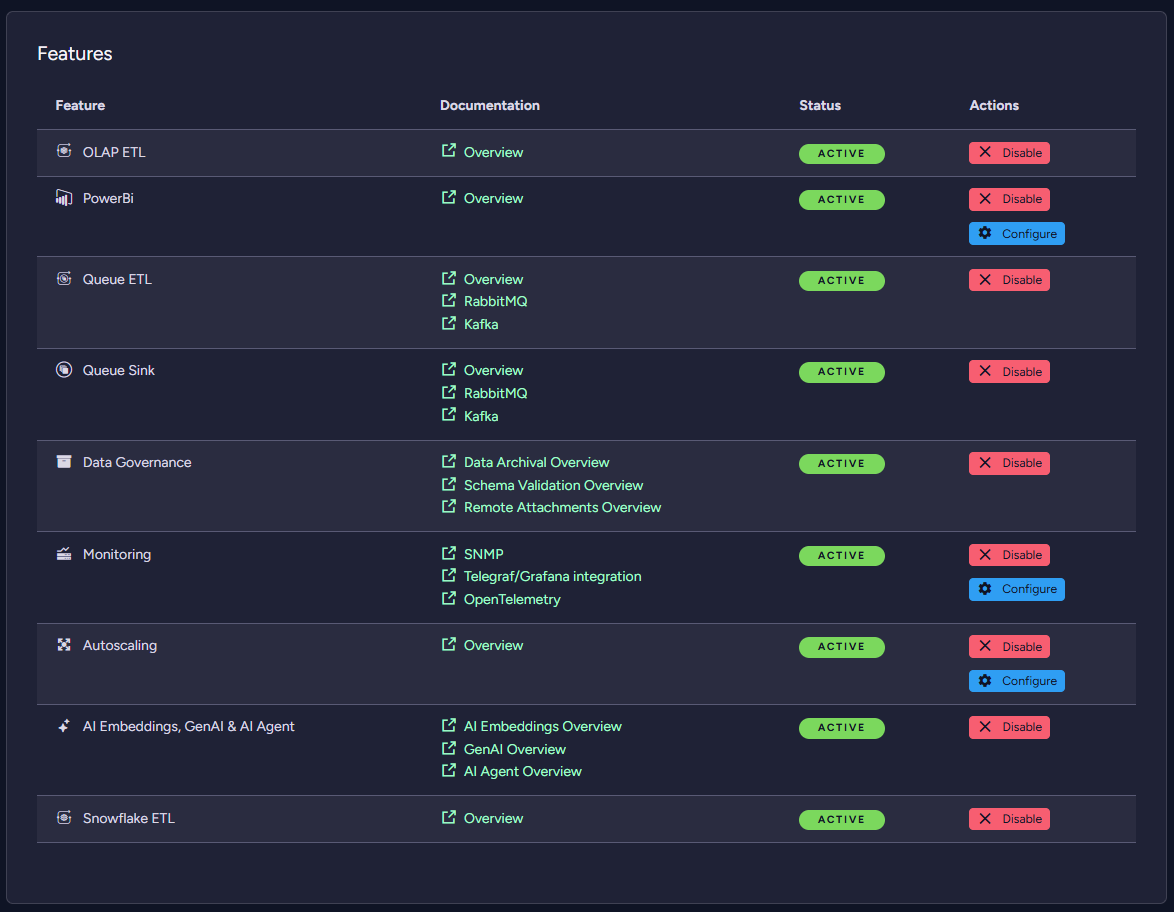
Available features are described on Product Features page.
Nodes: Additional product nodes
You can expand your cluster by adding more product nodes to your cluster. This helps improve High Availability and task/load balancing.
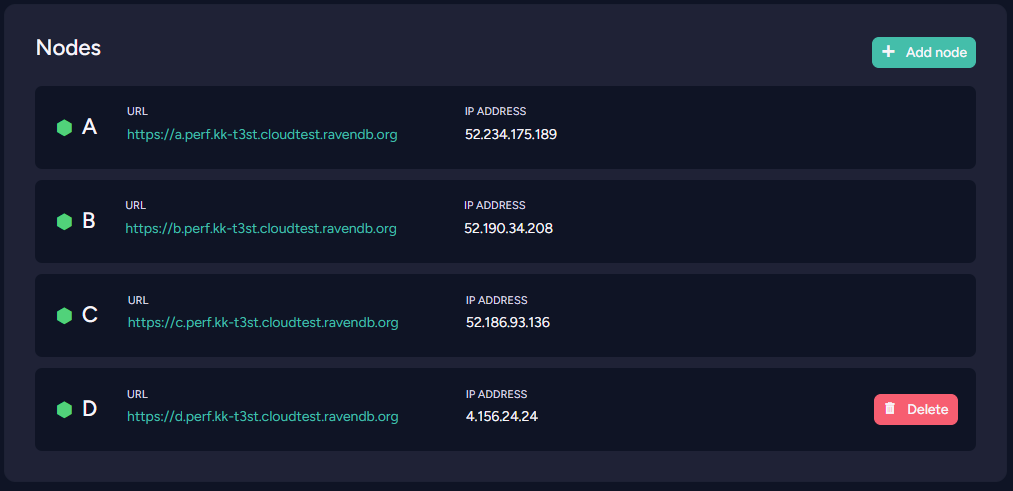
More details can be found here.
Maintenance and Danger Zones
You can restart your product nodes, deploy additional tools and terminate your product here.
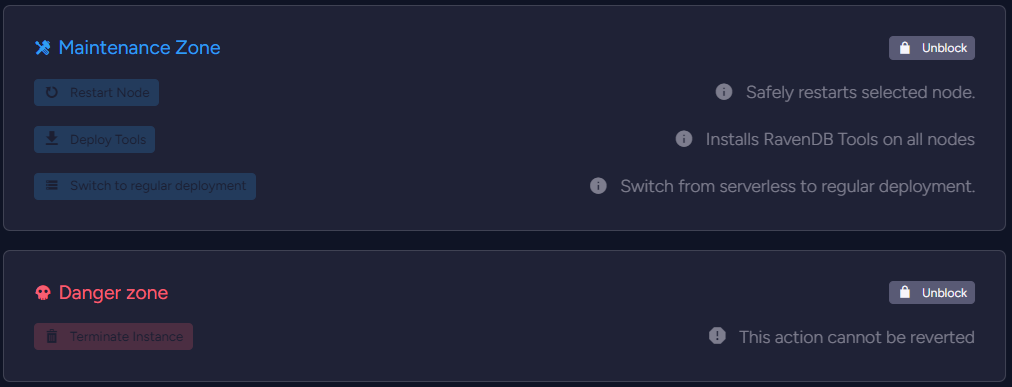
- Maintenance Zone
Use this tab to restart selected node and deploy RavenDB tools. For Serverless products, you can switch to regular deployment.
Changing your product deployment type is irreversible.

- Danger Zone
Use this tab's Terminate button to eliminate your cluster.

Terminating your instance is irreversible. Your data and cluster properties will be permanently lost.