Cloud: External SSO & User Management
External SSO & User Management lets your team sign in to RavenDB Cloud through your organization's own identity provider (IdP) — Okta, Microsoft Entra ID, Google, or any other OpenID Connect (OIDC) provider. Optionally, the identity provider can also create, update and deactivate those users automatically through SCIM 2.0, and map its groups to RavenDB Cloud roles.
Authentication stays with your identity provider. Authorization stays in RavenDB Cloud: what a user may do is still decided by account roles and product permissions.
Availability
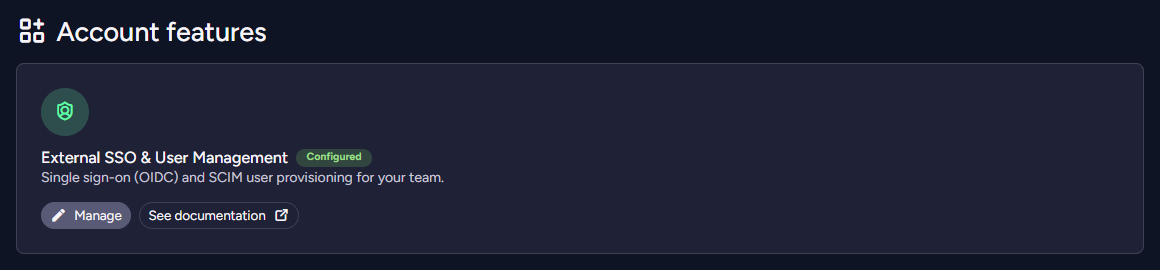
The feature is listed under Account features in the Portal sidebar, on the External SSO & User Management card.
External SSO & User Management has to be activated for your account by RavenDB Cloud before you can configure it. Until then, the card shows a Not available badge and a Contact sales button that opens an email to our sales team.
Once the feature is activated:
- Not configured — click Configure to open the connect wizard.
- Configured — click Manage to open the SSO settings page.
The card's See documentation link opens this page.
Who can configure SSO
| Role | What it allows |
|---|---|
| External SSO & User Management | Everything on this page: create and edit the connection, generate and revoke SCIM tokens, change the management type, reset identity links, and disable SSO. Account owners hold this role. |
| Account with User Management | Once a connection exists: open the SSO settings and edit the group to role mapping. In Sign-in only mode, add SSO users on the Users & Access page. It cannot change the connection, the SCIM tokens or the management type. |
A member without the External SSO & User Management role who opens a card that is not configured yet sees An account admin needs to set this up first.
See Account roles for the full list of roles.
Management types
You choose one of two management types when you connect your identity provider.
| Sign-in only | Sign-in and user provisioning (SCIM) | |
|---|---|---|
| Who signs users in | Your identity provider | Your identity provider |
| Who creates SSO users | You, on the Users & Access page (Add new SSO user) | Your identity provider, through SCIM |
| Who removes SSO users | You, on the Users & Access page | Your identity provider (deactivating or unassigning a user) |
| Where SSO users' roles are set | Users & Access | Your identity provider's groups, through the group to role mapping |
| Required at the identity provider | OpenID Connect | OpenID Connect and outbound SCIM 2.0 |
An SSO user signs in only through your identity provider. A Cloud user signs in with a magic link or with Google, GitHub or Microsoft, as described in Login.
Turning SSO on does not remove Cloud users: existing members keep their access, and you can still invite new Cloud users in either management type. Deprovisioning someone at your identity provider removes only their SSO user, not a Cloud user the same person may also have. If you want your identity provider to be the only way into the account, remove the other Cloud members yourself.
You can switch between the two types later from the SSO settings page (Change management type). The switch asks you to type your account domain to confirm, because it permanently removes every SSO user on the connection. Leaving Sign-in and user provisioning (SCIM) also deletes the SCIM tokens, the discovered groups and the group mapping. When you switch to SCIM, your identity provider re-creates the users it manages on its next push.
Identity provider requirements
Any identity provider that implements the standard OpenID Connect authorization code flow works, as long as it meets these requirements:
| Requirement | Details |
|---|---|
| Discovery document | The issuer must serve /.well-known/openid-configuration. All endpoints are read from it; they cannot be entered by hand. |
| HTTPS issuer | The issuer must use HTTPS and a public host name — not an IP address, and no user name or password in the URL. Redirects from the discovery or token endpoint are not followed. |
| Client authentication | The client ID and secret are sent in the request body (client_secret_post). A provider that accepts only HTTP Basic client authentication (client_secret_basic) fails at the token exchange. |
| ID token claims | sub and email must both be present in the ID token itself. RavenDB Cloud does not call the UserInfo endpoint. |
| Verified email | At a user's first sign-in, if the ID token marks the email as unverified (email_verified: false), the sign-in is refused. A token without the claim is accepted. |
| Scopes | openid profile email. The scopes are fixed; allow them for the application at your identity provider. |
| Redirect URL | https://cloud.ravendb.net/api/v1/sso/callback, registered at your identity provider exactly as shown — no trailing slash or extra characters. |
| SCIM (optional) | For Sign-in and user provisioning (SCIM): an identity provider that pushes users and groups to a SCIM 2.0 endpoint with a bearer token, such as Okta or Microsoft Entra ID (P1 or P2). |
A groups claim in the ID token is ignored. Roles come only from SCIM group membership and your
group to role mapping.
Connect your identity provider
Before you start, create an OpenID Connect application at your identity provider - see Provider setup guides. You need its issuer, client ID and client secret.
- In the Portal sidebar, open Account features and click Configure on the External SSO & User Management card.
- Management type — choose Sign-in only or Sign-in and user provisioning (SCIM). See Management types.
- Identity provider — enter your OpenID Connect details:
- Issuer / discovery URL — the issuer of your identity provider, e.g.
https://idp.example.com. - Client ID and Client secret — from the application you created.
- Scopes — shown for reference:
openid profile email.
- Issuer / discovery URL — the issuer of your identity provider, e.g.
- Redirect URL — copy the URL shown and add it to the application's redirect (callback) URLs at your identity provider. It must match exactly.
- Review — check the details and click Create connection.
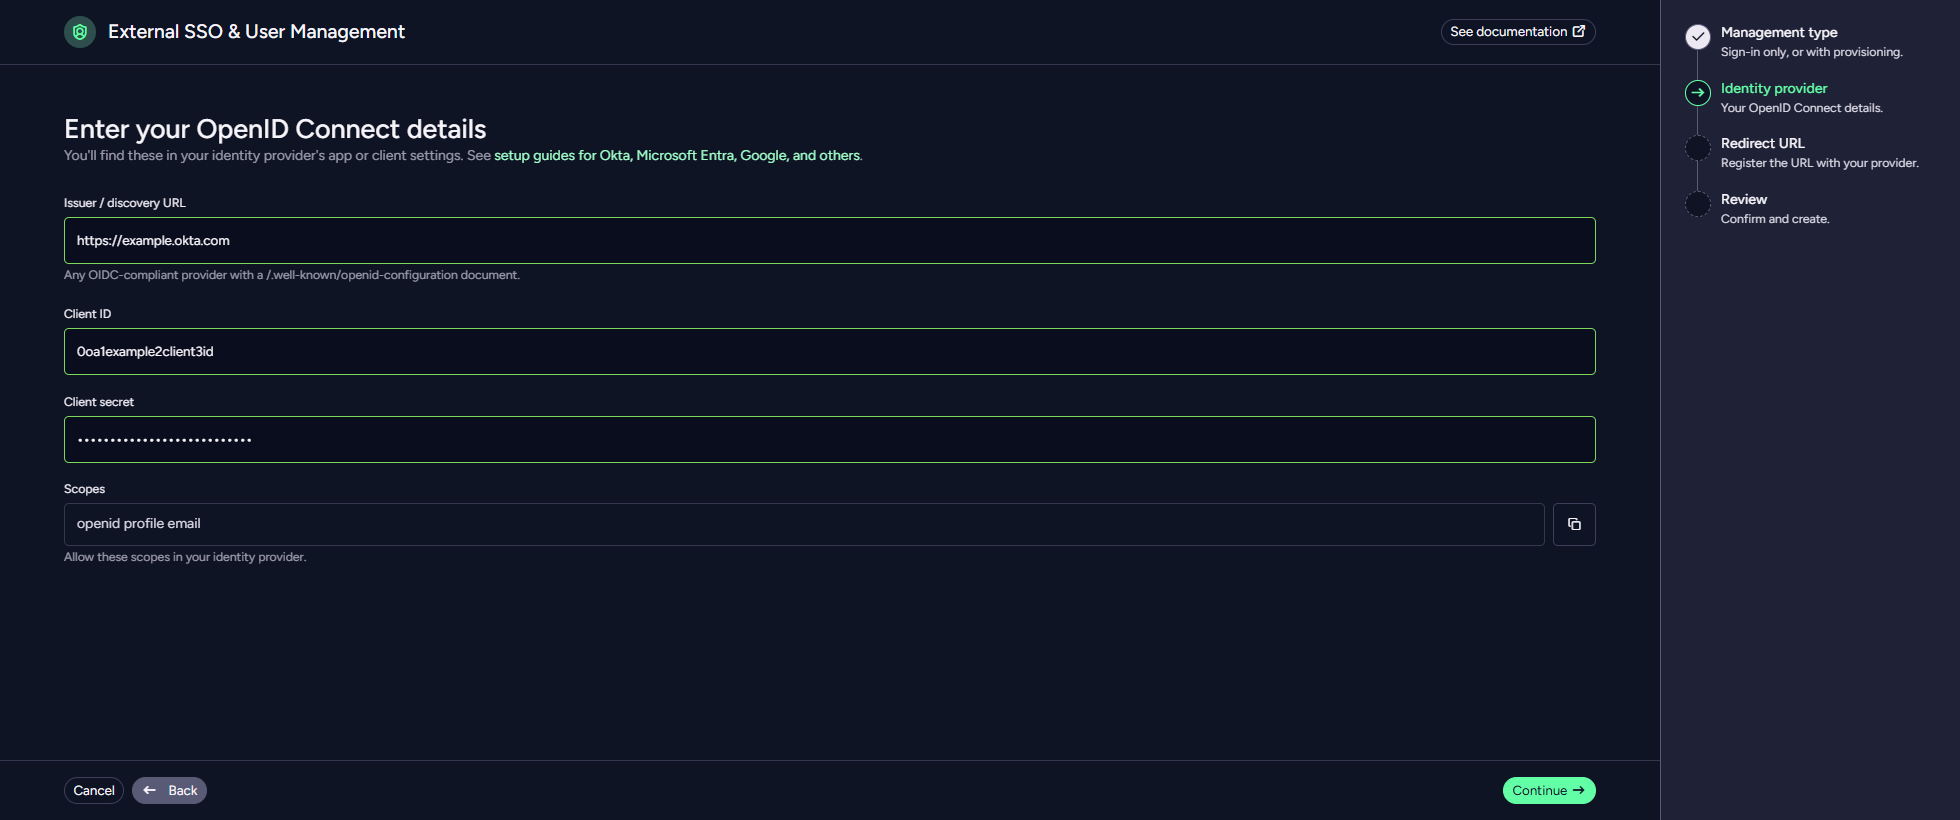
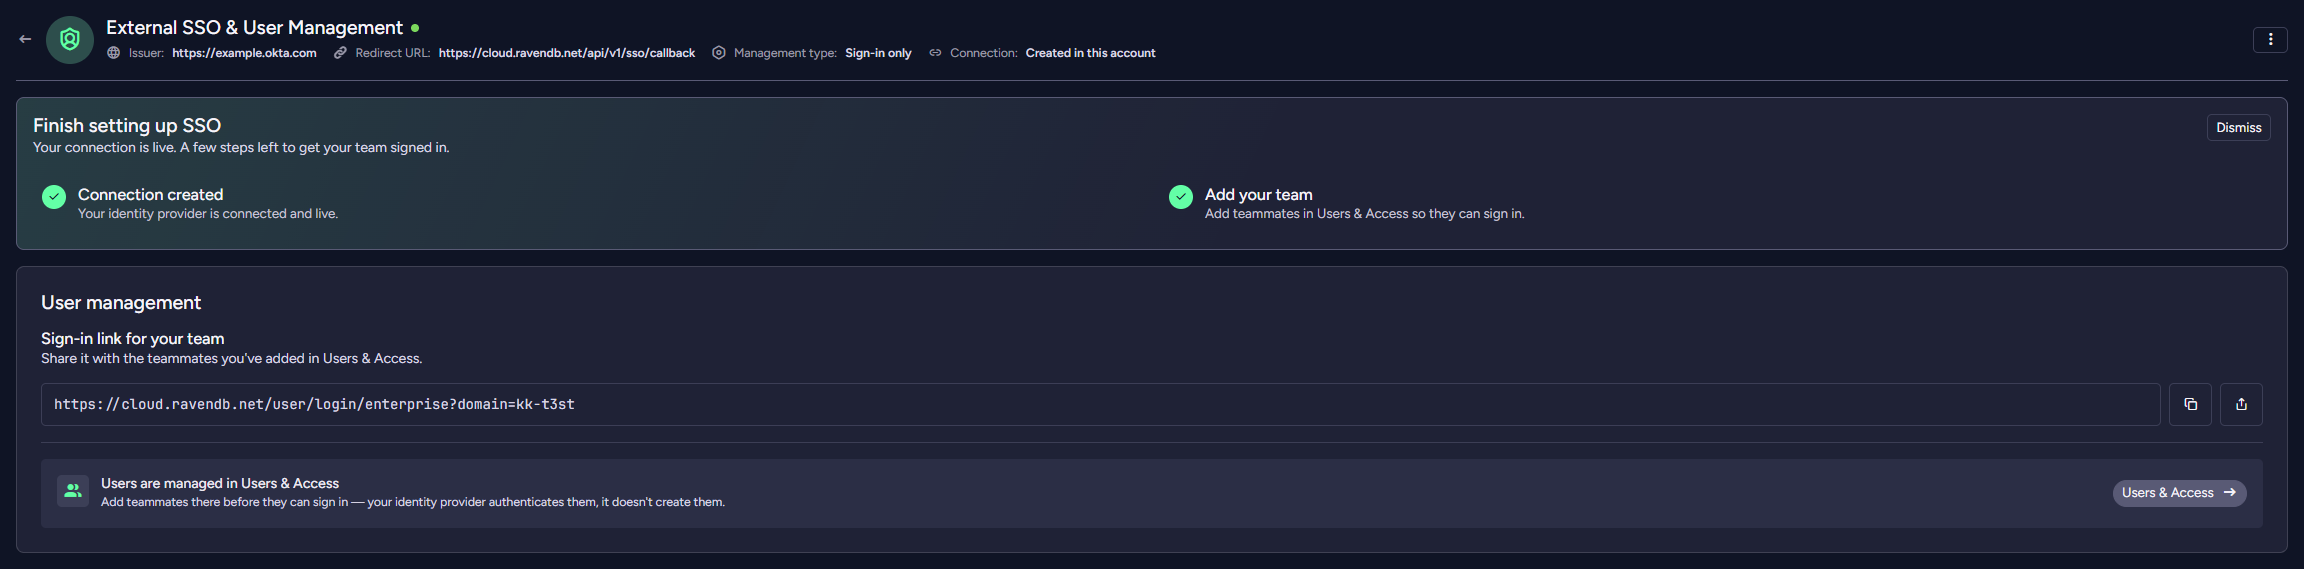
The connection is created and the SSO settings page opens. A Finish setting up SSO banner lists the remaining steps.
With Sign-in and user provisioning (SCIM), creating the connection also creates the first SCIM token and shows it together with the SCIM base URL. The token is displayed only once — copy both values and enter them in your identity provider's provisioning settings. See SCIM provisioning.
Provider setup guides
Every provider needs the same three things: an OpenID Connect web application that uses the authorization code flow, the Redirect URL registered on it, and its issuer, client ID and client secret entered in the connect wizard. Assign the application to the people who should sign in.
Okta
- Create an app integration of type OIDC - OpenID Connect, application type Web Application.
- Add the Redirect URL as a Sign-in redirect URI, and use Client secret for client authentication.
- Issuer: your Okta domain, e.g.
https://your-company.okta.com. If you use a custom authorization server, use its issuer instead, e.g.https://your-company.okta.com/oauth2/default. - For Sign-in and user provisioning (SCIM), configure SCIM provisioning with:
- SCIM connector base URL — the SCIM base URL from the Portal.
- Unique identifier field for users —
userName. - Authentication Mode — HTTP Header, with the SCIM token as the bearer token.
- Enable creating, updating and deactivating users, and push the groups you want to map to roles.
- Set the application's Application username format to Email, so that the SCIM
userNameis the user's email address. See SCIM provisioning.
Microsoft Entra ID
- Register an application (App registrations > New registration) and add the Redirect URL with the Web platform.
- Create a client secret under Certificates & secrets, and copy its value.
- Under Token configuration, add the optional email claim to the ID token, so that the ID token carries the user's email address.
- Issuer:
https://login.microsoftonline.com/<tenant-id>/v2.0. The client ID is the Application (client) ID. - For Sign-in and user provisioning (SCIM) (requires Microsoft Entra ID P1 or P2): in the application's
Enterprise application > Provisioning, set Provisioning Mode to Automatic, enter the
SCIM base URL as Tenant URL and the SCIM token as Secret Token, and test the connection.
Entra ID maps
userPrincipalNameto the SCIMuserNameby default. If your users' principal names differ from their email addresses, mapmailtouserNameunder Attribute mappings.
Microsoft Entra ID does not send an email_verified claim; RavenDB Cloud accepts its tokens without it.
Google
- In the Google Cloud console, create an OAuth client ID of type Web application, and add the Redirect URL to its Authorized redirect URIs.
- Issuer:
https://accounts.google.com. - To limit sign-in to your Google Workspace organization, set the OAuth consent screen's user type to Internal.
- Google Workspace does not provision users to custom SCIM applications, so use Sign-in only and add your team on the Users & Access page.
Other OpenID Connect providers
Auth0, Keycloak, Ping Identity, OneLogin and other providers work the same way: create a regular web
application (confidential client) with the authorization code flow, allow the client_secret_post
client authentication method, register the Redirect URL, and enter the issuer exactly as the provider's
discovery document states it (for Keycloak: https://<host>/realms/<realm>).
Use Sign-in only with providers that cannot push users to an external SCIM endpoint, such as Auth0.
SCIM provisioning
With Sign-in and user provisioning (SCIM), your identity provider pushes users and groups to RavenDB Cloud:
- Assigning a user to the application creates an SSO user in your account, with the SCIM
userNameas the user's email address. - A full update of the user (SCIM
PUT, which Okta sends) is applied to that SSO user. A partial update (SCIMPATCH) can only activate or deactivate the user; any other change is rejected. - Deactivating or unassigning the user removes them from the account.
- Group memberships drive the user's roles through the group to role mapping.
SCIM never changes the account owner.
RavenDB Cloud reads the SSO user's email address from the SCIM userName and ignores the emails
attribute. At the user's first sign-in, the email claim in the ID token must match that address;
otherwise the sign-in fails with You don't have access to this account yet. Configure your identity
provider to send the user's email address as the userName.
Configure your identity provider with:
| Setting | Value |
|---|---|
| SCIM base URL | The SCIM base URL shown on the SSO settings page. Enter it as shown — your identity provider appends /Users and /Groups itself. |
| Authentication | HTTP header bearer token: the SCIM token issued in the Portal. An API key does not work here. |
SCIM tokens
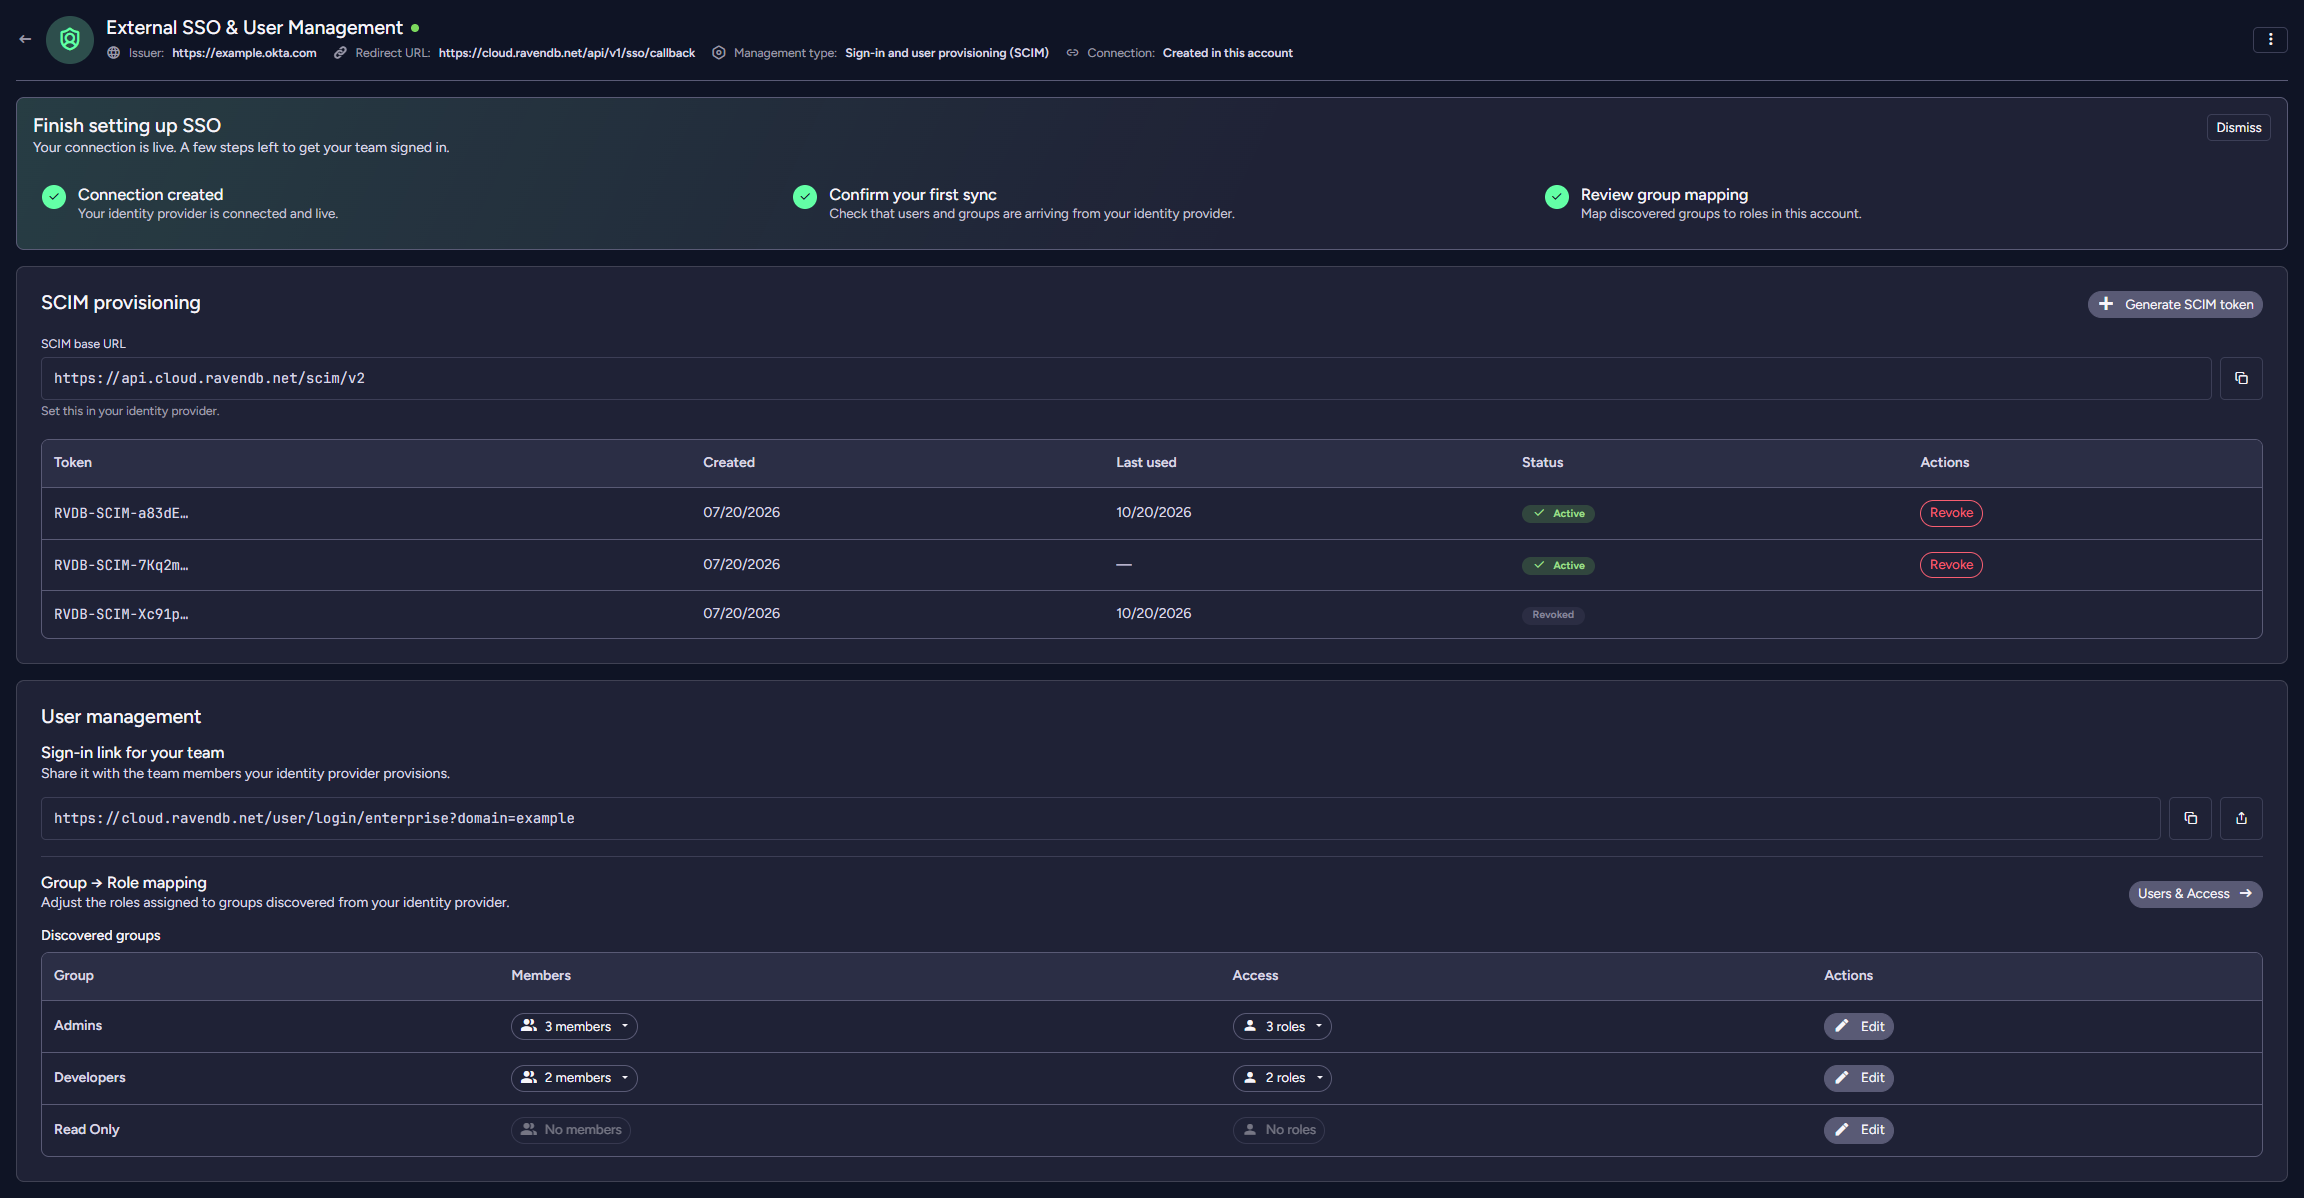
- The connect wizard creates the first token. To create another one, click Generate SCIM token on the SCIM provisioning card of the SSO settings page.
- A token is shown only once, when it is created. Save it somewhere safe.
- Tokens do not expire. Revoke a token you no longer use.
- You can have several active tokens, for example to rotate them without downtime.
- Managing tokens requires the External SSO & User Management role.
SCIM requests are accepted only while the connection uses Sign-in and user provisioning (SCIM).
Group to role mapping
In Sign-in and user provisioning (SCIM) mode, the groups your identity provider pushes appear under Discovered groups on the SSO settings page. Edit a group's mapping to set:
- Defined roles — the account roles that members of the group receive.
- Group access — the members' product permissions, including the default access for new products.
How the mapping is applied:
- A user who belongs to several groups receives the roles and product permissions of all of them combined.
- A change to the mapping applies to the group's members immediately.
- Any account role can be mapped. A member who is not the account owner can map only roles and product permissions they hold themselves.
- In this mode, SSO users are locked on the Users & Access page and in a product's User Access widget: their roles and product permissions change only through the mapping.
Anyone who can change group membership in your identity provider can, through the mapping, grant the roles mapped to that group — including Account with User Management and External SSO & User Management. Map those roles only to groups whose membership you control.
Signing in with SSO
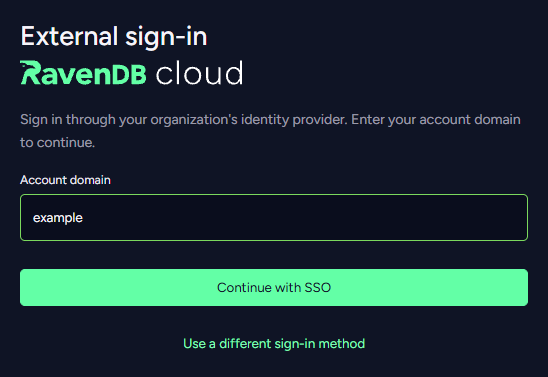
SSO users sign in from the RavenDB Cloud login page:
- Click Sign in with External SSO.
- Enter your Account domain and click Continue with SSO.
- Sign in at your identity provider. You are then returned to the Portal.
Your identity provider asks for your credentials at every sign-in, even if you are already signed in there.
The SSO settings page shows a Sign-in link for your team that skips step 2:
https://cloud.ravendb.net/user/login/enterprise?domain=<your-account-domain>.
Adding an SSO user sends no email, so share this link with your team. If you add RavenDB Cloud to your
identity provider's app dashboard, point the tile at this link — the sign-in must start at RavenDB Cloud.
- A person must already exist as an SSO user — added on the Users & Access page, or provisioned through SCIM. Signing in never creates users.
- The sign-in must be completed in the browser that started it, within 10 minutes.
- If your account restricts member email domains, an SSO user with an email address outside them is refused at their first sign-in.
The account owner never signs in through SSO and is never provisioned, deprovisioned or changed by SCIM. The owner keeps using their own login, so a misconfigured connection cannot lock you out of the account. If the owner tries to sign in through SSO, the sign-in ends with You don't have access to this account yet.
Multi-factor authentication for SSO users is enforced by your identity provider. SSO users cannot turn on RavenDB Cloud two-factor authentication; their Profile Security page shows Managed by your identity provider instead. See MFA.
When SSO sign-in cannot complete
| Message | What it means |
|---|---|
| You don't have access to this account yet. Contact your administrator. | No SSO user exists for you on the connection. Ask an administrator to add or provision you. |
| Your account does not have access to sign in through single sign-on. Contact your administrator. | You are not an active member of the account, or your email domain is not allowed. |
| Single sign-on is not enabled for this account. | SSO is disabled, or the feature is not active for the account. |
| Your single sign-on session expired. Please try again. | The sign-in took longer than 10 minutes, or finished in a different browser. Start again. |
| Single sign-on failed. Please try again or contact your administrator. | The identity provider returned an error, the sign-in was cancelled, or the ID token failed validation. |
| Your identity provider reports that your email address is not verified, so it cannot be used to sign in. Ask your administrator to verify it. | The ID token marks the email as unverified. Verify it at the identity provider. |
| Single sign-on is misconfigured for this account. Please contact support. | The stored connection cannot be read. Contact Support. |
Managing the connection
Open Account features and click Manage on the External SSO & User Management card. The SSO settings page shows the Redirect URL and the Management type. Holders of the External SSO & User Management role also get an actions menu with:
- Edit — change the issuer, client ID or client secret. Leave the client secret empty to keep the stored one.
- Change management type — see Management types.
- Reset identity links — clears the stored link between each SSO user and their identity at the provider. Each user is linked again at their next sign-in. Use it when users cannot sign in after the application was re-created at your identity provider.
- Disable SSO — stops sign-in through your identity provider.
Disabling SSO also deletes every SSO user, every discovered group, the group mapping and all SCIM tokens. Enabling SSO again starts from an empty setup.
Changing the issuer or client ID resets the identity links automatically, because the identity provider may issue new user identifiers for the new application.
If the feature is deactivated for your account, SSO sign-in and SCIM requests stop, and the configuration is kept.
Troubleshooting
- Sign-in fails although the identity provider shows a successful login — check that the
emailclaim is in the ID token, not only in the UserInfo response. This is the most common setup issue. - Sign-in fails right after the identity provider redirects back — check that the provider accepts
client_secret_postclient authentication, and that the Redirect URL is registered exactly as shown. - SCIM requests return 404 — check the SCIM base URL: use it exactly as shown in the Portal, without
adding
/scim/v2or/Usersto it. - SCIM requests return 401 — the SCIM token is wrong or no longer exists. Revoking a token, leaving Sign-in and user provisioning (SCIM) mode and Disable SSO all delete tokens; generate a new one and enter it at your identity provider.
- SCIM requests return 403 with "SSO is not approved for this account." — the feature is not active for your account. Contact Support.
- A provisioned user gets You don't have access to this account yet. — the SCIM
userNamedoes not match theemailclaim in the ID token. See SCIM provisioning. - The identity provider's connection test fails right after you create a token — wait a few seconds and test again.
- Everyone is locked out after the application was re-created at the identity provider — use Reset identity links.