Cloud: Security
RavenDB Cloud products use several layers of security. All instances are encrypted using HTTPS and TLS protocol version 1.2 or 1.3. Servers and client applications authenticate each other using X.509 certificates.
Using the initial client certificate
A client certificate is automatically generated during the creation of your RavenDB cloud product.
You will need to import this certificate to your browser in order to access your cloud instances.
Expiration for client certificates is set to 5 years by default.
The certificate will be automatically regenerated 30 days before its expiration date.
RavenDB Cloud will notify you by email 60 days before regeneration.
Download certificate
Go to the Products tab in the cloud portal and click the Download Certificate button.

Install the certificate
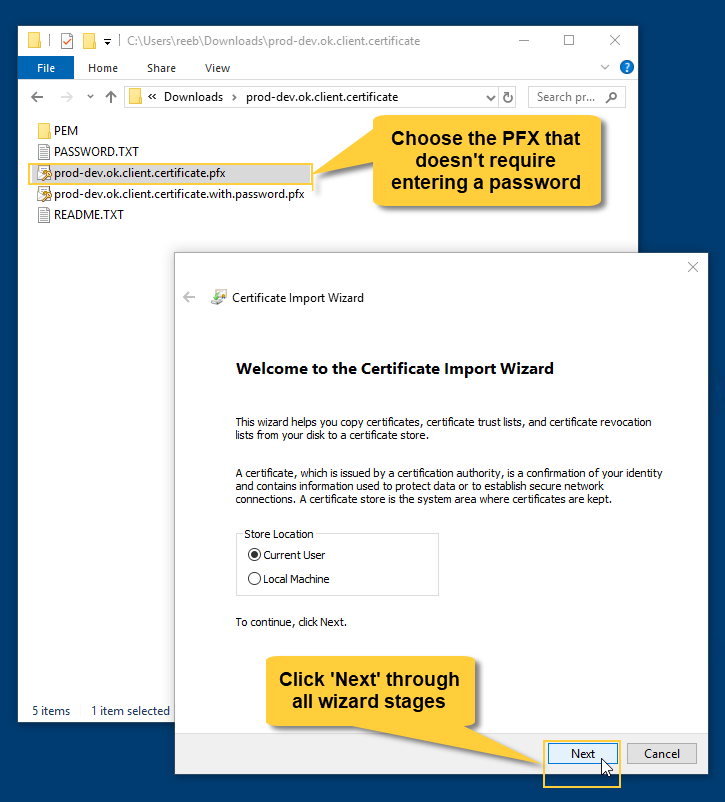
Extract the certificate package, open the extracted files' folder, and double-click the .pfx file that requires no password.
When the certificate import wizard is launched, click "Next" all the way through the wizard.
Access your product
If you're using Chrome on Windows, you will now be able to access your RavenDB Cloud instance. You may need to restart your browser.
In other cases (e.g. if you're using Firefox) you will have to import the certificate to your browser manually.

Once the certificate is imported, please make sure your IP address is on the allowed IPs list and then click your cloud instance's URL. Your browser will prompt you to select a certificate. When you select the client certificate, your product's management studio will launch.
Managing allowed IPs
Managing client certificates and the Allowed IPs list from the Cloud Portal requires Security admin access to the product (the Account Owner always has full access).
To access your product your IP address must be added to the Allowed IPs list.
Allowed IPs entries are CIDR ranges
that define networks from which the connection is allowed.
- You can set Allowed IPs to
0.0.0.0/0, which would allow access from any location, or you can specify certain IPs or IP ranges. - Be aware that you will not be able to access your instance from locations that are not specified in the allowed IPs list.
- You can edit the list at any time through the Cloud Portal.
- Regardless of the allowed IPs setting, your RavenDB Cloud instances will always require authentication using X.509 certificates for access. The allowed IPs list serves as an additional layer of security, but isn't the only one.
Azure products do not permit overlapping of addresses in the Allowed IPs list.
If addresses in your list overlap, an error is going to be displayed upon product creation. E.g. -
- Listing both 13.64.151.161/32 and 13.74.249.156/32 is not permitted.
- Listing 0.0.0.0/0 and any other address is not permitted.
- Listing both 51.140.148.192/27 and 13.74.249.156/32 is permitted.
Cross-instance communication inside the cluster is not subject to these restrictions.
Using additional certificates
Your initial operator-level certificate allows you to perform operations like creating and deleting databases, managing access to the cluster, and inspecting the cluster's state. Operations like adding and removing cluster nodes are left for your products administrators.
We recommend that you generate and use different certificates for your client applications, for maximum security.
If your instance runs on a burstable CPU, especially if it is a low-end one,
RavenDB may take a while to generate certificates and spend a lot of your CPU credits in the
process.
We therefore recommend that you generate your certificates off-cloud and import them to your cloud instance.
To generate additional operator or user certificates:
- Go to the server management studio, and click the
Manage Certificatesbutton.
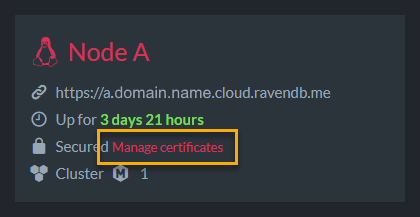
- Click Generate client certificate

MFA
Multi-Factor Authentication (MFA) enhances account security by requiring multiple forms of verification. MFA significantly reduces the risk of unauthorized access, even if email account credentials are compromised.
Components of Multi-Factor Authentication:
- Authenticator Application: This involves using a mobile app to generate one-time codes for login verification. These codes are time-sensitive and provide an additional layer of security beyond passwords.
- Recovery Codes: Recovery codes are pre-generated, single-use codes that users can use to access their accounts if they lose access to their primary authentication methods. It's crucial to store these codes securely in case they are needed for account recovery.
- Recovery Phone Number: Adding a recovery phone number provides an additional method for account recovery. In case of access issues. Support request needs to be made in order to use this method.
By utilizing these components of MFA, users can significantly enhance the security of their accounts and mitigate the risk of unauthorized access.
MFA is managed on the Security page of your profile: open the profile menu at the bottom of the Portal sidebar and select Security, or go to https://cloud.ravendb.net/portal/profile/security.
Enable MFA
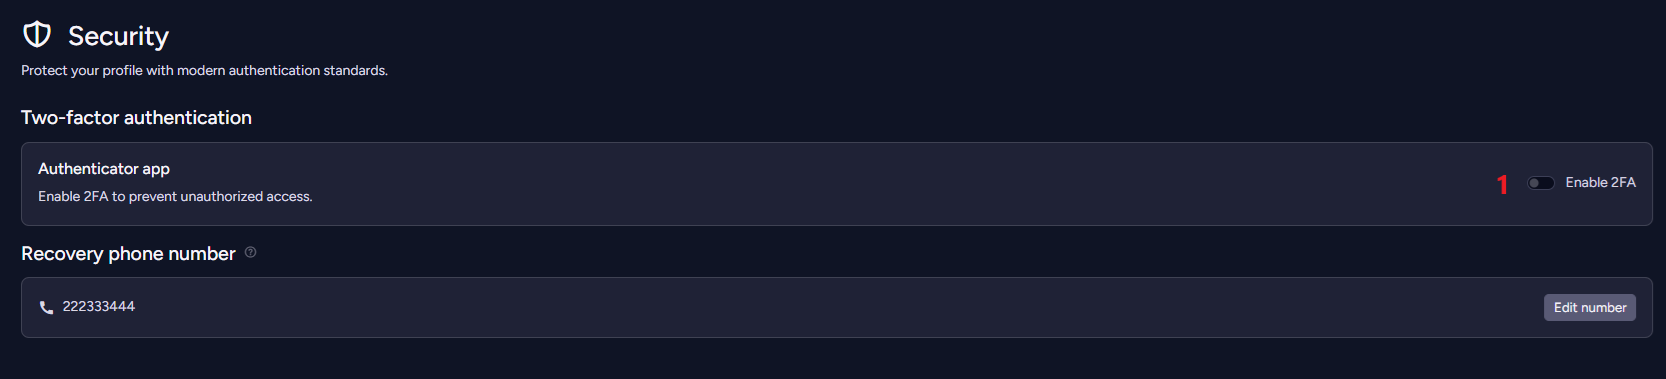
- In the Authenticator app card, turn on the Enable 2FA switch.
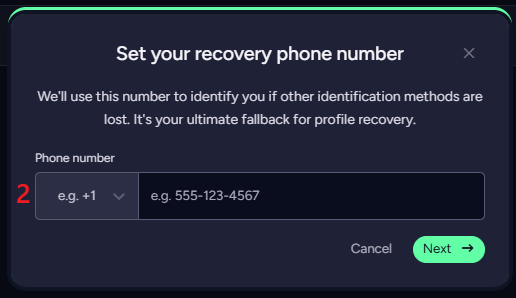
- Only if you have no recovery phone number yet: the Set your recovery phone number dialog opens first. Enter your number and click Next.
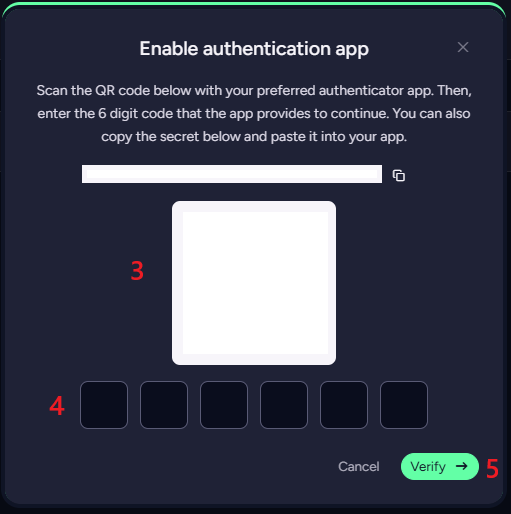
- Scan the QR code with an authenticator app of your choice, or copy the secret and paste it into the app.
- Enter the 6-digit code that the app generates.
- Click Verify.
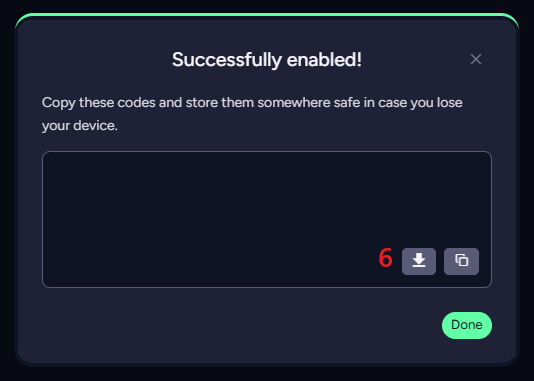
- Save the 10 recovery codes in a secure place — download them as a file or copy them — and click Done.
MFA is now enabled on your account.
Recovery codes and phone number
While MFA is on, the Recovery codes card on the Security page tracks your unused recovery codes. Each code works once.
- When 3 or fewer codes are left, the card shows an alert with a link to generate a new set: a warning at 3 and 2 codes, a red alert at 1 and 0. With none left, you can no longer sign in with a recovery code.
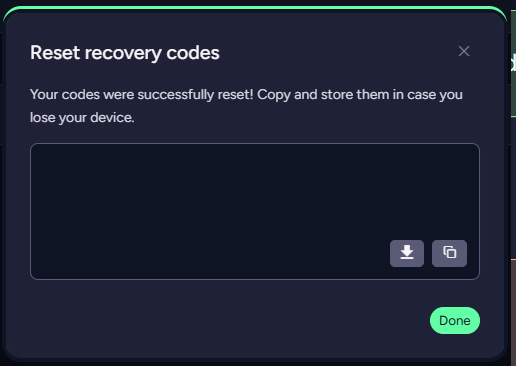
- Click Reset recovery codes to create a new set. Your old codes stop working as soon as the new ones are created.
The Recovery phone number section shows your number, with Add number or Edit number to set it. The phone number is the last-resort way to identify you if all other security methods are lost; using it requires a Support request.
If you selected Remember me when you last signed in with a 2FA code, a Forget this browser link appears on the Security page. Click it to be asked for a code again at your next sign-in from this browser.
Disable MFA
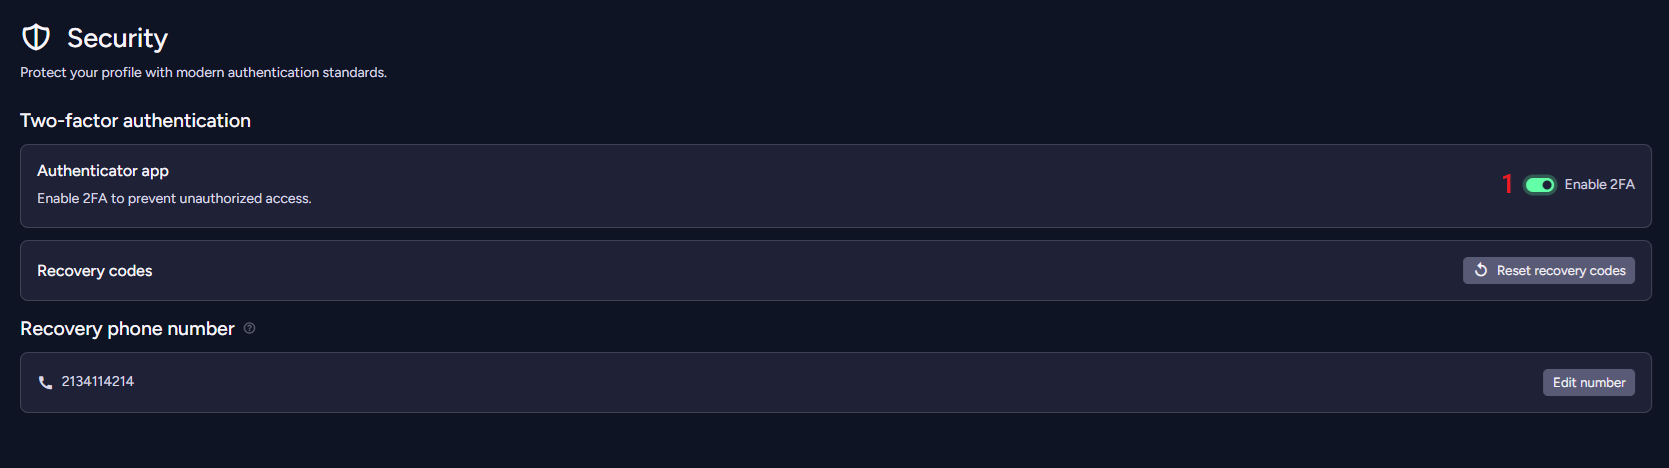
- In the Authenticator app card, turn off the Enable 2FA switch.
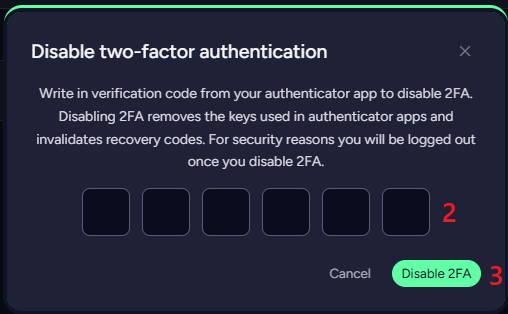
- In the Disable two-factor authentication dialog, type the code generated by your authenticator app.
- Click Disable 2FA.
Disabling MFA removes the keys used by your authenticator app and invalidates your recovery codes.
For security reasons you will be logged out once you disable 2FA. The login page then shows Two-factor authentication is off. Sign in again to continue.
MFA for SSO users
Users who sign in through External SSO cannot turn on RavenDB Cloud 2FA. Their Security page shows a Managed by your identity provider badge instead of the Enable 2FA switch: multi-factor authentication for them is configured and enforced at your organization's identity provider.
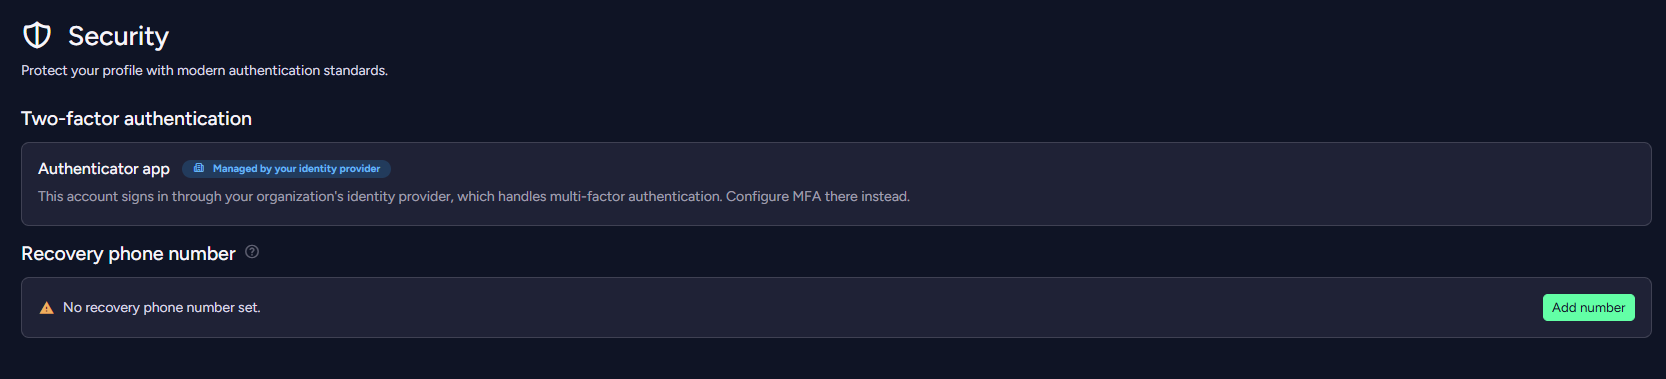
If an SSO user already had RavenDB Cloud 2FA turned on, the Enable 2FA switch stays next to the badge, so they can turn 2FA off. Signing in through SSO does not ask them for the 2FA code.