Use Setup Package
-
The Use setup package flow is the third option available in the Choose setup method step.
It allows you to initialize a RavenDB instance using a configuration ZIP file generated in a previous session. -
In this article:
When to use
Choose this setup method in the following scenarios:
-
When you have already configured the first node (e.g., Node A) of a multi-node cluster
and need to set up the remaining machines (Node B, Node C, etc.) using the generated ZIP package. -
When you are ready to apply a configuration package to your target server that was created using one of the following methods:
- The Create a package for external setup flow
- The
rvn create-setup-packageCLI command in the rvn utility
Using an existing setup package
Run the Setup Wizard:
Extract the RavenDB server package into a new folder on the target machine where you wish to install the node.
Run run.ps1 (Windows) or run.sh (Linux) and accept the EULA, as explained in How to run the Setup Wizard.
Select "Use setup package":
In the Choose setup method step, select the "Use setup package" option.

- Select "Use setup package"
- Click "Continue" to proceed.
Upload the ZIP package:
Upload the configuration .zip file that was generated and downloaded during the initial setup.
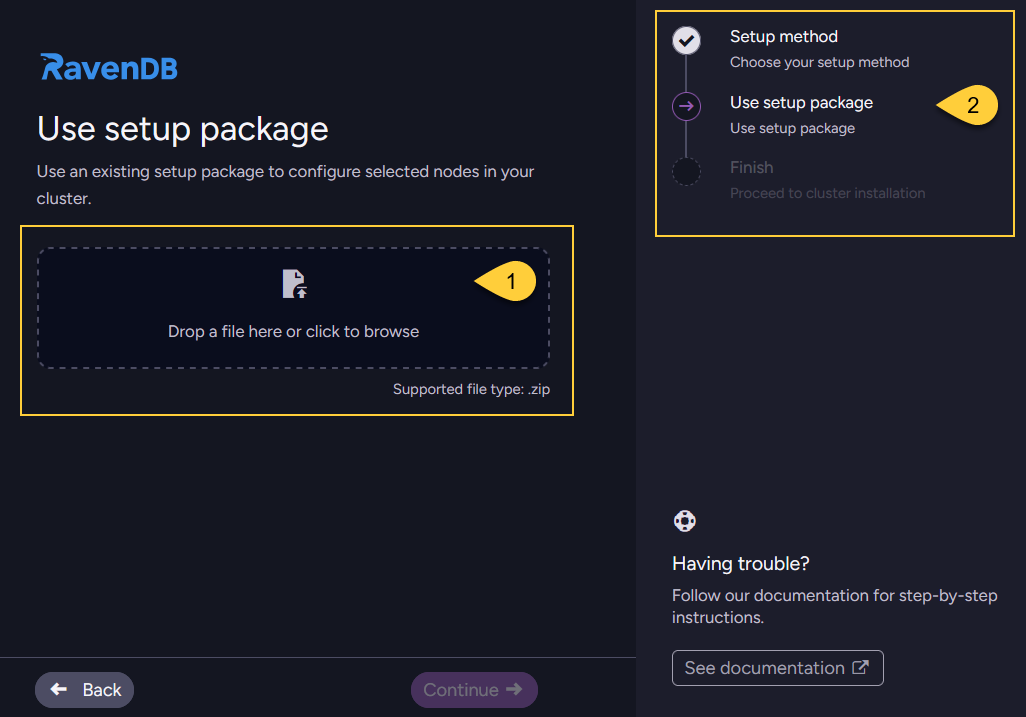
- Drag and drop the
.zipfile or click to browse your local files. - The navigation panel indicates your current step ("Use setup package").
Select node:
Select the specific node tag (e.g., Node B or Node C) that you want to assign to this specific machine.
Note: Do not start a setup process on a node that has already been configured.
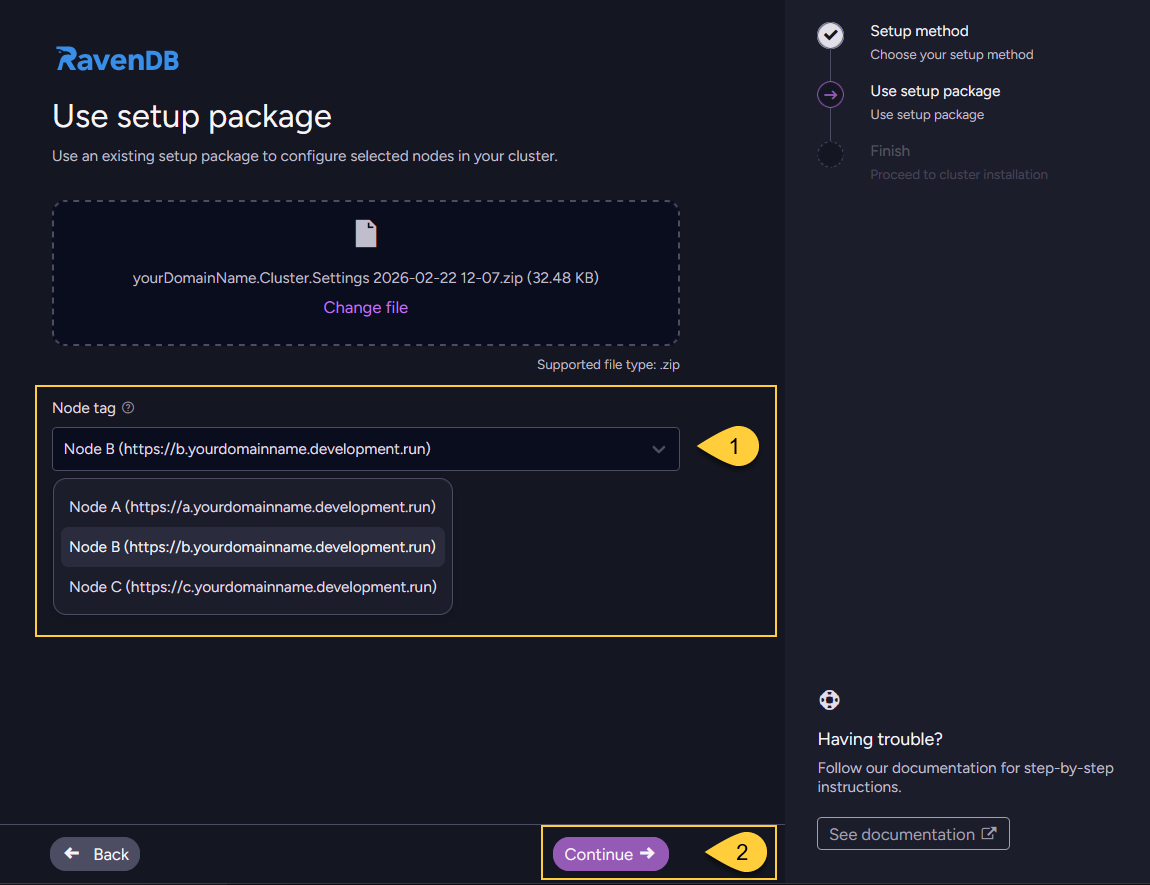
- Open the dropdown and select the node intended for this machine.
- Click "Continue" to proceed.
Configuration in progress:
Wait while the wizard validates the package, applies the settings, creates the local settings.json file,
and registers any necessary certificates.
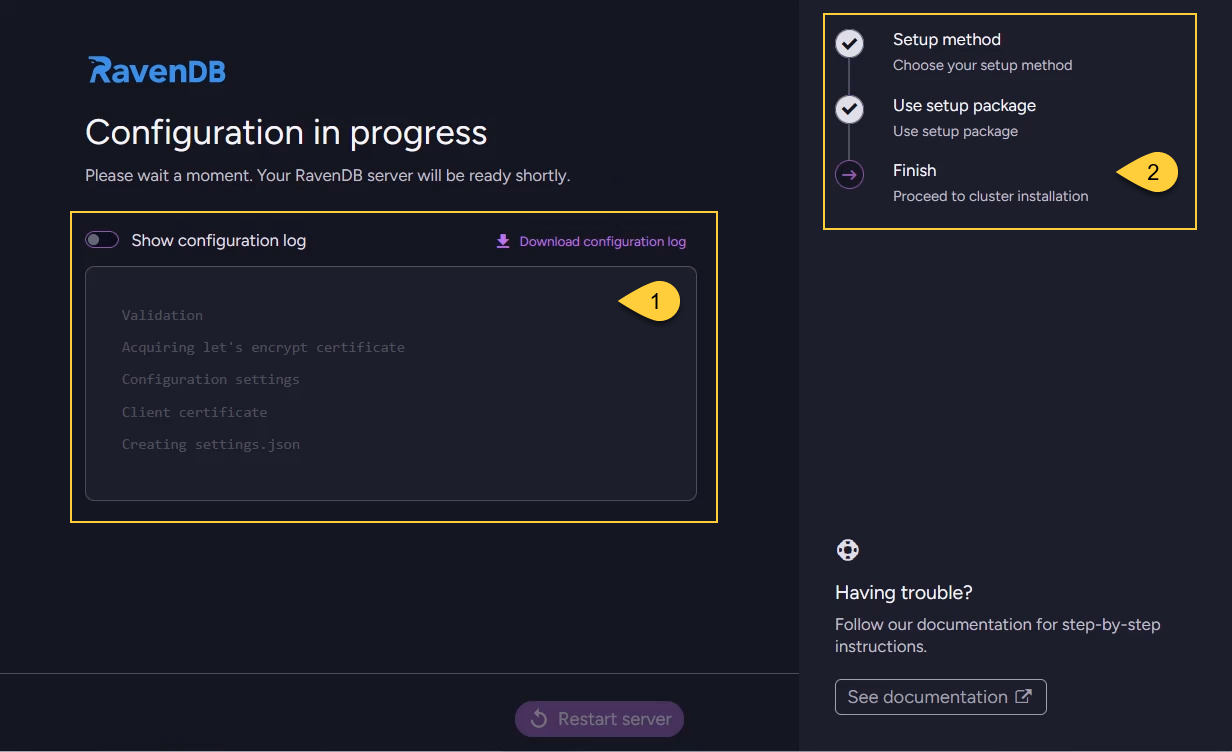
- View the real-time configuration log to track the installation progress.
- The navigation panel shows you have reached the final Finish step.
Restart the server:
Once the "All set!" screen appears, click Restart server to apply the configuration and start the node.
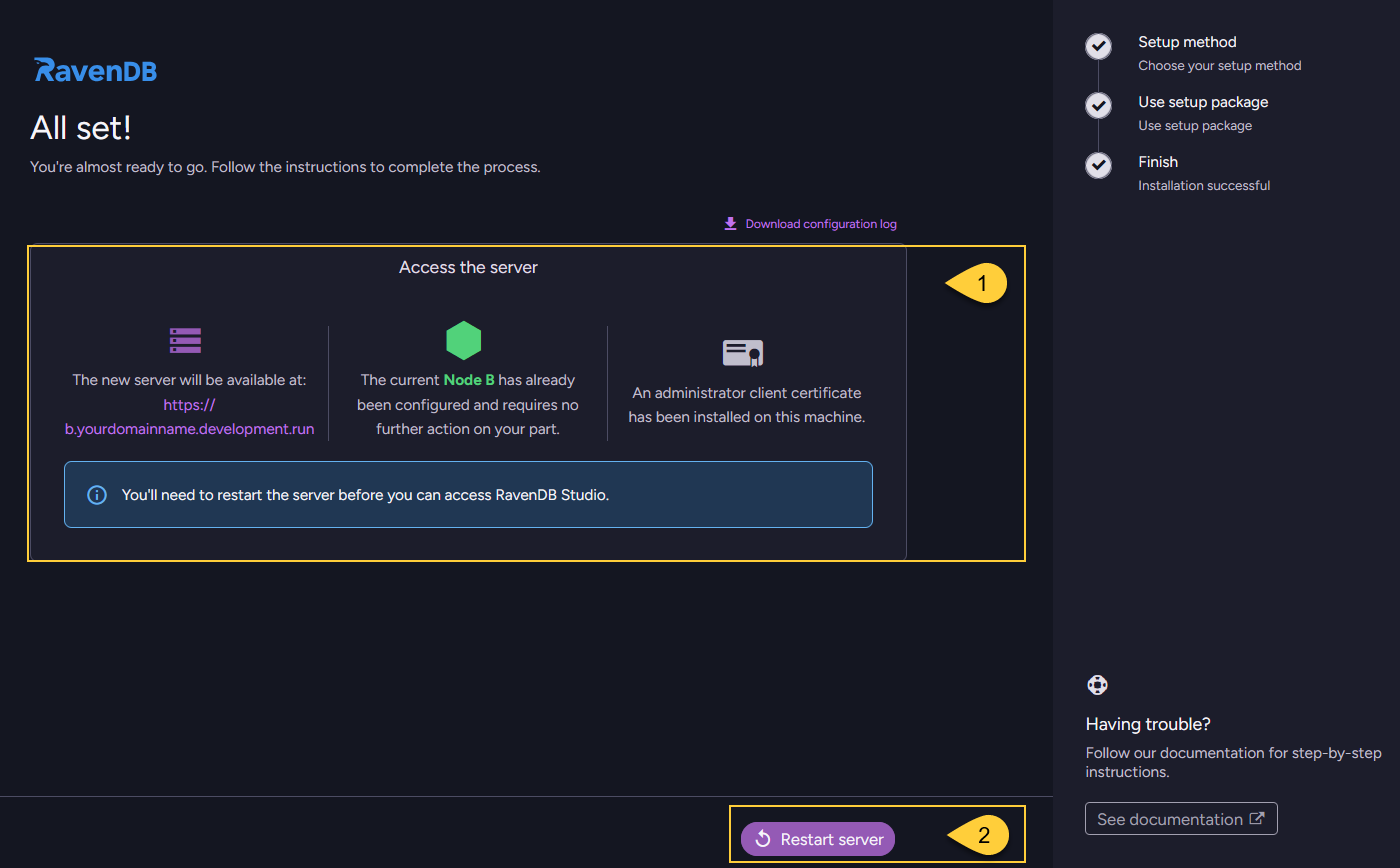
- Review the configuration summary for the current node (Node B in this example).
- Click Restart server.
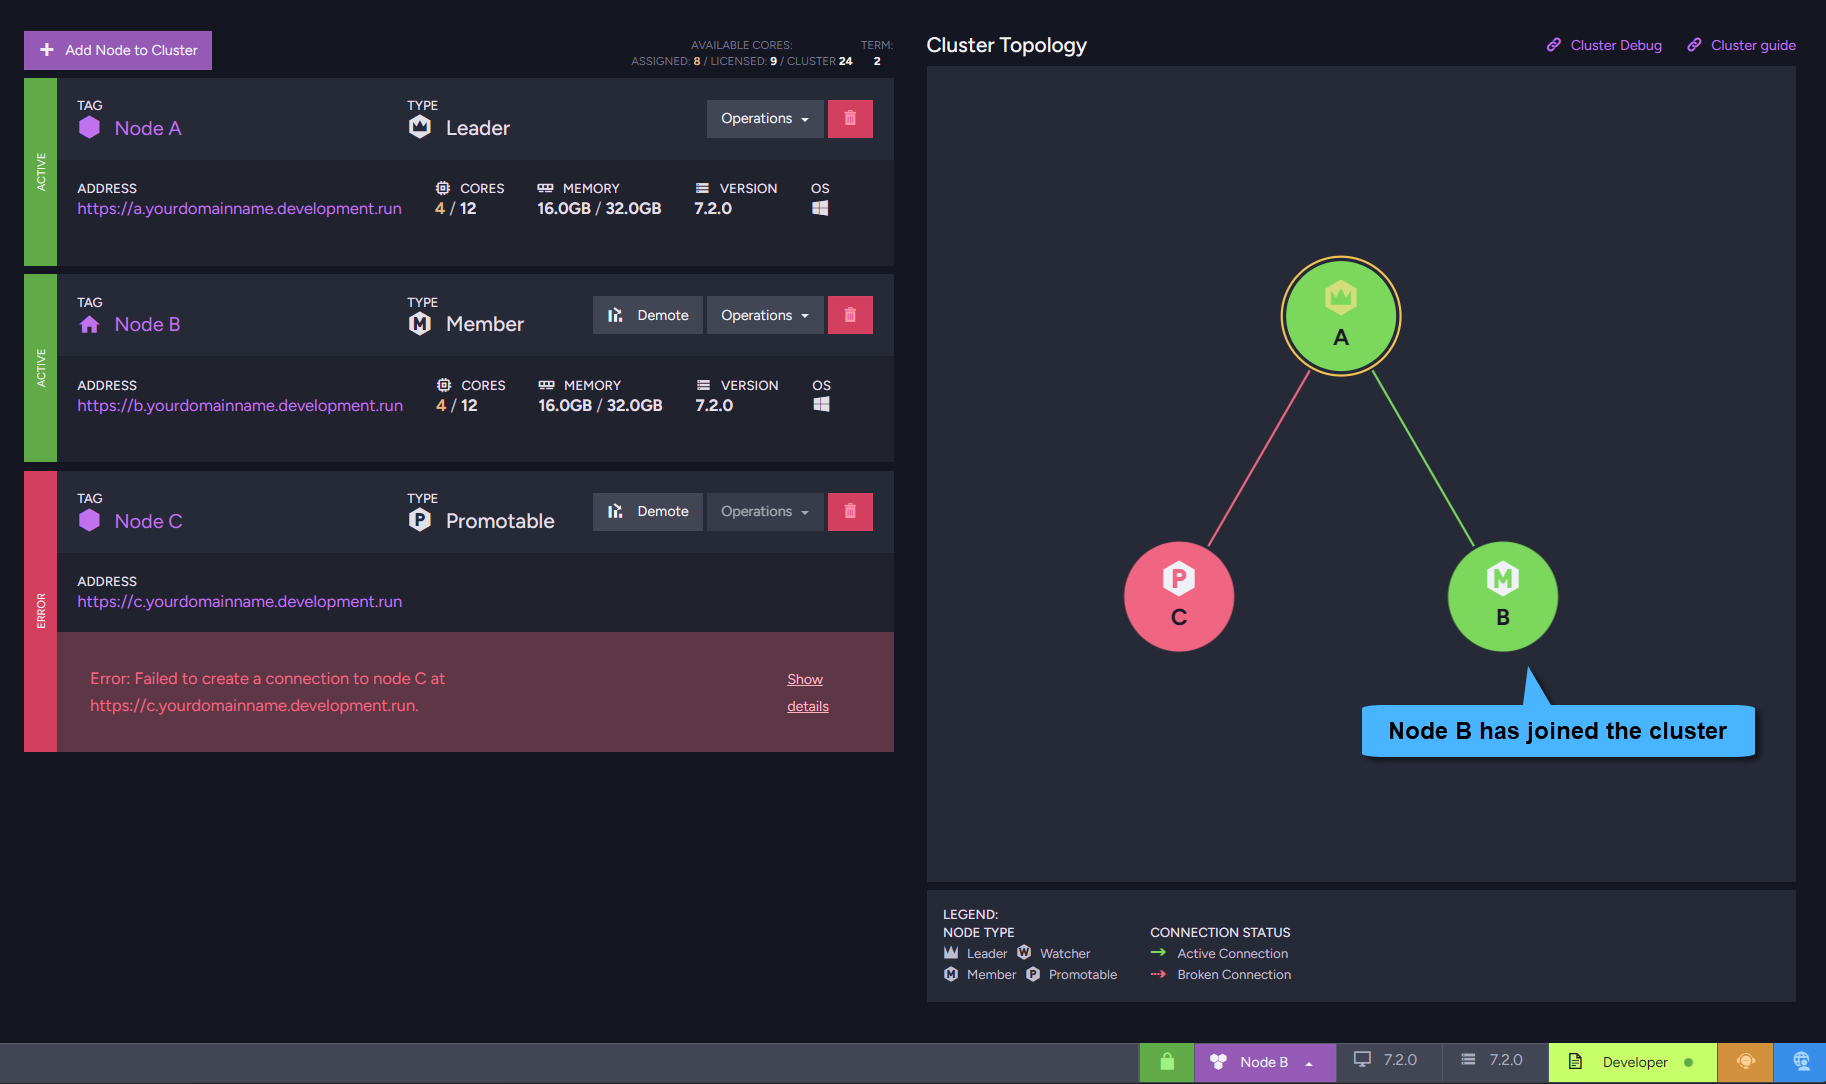
Node joins the cluster:
Once the node restarts, it will automatically join the existing cluster and begin communicating with the other nodes.
There is no need to add it manually through Studio.
Repeat for remaining nodes:
Repeat this process on each dedicated machine for all remaining nodes defined in your setup package.